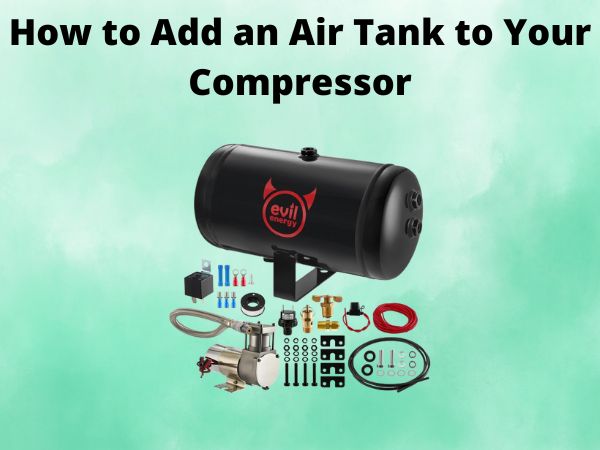
How to Add an Air Tank to Your Compressor: A Step-by-Step Guide
As a seasoned DIY enthusiast, I’m always on the lookout for ways to enhance the performance and efficiency of my workshop tools. One such tool that has been a game-changer for me is my trusty air compressor. But did you know that by adding an air tank to your compressor, you can unlock even more power and versatility? In this comprehensive guide, I’ll walk you through the process of adding an air tank to your compressor, so you can enjoy the benefits of increased air storage and improved tool performance.
Table of Contents
Understanding the Benefits of an Air Tank
Before we dive into the installation process, let’s explore the key advantages of adding an air tank to your compressor. First and foremost, an air tank provides additional storage capacity for the compressed air, allowing your compressor to work less frequently to maintain the desired pressure. This translates to reduced energy consumption, quieter operation, and extended compressor lifespan. Additionally, the increased air volume can provide a more consistent and steady flow of air, which is crucial for power tools that require a consistent air supply, such as pneumatic nailers, impact wrenches, and spray guns.
Choosing the Right Air Tank for Your Compressor
When it comes to selecting an air tank, there are a few important factors to consider. First, you’ll need to determine the size of the tank that will best suit your compressor and your specific needs. As a general rule, the larger the tank, the more air it can store, but keep in mind that the tank size should be compatible with your compressor’s output capacity. It’s also important to ensure that the tank is rated for the maximum pressure your compressor can generate, typically around 150 PSI.
Another factor to consider is the mounting location of the tank. Will you be placing it next to the compressor, or do you have a suitable spot elsewhere in your workshop? This will help you determine the size and shape of the tank that will work best for your setup.
Preparing for the Installation
Before you begin the installation process, make sure you have all the necessary tools and materials on hand. You’ll need a wrench or socket set, Teflon tape, and any additional fittings or adaptors required to connect the tank to your compressor. It’s also a good idea to turn off the power to your compressor and release any remaining air pressure in the system.
Step-by-Step Installation Guide
Locate the Suitable Mounting Spot
Carefully consider the placement of the air tank, ensuring it is in a safe and accessible location. Avoid areas with excessive heat or vibration, and make sure the tank can be securely mounted.
Attach the Air Tank
Use the appropriate mounting hardware, such as brackets or clamps, to securely attach the air tank to the chosen location. Make sure the tank is level and firmly in place.
Connect the Air Line
Locate the air outlet on your compressor and use the appropriate fittings to connect the air line from the compressor to the air tank. Wrap the threads with Teflon tape to ensure a tight seal and prevent air leaks.
Install a Pressure Relief Valve
For safety purposes, it’s essential to install a pressure relief valve on the air tank. This will prevent the tank from becoming over-pressurized, which could lead to a dangerous situation.
Check for Leaks
Once the installation is complete, turn on the compressor and check for any air leaks around the fittings and connections. Use a soapy water solution to identify any leaks and tighten the connections as needed.
Adjust the Pressure Switch
Depending on the size of the air tank, you may need to adjust the pressure switch on your compressor to ensure it maintains the desired pressure range. Consult your compressor’s manual for guidance on this step.
Conclusion
Adding an air tank to your compressor is a straightforward and rewarding project that can significantly enhance the performance and efficiency of your workshop tools. By following the steps outlined in this guide, you’ll be able to unlock the full potential of your air compressor and enjoy the benefits of increased air storage and improved tool operation. Remember to always prioritize safety, and don’t hesitate to reach out to a professional if you have any doubts or concerns during the installation process. Happy tinkering!
FAQs
How do I determine the right size air tank for my compressor?
The size of the air tank you choose should be compatible with the output capacity of your compressor. As a general rule, the larger the tank, the more air it can store. However, the tank size should not exceed the maximum pressure rating of your compressor, typically around 150 PSI.
Can I install an air tank on any air compressor?
Yes, you can add an air tank to most air compressors, as long as the tank is properly sized and rated for the maximum pressure your compressor can generate. However, it’s always a good idea to consult your compressor’s manual or manufacturer to ensure compatibility.
Do I need to adjust the pressure switch after adding an air tank?
In most cases, yes, you may need to adjust the pressure switch on your compressor after installing an air tank. The increased air storage capacity can affect the way the compressor cycles on and off to maintain the desired pressure range. Refer to your compressor’s manual for guidance on adjusting the pressure switch.
How do I know if my air tank is properly sealed and free of leaks?
After completing the installation, turn on your compressor and use a soapy water solution to check for any air leaks around the fittings and connections. Look for bubbles forming, which would indicate a leak. Tighten the connections as needed to ensure a tight seal and prevent air loss.
Can I install the air tank in any location, or does it need to be near the compressor?
The air tank can be installed in a variety of locations, as long as it is securely mounted and the connections to the compressor are properly sealed. However, it’s generally best to keep the tank in close proximity to the compressor to minimize the length of the air line and potential for leaks.


