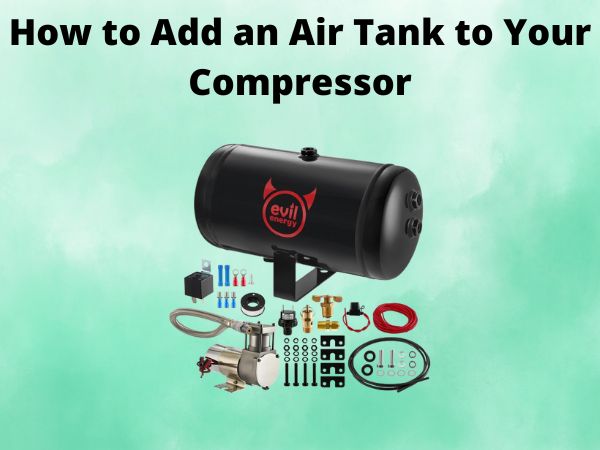
How to Add an Auxiliary Tank to Your Air Compressor Safely
As an avid DIYer or professional contractor, you know the importance of a reliable air compressor in your workshop or job site. But did you know that adding an auxiliary tank to your existing air compressor can take its performance to the next level? In this comprehensive guide, I’ll walk you through the step-by-step process of safely installing an auxiliary tank, unlocking a whole new world of benefits for your compressed air system.
Why Add an Auxiliary Tank?
An air compressor’s main function is to store compressed air, which can then be used to power a variety of pneumatic tools and equipment. However, the onboard tank that comes with most compressors may not always be sufficient, especially if you’re running multiple tools simultaneously or need to maintain consistent air pressure for extended periods. That’s where an auxiliary tank comes in handy.
By adding an extra storage vessel to your air compressor setup, you can increase the total available air volume, allowing your tools to operate more efficiently and with less interruption. This means faster work, higher productivity, and a smoother overall experience. Additionally, the extra tank can help regulate air pressure fluctuations, ensuring a steadier and more reliable supply of compressed air.
Selecting the Right Auxiliary Tank
Before you start the installation process, it’s crucial to choose the right auxiliary tank for your specific air compressor. The key factors to consider are:
- Tank Capacity: Determine the tank size based on your compressor’s CFM (cubic feet per minute) output and the air demands of your tools. Typically, a tank that’s 2-3 times the size of your main compressor tank is a good rule of thumb.
- Tank Material: Steel tanks are the most common and durable option, but aluminum or composite tanks may be lighter and more corrosion-resistant, depending on your needs.
- Tank Pressure Rating: Ensure the auxiliary tank is rated for at least the same maximum pressure as your air compressor, if not higher.
- Tank Connections: Make sure the inlet and outlet fittings on the auxiliary tank match the existing ports on your compressor.
Step-by-Step Guide to Installing an Auxiliary Tank
1. Prepare the Work Area
Start by finding a suitable location near your air compressor to install the auxiliary tank. Make sure the area is clean, level, and easily accessible for future maintenance and inspections. Gather all the necessary tools and materials, including the auxiliary tank, hoses, fittings, and any required mounting hardware.
2. Shut Off and Depressurize the Air Compressor
Before you begin the installation, it’s crucial to completely shut off the air compressor and release any remaining air pressure from the main tank. This will prevent any sudden and dangerous air releases during the installation process.
3. Mount the Auxiliary Tank
Carefully position the auxiliary tank in the desired location and secure it using the appropriate mounting hardware, such as brackets or straps. Ensure the tank is level and firmly attached to prevent any unwanted movement or vibration.
4. Connect the Auxiliary Tank to the Air Compressor
Using the appropriate hoses and fittings, connect the inlet of the auxiliary tank to the outlet port of your air compressor. Make sure all connections are tightened securely to prevent air leaks.
5. Install a Check Valve
To prevent backflow and ensure the air in the auxiliary tank doesn’t flow back into the compressor, install a check valve between the compressor outlet and the auxiliary tank inlet. This will keep the two tanks isolated and maintain the proper air flow direction.
6. Test the Installation
Once everything is connected, turn on the air compressor and let it fill both the main and auxiliary tanks. Check for any air leaks around the fittings and connections, and make any necessary adjustments. Test the operation of your pneumatic tools to ensure the added air volume is providing the expected performance benefits.
Conclusion
Upgrading your air compressor with an auxiliary tank is a simple and effective way to boost its capabilities and enhance your overall productivity. By following the steps outlined in this guide, you can safely and confidently add an extra air storage vessel to your setup, unlocking new levels of power and efficiency for your workshop or job site. Happy compressing!
Frequently Asked Questions
How much additional air volume do I need?
The amount of additional air volume you need depends on the size of your air compressor and the tools you’ll be using. As a general rule, an auxiliary tank that’s 2-3 times the size of your main compressor tank is a good starting point. You can also consult the manufacturer’s recommendations or an air system specialist to determine the optimal tank size for your specific needs.
Can I install the auxiliary tank myself, or do I need a professional?
In most cases, adding an auxiliary tank to an air compressor is a relatively straightforward DIY project that can be completed by a moderately skilled homeowner or mechanic. As long as you follow the safety precautions and installation steps carefully, you should be able to handle the installation yourself. However, if you’re unsure or the task seems overly complex, it’s always best to consult a professional air compressor technician to ensure the job is done correctly and safely.
How do I maintain the auxiliary tank?
Maintaining the auxiliary tank is similar to maintaining your air compressor’s main tank. Regularly check for any signs of wear, corrosion, or damage, and address any issues promptly. Drain the tank of any accumulated moisture and debris after each use, and consider adding a water separator or filter to the air line to keep the tank’s internal components clean. Additionally, follow the manufacturer’s recommended inspection and maintenance schedule to ensure the tank remains in good working condition.
Can I use the auxiliary tank with any air compressor?
While you can generally add an auxiliary tank to most air compressors, it’s important to ensure compatibility between the tank and your specific compressor model. Make sure the tank’s inlet and outlet fittings match the ports on your compressor, and that the tank’s pressure rating is suitable for your compressor’s maximum operating pressure. It’s always best to consult the compressor manufacturer’s recommendations or an air system specialist to ensure a proper and safe installation.
How does an auxiliary tank improve air compressor performance?
Adding an auxiliary tank to your air compressor provides several performance benefits. The extra air storage volume helps maintain a more consistent air pressure, even when multiple tools are in use simultaneously. This results in improved tool performance, less interruption, and increased overall productivity. The auxiliary tank also helps regulate pressure fluctuations, reducing the compressor’s workload and potentially extending its lifespan.