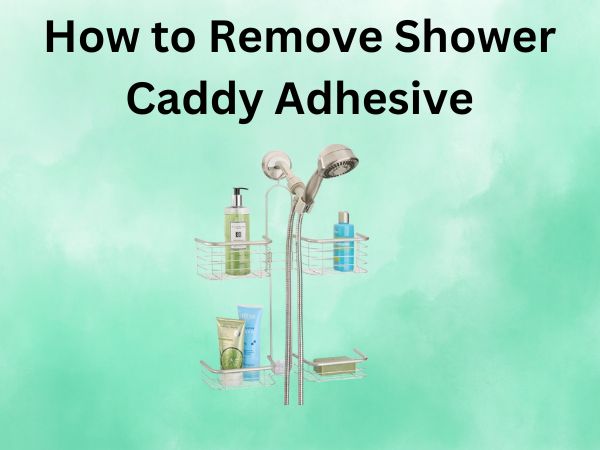
How to Remove Shower Caddy Adhesive [A Complete Guide]
Are you staring at those stubborn adhesive marks left behind by your old shower caddy, wondering how on earth you’re going to get rid of them? Don’t worry, you’re not alone in this sticky situation! Whether you’re redecorating your bathroom or just fed up with that eyesore, removing shower caddy adhesive can seem like a daunting task. But fear not! I’m here to walk you through the process, step by sticky step.
Understanding Shower Caddy Adhesives
Before we dive into the nitty-gritty of adhesive removal, let’s take a moment to understand what we’re dealing with. After all, knowing your enemy is half the battle, right?
Types of Adhesives Used
Shower caddies typically use strong, waterproof adhesives to stay put in your shower’s humid environment. These can include:
- Silicone-based adhesives
- Epoxy adhesives
- Acrylic adhesives
- Polyurethane adhesives
Each type has its own properties, but they all share one common trait: they’re designed to be tough and long-lasting. That’s great when you want your caddy to stay put, but not so great when you’re trying to remove it!
Why Removal Can Be Challenging
You might be wondering, “If water can’t budge this stuff, how am I supposed to?” Well, that’s precisely why removal can be such a pain. These adhesives are engineered to withstand constant exposure to water and humidity. Plus, they bond tightly with the surface they’re attached to, whether it’s tile, glass, or metal. But don’t lose hope! With the right approach, you can say goodbye to that pesky adhesive.
Preparation: Before You Begin
Before we roll up our sleeves and get to work, let’s make sure we’re prepared. A little prep goes a long way in making this task easier and safer.
Safety Precautions
Safety first, folks! Some of the methods we’ll discuss involve chemicals or heat, so it’s crucial to protect yourself:
- Wear rubber gloves to protect your hands
- Ensure good ventilation in your bathroom
- Use eye protection, especially when scraping or sanding
- If using chemical removers, read and follow all safety instructions on the product label
Remember, your health is more important than any shower caddy!
Gathering Necessary Tools and Materials
Now, let’s talk tools. Depending on the method you choose, you might need:
- Hairdryer or heat gun
- Plastic scraper or putty knife
- Commercial adhesive remover
- Rubbing alcohol or vinegar
- Baking soda
- Clean cloths or paper towels
- Fine-grit sandpaper
- Cleaning solution and sponge
Having these on hand will make the process smoother and prevent any mid-task runs to the hardware store.
Methods for Removing Shower Caddy Adhesive
Alright, it’s time to tackle that adhesive! We’ve got a few tricks up our sleeve, so let’s explore our options.
Heat Method
Ever noticed how chewing gum gets softer when it’s warm? The same principle applies to many adhesives. Heat can make them more pliable and easier to remove.
Using a Hairdryer
- Set your hairdryer to its highest heat setting.
- Hold it about 3-4 inches away from the adhesive.
- Move the dryer back and forth over the area for 30-60 seconds.
- Once the adhesive softens, try to peel or scrape it off.
- Repeat if necessary.
Be careful not to overheat the surface, especially if it’s plastic or painted.
Hot Water Technique
If your shower caddy was on a removable surface:
- Fill a sink or bucket with very hot water.
- Submerge the item with the adhesive for 10-15 minutes.
- Try to peel or scrape off the softened adhesive.
This method is great for smaller items but obviously won’t work for wall tiles!
Chemical Removal Methods
When heat alone doesn’t cut it, it’s time to bring in some chemical reinforcements.

Commercial Adhesive Removers
There are many products designed specifically for removing stubborn adhesives. Popular options include Goo Gone, WD-40, and 3M Adhesive Remover. Here’s how to use them:
- Apply the remover according to the product instructions.
- Let it sit for the recommended time (usually a few minutes).
- Wipe or scrape off the loosened adhesive.
- Clean the area thoroughly afterward.
Always test on a small, inconspicuous area first to ensure it won’t damage the surface.
Household Products as Alternatives
Don’t want to buy a special product? Your kitchen might have what you need:
- Vinegar: Soak a cloth in white vinegar and press it against the adhesive for several minutes.
- Rubbing alcohol: Apply with a cloth and let it sit before scraping.
- Baking soda and coconut oil paste: Mix equal parts and apply to the adhesive. Let it sit for an hour before removing.
These methods might take a bit more elbow grease, but they’re often gentler on surfaces.
Mechanical Removal Techniques
Sometimes, you’ve got to get physical with that stubborn adhesive. Here’s how to do it safely.
Scraping Method
- Use a plastic scraper or putty knife to avoid scratching the surface.
- Hold the scraper at a 45-degree angle to the surface.
- Apply firm, even pressure and scrape in one direction.
- Be patient and take your time to avoid damaging the underlying surface.
Sanding Approach
For really stubborn residues on hard surfaces:
- Use fine-grit sandpaper (220 grit or higher).
- Sand gently in circular motions.
- Wipe away the dust frequently to check your progress.
- Be extra careful on painted or delicate surfaces.
Remember, sanding should be a last resort as it can potentially damage the surface if you’re not careful.
Step-by-Step Guide to Adhesive Removal
Now that we’ve covered the methods, let’s put it all together into a comprehensive approach:
- Start with the heat method, using a hairdryer to soften the adhesive.
- Try to peel off as much as possible with your fingers or a plastic scraper.
- If heat alone doesn’t work, apply a chemical remover (commercial or household alternative).
- Let the remover sit for the recommended time.
- Scrape off the loosened adhesive.
- For any remaining residue, try sanding gently.
- Clean the area thoroughly.
Remember, you might need to repeat these steps or try a combination of methods for particularly stubborn adhesives.
Cleaning Up After Removal
Congratulations! You’ve conquered the adhesive. But we’re not quite done yet. Proper cleanup is crucial:
- Wipe down the area with a damp cloth to remove any leftover adhesive bits or chemical residue.
- Use a mild soap solution to clean the surface thoroughly.
- Rinse well with clean water.
- Dry the area completely with a clean towel.
This final step not only leaves your shower looking great but also prepares the surface if you’re planning to install a new caddy.
Preventing Future Adhesive Issues
Now that you’ve gone through all this trouble, you probably want to avoid a repeat performance. Here are some tips:
- Consider alternative shower storage solutions like tension rod caddies or suction cup models.
- If using adhesive mounts, look for removable options designed for bathroom use.
- Clean and dry the surface thoroughly before applying any new adhesives.
- Follow installation instructions carefully, including curing times.
Remember, sometimes the best solution is the one that doesn’t create future problems!
When to Seek Professional Help
While most adhesive removal can be a DIY job, there are times when it’s best to call in the pros:
- If you’re dealing with very large areas of adhesive
- When working with delicate or expensive surfaces like natural stone
- If you’ve tried multiple methods without success
- If you notice any damage to the underlying surface
A professional tiler or bathroom specialist can often remove stubborn adhesives without damaging your shower.
FAQs
1. Can I use a razor blade to scrape off shower caddy adhesive?
While a razor blade can be effective, it’s also risky. It can easily scratch or damage surfaces, especially softer ones like acrylic or fiberglass. Stick to plastic scrapers for safety.
2. How long should I let adhesive remover sit before scraping?
It depends on the product and the adhesive’s stubbornness. Generally, 5-15 minutes is a good range, but always follow the specific instructions on your adhesive remover.
3. Will removing the adhesive damage my shower tiles?
If done carefully, adhesive removal shouldn’t damage tiles. However, always test your chosen method on a small, inconspicuous area first, and avoid harsh scraping or abrasive materials.
4. Can I use olive oil to remove adhesive if I don’t have coconut oil?
Yes, olive oil can work as a substitute for coconut oil in the baking soda paste method. However, it might not be as effective and could leave an oily residue that needs extra cleaning.
5. Is it safe to use adhesive removers in a small bathroom?
Many adhesive removers contain strong chemicals. Always ensure good ventilation when using them. Open windows, run an exhaust fan, and consider wearing a mask if your bathroom is particularly small or poorly ventilated.
Conclusion
Removing shower caddy adhesive might not be the most glamorous home improvement task, but with the right approach, it’s definitely doable. Whether you opt for heat, chemicals, or good old-fashioned elbow grease, the key is patience and persistence. Remember to prioritize safety, test methods on a small area first, and don’t be afraid to try a combination of techniques for stubborn spots.
By following this guide, you’ll be able to bid farewell to that pesky adhesive and hello to a clean, refreshed shower space. Who knows? You might even find yourself looking around for other surfaces to de-stick! (But maybe save that enthusiasm for another day.)