How to Cook an Egg in Water Perfectly: A Complete Guide to Boiling Eggs Like a Pro
Why Boiling Eggs in Water Is Easier Than You Think
Cooking eggs in water is honestly one of the most forgiving cooking methods available. Unlike frying or scrambling, where timing can be incredibly tight, boiling gives you a larger window of success. Plus, once you understand the basic principles, you’ll consistently produce excellent results every single time.
The Science Behind Boiling Eggs
Here’s the fascinating part: when you heat an egg in water, the proteins inside start to denature and coagulate at different temperatures. The egg white solidifies at around 140 degrees Fahrenheit, while the yolk needs about 158 degrees to fully set. Understanding this temperature progression is your secret weapon for achieving your desired doneness level.
What You’ll Need to Get Started
Essential Equipment
You don’t need fancy gadgets to boil eggs perfectly. Here’s the minimal setup that works beautifully:
- A pot (size depends on how many eggs you’re cooking)
- Water
- A stove or heat source
- A timer (your phone works great)
- A slotted spoon or strainer
- A bowl with ice water
Optional Items That Help
While not absolutely necessary, these tools can make the process smoother and more enjoyable:
- An egg rack or steamer basket
- An instant-read thermometer for precision
- A dedicated egg storage container
- An egg piercer to prevent cracking
The Hot Start Method: Your Best Option
Step One: Prepare Your Pot and Water
Fill your pot with enough water to cover your eggs by about an inch. This is crucial because you want consistent heat distribution around each egg. If you’re cooking a large batch, use a larger pot to maintain adequate water coverage. The amount of water matters more than people realize—too little water will cool down too quickly when you add cold eggs, affecting your cooking time.
Step Two: Bring Water to a Rolling Boil
Put the heat to high and wait for the water to reach a true rolling boil. You’ll know it’s ready when you see vigorous bubbles rapidly breaking the surface. This usually takes between five to ten minutes depending on your pot size and stove power. Don’t skip this step—starting with boiling water is the foundation of perfectly boiled eggs.
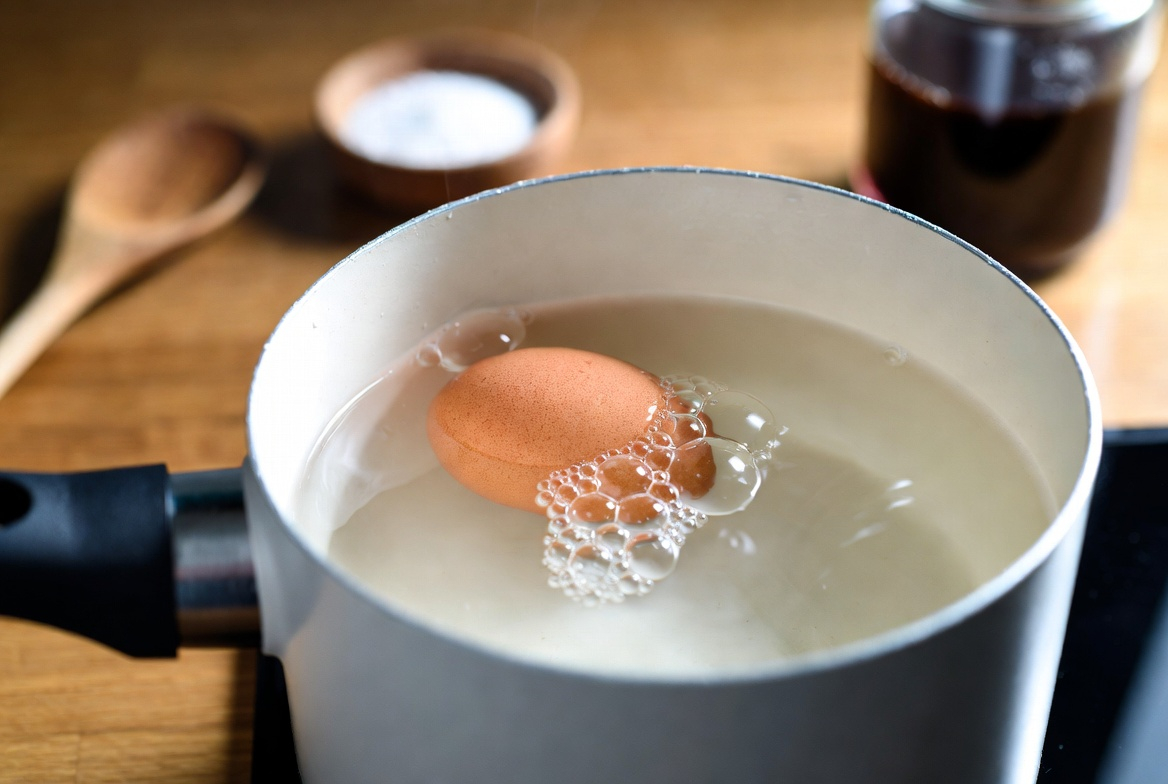
Step Three: Gently Add Your Eggs
Here’s where patience and gentleness matter. Using a spoon, carefully lower your eggs into the boiling water. Lowering them slowly rather than dropping them prevents them from cracking due to thermal shock. If you’re worried about cracking, you can use an egg piercer to make a tiny hole in the wider end of the shell first—this allows steam to escape gradually.
Step Four: Set Your Timer Based on Desired Doneness
This is where precision becomes your friend. The moment all your eggs are in the water, start your timer. Different cooking times produce different results, which we’ll explore in detail below.
Step Five: Prepare Your Ice Bath
While your eggs are cooking, fill a bowl with ice water. This is absolutely essential because it stops the cooking process immediately. Without an ice bath, the residual heat will continue cooking your eggs even after you remove them from hot water, potentially leading to that unwanted gray-green ring around the yolk.
Step Six: Transfer Eggs Immediately to Ice Water
When your timer goes off, use a slotted spoon to transfer all your eggs to the ice bath. Work quickly but carefully. Let them sit in the cold water for at least five minutes. This cooling period is where the magic happens—it halts the cooking process and makes peeling easier later.
Timing for Perfect Results Every Time
Soft-Boiled Eggs (Runny Yolk)
Want that beautiful creamy yolk with a just-set white? Cook for four to six minutes. These eggs are perfect for dipping toast soldiers or enjoying from an egg cup with a spoon. The white will be mostly set, but the yolk will still flow beautifully when you break into it.
Medium-Boiled Eggs (Jammy Yolk)
This is the sweet spot for most people. Cook for seven to nine minutes and you’ll get that gorgeous orange yolk that’s still slightly soft in the very center but set enough to handle. This is the egg that’s perfect for ramen, salads, or eating on its own. It’s got that Instagram-worthy appeal with excellent flavor.
Hard-Boiled Eggs (Fully Set Yolk)
For completely set yolks with no runniness whatsoever, cook for twelve to fourteen minutes. These are your go-to eggs for meal prep, egg salad, deviled eggs, or anything where you need structure and stability. Hard-boiled eggs last longer in the refrigerator and are more versatile for storage.
The Cooling and Peeling Process
Making Peeling Easier
Nobody likes struggling to peel an egg. Here’s the thing: older eggs (ones that have been in your refrigerator for a week or two) peel much more easily than super-fresh eggs from the farm. This is because the air pocket between the shell and the membrane enlarges over time, creating separation. If you’re using farm-fresh eggs, consider buying them a few days before you plan to boil them.
The Peeling Technique
Once your eggs have cooled completely, here’s the gentlest approach. Tap the egg firmly all over to create cracks in the shell. Roll the egg gently against the counter, applying steady pressure to crack the shell evenly. Start peeling from the wider end where the air pocket is located. Gently work your way around, separating the membrane from the egg white as you go. Running the egg under cool water while peeling helps separate the shell further and makes the whole process smoother.
Avoiding Common Boiling Mistakes
The Gray-Green Ring Problem
That unappealing grayish-green ring that appears around the yolk isn’t harmful, but it’s definitely not attractive. It happens when the yolk is exposed to high heat for too long, causing a chemical reaction between the iron in the yolk and sulfur in the white. The solution? Don’t overcook your eggs and always use an ice bath immediately after cooking. This single step eliminates the issue almost entirely.
Eggs That Crack During Cooking
Cracking usually happens due to temperature shock when cold eggs hit boiling water. Solution: bring your eggs closer to room temperature before cooking, or use the egg piercer method mentioned earlier. Another trick is adding a pinch of salt to your water, which raises the boiling point slightly and can prevent cracks.
Difficulty Peeling
If you’re constantly struggling with peeling, consider your egg age. Use eggs that have been stored for several days rather than ultra-fresh ones. Additionally, ensure you’re getting a good ice bath—thirty seconds in cool water isn’t enough. Give them a solid five minutes of cooling.
Storage and Food Safety Guidelines
How Long Do Boiled Eggs Last?
Properly stored hard-boiled eggs will keep in your refrigerator for up to seven days. If you’ve already peeled them, consume them within two days for best quality. Store them in an airtight container, and if they start to smell unusual or develop a slimy texture, it’s time to discard them.
Can You Freeze Boiled Eggs?
Here’s where it gets tricky. Boiled egg whites freeze reasonably well, but yolks become rubbery and unappetizing when frozen. If you want to freeze eggs for later use, stick to freezing the whites and use them in cooking rather than eating them straight. Fresh raw eggs freeze better if you’re planning long-term storage.
Creative Ways to Use Your Perfectly Boiled Eggs
Meal Prep and Quick Lunches
Boiled eggs are the ultimate meal-prep ingredient. Peel a batch and store them to grab throughout the week. They’re perfect for breakfast bowls, salads, or quick protein snacks. I like to keep a container in my fridge for those moments when I need a quick, nutritious pick-me-up.
Traditional and Creative Recipes
The uses are honestly endless. Classic egg salad, deviled eggs, Scotch eggs, or even chopped into a avocado toast. You can add them to grain bowls, use them as salad toppings, or crumble them into sandwich fillings. The jammy-yolk version works beautifully for ramen and Asian dishes.
Temperature Control Tips for Consistency
Adjusting for Altitude
If you live at a higher altitude, water boils at a lower temperature, which means your eggs might need slightly longer cooking times. Add an extra minute or two to your cooking time if you’re at significant elevation. This is one reason why tracking your results and adjusting based on experience matters.
Pot Size and Water Volume
The relationship between pot size and water volume affects how quickly your water temperature recovers after adding eggs. Using a large pot with plenty of water ensures more consistent results because the water temperature drops less dramatically when you add eggs.
The Cold Start Method: An Alternative Approach
Some people prefer starting with cold water and bringing everything to a boil together. This method takes longer (add about five minutes to your total time) but can result in easier-to-peel eggs because the temperature change is more gradual. Start your eggs in cold water, bring to a boil, then remove from heat and let sit covered for your desired time. The method works, though most professionals prefer the hot start method for greater consistency.
Making Soft-Boiled Eggs with Runny Centers
Perfecting the Jammy Egg
The jammy egg—where the white is fully set but the yolk has that gorgeous creamy center—is having a moment. To achieve this consistently, precision matters. Seven to nine minutes of boiling in already-boiling water, followed by an immediate ice bath, will give you that restaurant-quality result. The yolk should wobble slightly when you hold the peeled egg in your hand.
Conclusion
Cooking an egg in water perfectly is genuinely achievable for anyone willing to pay attention to the basics. Start with boiling water, time your eggs carefully based on your desired doneness, and always use an ice bath to stop the cooking process. Whether you prefer jammy yolks or fully hard-boiled eggs, the principles remain the same. The beauty of this cooking method is that once you’ve done it a few times, muscle memory takes over and you’ll produce perfect results without even thinking about it. Keep practicing, adjust based on your specific stove and preferences, and soon you’ll be confidently cooking eggs in water like a professional.
Frequently Asked Questions
Why do my boiled eggs keep cracking in the pot?
Cracking typically occurs when cold eggs experience sudden temperature shock in boiling water. Try bringing your eggs to room temperature first, add a small pinch of salt to your water to raise the boiling point slightly, or use an egg piercer to create a tiny hole in the wider end. These simple adjustments significantly reduce cracking incidents.
How can I tell when my boiled eggs are done without a timer?
While a timer is definitely recommended for consistency, you can use the visual method. For soft-boiled, cook until the white is mostly set but jiggles slightly when moved. For hard-boiled, wait until the water stops producing vigorous bubbles and let sit for a minute. However, investing in a simple kitchen timer or using your phone eliminates guesswork.
Can I use a microwave to boil eggs in water?
Microwaving isn’t the ideal method because eggs can explode if not handled carefully. The water heats unevenly and pressure builds up inside the shell. While specialized microwave egg cookers exist, traditional stovetop boiling is safer and more reliable for most home cooks.
What’s the best way to reheat a boiled egg?
Boiled eggs are best eaten cold or at room temperature. If you want to warm one, place it in hot (not boiling) water for a few minutes, or simply let it sit out until it reaches room temperature. Overheating can toughen the white further. For most uses, they’re perfect straight from the refrigerator.
Are brown eggs and white eggs the same for boiling?
The shell color makes no difference in cooking time or results. Brown and white eggs cook identically when boiled. The color is determined by the chicken breed and doesn’t affect what’s inside. Focus on egg size and age rather than shell color for consistent results.
“`