Clean Dometic RV Air Conditioner Coils: A Step-by-Step Guide
The easiest way to clean Dometic RV air conditioner coils is by using a stiff brush and coil cleaner spray. This process helps improve cooling efficiency and prevents costly repairs. Regular cleaning ensures your RV stays comfortable on those hot travel days. You’ll want to make sure the unit is powered off before you start this important maintenance task.
Dirty coils can really hamper your RV’s air conditioner performance. When dust and debris build up, air can’t flow freely. This forces the system to work harder, using more energy. Cleaning them is key for optimal performance and longevity of your Dometic unit.
- Turn off power to the AC unit.
- Access the RV air conditioner’s cover.
- Gently brush away loose debris.
- Apply a suitable coil cleaner.
- Rinse thoroughly and reassemble.
Let’s walk through exactly how to get your Dometic RV air conditioner coils sparkling clean, step by step.
Keeping Your Dometic RV AC Coils Clean for Peak Performance
You know that feeling. You pull into a dusty campsite, the sun is beating down, and you flick on your Dometic RV air conditioner, only to get a lukewarm puff of air. Frustrating, right? The culprit is often clogged coils. Cleaning them is a simple maintenance task that can make a huge difference. We found that dirty coils restrict airflow. This makes your AC work harder and less efficiently (RV Air). Let’s get those coils clean and your RV cool again.
Gathering Your Cleaning Supplies
Before you dive in, let’s make sure you have everything you need. Having the right tools on hand makes the job much smoother. You wouldn’t go into battle without your weapons, right? Think of this as a battle against heat and poor airflow.
Essential Tools for Coil Cleaning
You’ll need a few key items to get the job done right. These aren’t hard to find. Most are probably already in your RV or garage. We recommend gathering these before you start.
- Stiff Brush: A soft brush might not be enough for stubborn grime. A medium-stiff brush works best. Avoid wire brushes, as they can damage the fins.
- Coil Cleaner Spray: Look for a cleaner specifically designed for HVAC coils. These are formulated to break down dirt and grime effectively. Many are foaming types, which help lift debris.
- Water Source: A hose with a spray nozzle is ideal. You need to be able to rinse thoroughly.
- Gloves: Protect your hands from dirt and the cleaning chemicals.
- Safety Glasses: It’s always wise to protect your eyes from spray.
- Screwdriver or Nut Driver: You might need this to remove the AC cover.
Step-by-Step Guide to Cleaning Your Dometic RV AC Coils
Now that you’re prepped, let’s get down to business. We’ll break this down into manageable steps. Taking your time ensures you don’t miss anything.
Step 1: Power Down Your Air Conditioner
This is the most important first step. Safety first, always! You don’t want to accidentally turn the unit on while your hands are inside. Locate your RV’s circuit breaker panel. Find the breaker for your Dometic AC unit and switch it off. Double-check by trying to turn the AC on from your thermostat. If nothing happens, you’re good to go.
Step 2: Accessing the AC Unit and Coils
Your Dometic RV AC unit likely has an access panel. This is usually on the roof of your RV. Consult your Dometic manual if you’re unsure where to find it. Sometimes, the entire shroud needs to be removed. Other models have a smaller access panel for the fan and coils. You might need a screwdriver or nut driver to loosen screws holding the panel or shroud in place. Be gentle; these parts can become brittle over time.
Identifying the Evaporator and Condenser Coils
Once you have access, you’ll see the coils. Your Dometic AC has two sets: evaporator and condenser coils. The evaporator coils are typically inside the air handler, where the cold air comes from. The condenser coils are usually on the outside, where heat is released. Both need cleaning, but they might look a bit different. Research suggests that a clean condenser coil is vital for heat dissipation (Energy Star). This directly impacts cooling efficiency.
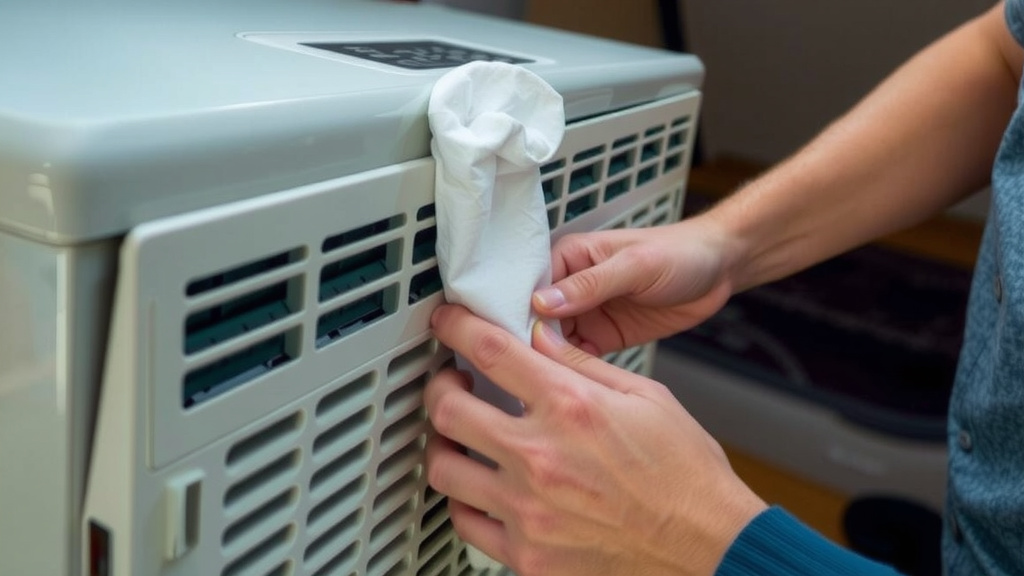
Step 3: The Initial Dry Clean
Before you introduce any liquids, it’s best to remove loose debris. Think of it like sweeping before mopping. Grab your stiff brush. Gently brush away any leaves, dust bunnies, or other gunk you see clinging to the coils. Work in the direction of the fins. You don’t want to bend them. This step removes the easiest-to-reach dirt, making the next steps more effective.
Step 4: Applying the Coil Cleaner
Now for the magic cleaner. Follow the instructions on your coil cleaner product. Most foaming cleaners are designed to be sprayed on and left to work for a few minutes. They will drip down and carry away dirt. Ensure you coat all the coil surfaces. Some cleaners require you to agitate the dirt with a brush after application. Others just need time to work their dissolving magic. We found that even coverage is key here.
Step 5: Rinsing the Coils
This step is critical. You need to rinse away both the dirt and the cleaner. Use your hose on a spray setting. A high-pressure jet isn’t necessary and can damage the fins. Aim to rinse from the inside out if possible. This pushes debris away from the unit. Allow ample time for thorough rinsing. You don’t want any cleaner residue left behind. Research indicates that proper rinsing is essential for the longevity of the coils (AC Parts).
Step 6: Reassembly and Power Up
Once the coils are clean and rinsed, let them air dry for a bit. Then, carefully reassemble any panels or shrouds you removed. Double-check that all screws are secure. Now, go back to your circuit breaker panel and switch the AC breaker back on. Test your Dometic AC unit. You should notice a significant improvement in airflow and cooling power. Your RV should feel much more comfortable!
Troubleshooting and Maintenance Tips
Sometimes, even with cleaning, you might encounter issues. Here are a few things to keep in mind for ongoing maintenance.
When to Call a Professional
If you notice significant damage to the fins, like many bent sections, it might be time to call a technician. Also, if your AC unit is still not cooling properly after a thorough cleaning, there could be a more serious issue, such as a refrigerant leak or a failing component. Don’t hesitate to seek expert help. Many RV repair services specialize in these units.
Frequency of Cleaning
How often should you clean your Dometic RV AC coils? This depends on your usage and environment. If you travel frequently, especially through dusty areas, aim for at least once a year. Some RV owners find cleaning before and after the main camping season is ideal. We found that regular checks can help you decide. If you see visible dirt buildup, it’s time for a clean, no matter the calendar.
Quick Coil Cleaning Checklist
Here’s a quick rundown to ensure you don’t forget a step:
- Turn off all power to the AC unit.
- Safely remove the AC cover or shroud.
- Gently brush away loose debris from the coils.
- Apply approved coil cleaner evenly.
- Rinse coils thoroughly with water.
- Reassemble and restore power.
Conclusion
You’ve learned how to clean your Dometic RV air conditioner coils, a simple yet essential maintenance task. Keeping these coils clean means better cooling, improved efficiency, and a longer lifespan for your AC unit. Remember to always power down the unit before starting and to use the right tools. With regular cleaning, your RV will stay comfortable no matter how hot it gets outside. Your next step? Schedule a time to perform this cleaning before your next big trip or at the start of camping season.
Frequently Asked Questions
How often should I clean my Dometic RV AC coils?
For most RVers, cleaning your Dometic AC coils once a year is sufficient. If you frequently travel through dusty areas or use your AC heavily, consider cleaning them twice a year, perhaps before and after the main camping season. Keep an eye on them; visible dirt is a sign it’s time for cleaning.
Can I use a regular household cleaner on my Dometic RV AC coils?
It’s best to use a coil cleaner specifically designed for HVAC units. These cleaners are formulated to break down the types of grime found on AC coils without damaging them. Standard household cleaners might not be effective or could even harm the delicate coil fins.
What happens if I don’t clean my Dometic RV AC coils?
When your Dometic AC coils are dirty, they can’t efficiently transfer heat. This forces your AC unit to work much harder, leading to reduced cooling performance, increased energy consumption, and premature wear on components. In some cases, severe clogs can lead to system failure.
Are Dometic RV AC evaporator and condenser coils cleaned the same way?
Yes, the general cleaning process is the same for both evaporator and condenser coils. You’ll access them, brush away loose debris, apply coil cleaner, and then rinse thoroughly. Ensure you clean both sets of coils for optimal performance.
Can I damage my Dometic RV AC coils while cleaning them?
Yes, you can. Be gentle when brushing and rinsing. Avoid using high-pressure water jets, which can bend or damage the delicate fins. Also, steer clear of stiff wire brushes that can tear through the fins. Always work in the direction of the fins.

![7 Best Homemade Air Conditioner [2026]](https://bathroomexplorer.com/wp-content/uploads/2026/06/7-best-homemade-air-conditioner-2026-featured-768x432.jpg)