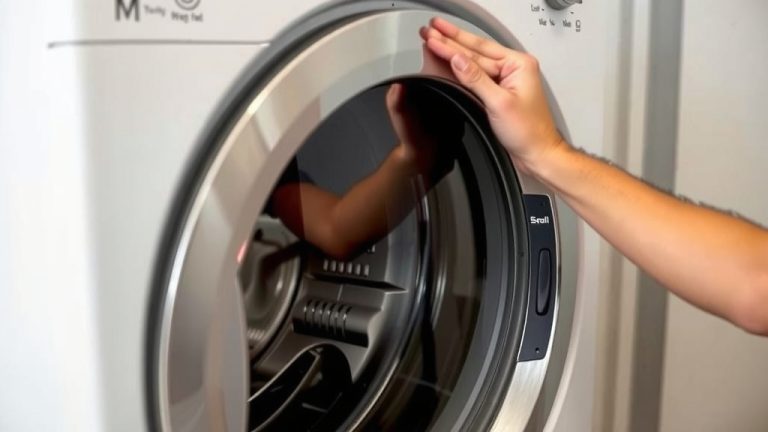
How to Lift a Washer onto a Pedestal Safely
The safest way to lift a washer onto a pedestal is to use a second person and a lifting strap. You should never try to lift a washing machine by yourself. We found that having two people work together is the best way to protect your back and your machine.
Washers are heavy, often weighing 150 pounds or more. Trying to muscle one up onto a pedestal by yourself is a recipe for injury. Proper lifting technique is about using your legs, not your back. You also need to be careful about the washing machine connections so you don’t damage the hoses.
- Never lift alone: Always use a second person for safety.
- Use a lifting strap: This simple tool reduces strain dramatically.
- Protect your floors: Use cardboard or blankets to avoid scratches.
- Check your connections: Make sure hoses are disconnected before you start.
- Take your time: Rushing this task can lead to dropped machines or injuries.
Below, we break down exactly how to do this step by step so you can get your laundry room setup done safely and without any drama.
Getting Your Washer Onto a Pedestal Without the Drama
You have your pedestal on the floor. The washer is sitting right next to it. Now comes the hard part, right? Not really. We found that the right tools and a clear plan make this job way easier than most people think.
The trick is to never use raw muscle. You want to use leverage and teamwork to get the job done. Let’s walk through this step by step so you can feel confident and stay safe.
Why You Should Never Lift a Washer Solo
Did you know that a standard washing machine can weigh between 150 and 200 pounds? That is a lot of dead weight. Lifting that alone puts massive stress on your spine and knees. The CDC reports that back injuries are among the most common lifting-related problems, and a heavy washer is a prime culprit.
We get it. You might think you can handle it. But one wrong twist or sneeze mid-lift can throw your back out for weeks. It is just not worth the risk. Two people are the minimum for this task, and we found that three people make it even more comfortable.
Gathering the Right Gear Before You Start
You wouldn’t cook a big meal without the right pots and pans, right? Lifting a washer needs specific gear too. Here is what you need to have on hand before you touch the machine.
- A lifting strap (rated for 300+ lbs): This is a game changer for your back.
- Work gloves: They protect your fingers from sharp metal edges.
- Cardboard or old blankets: These protect your floor and the washer’s side panels.
- A utility knife: You will need this later to cut the shipping bolts or strap ties.
- A buddy (or two): This is the most important piece of equipment you will use.
Choosing the Right Lifting Strap
There are different types of straps on the market. We found that the ratchet straps with padded sleeves are the easiest for beginners to use. They give you a good grip and let you tighten the strap securely around the machine.
Skip the flimsy rope. You need something that won’t dig into your shoulders or slip. A simple webbing strap with handles is perfect.
Preparing the Washing Machine for the Lift
Preparation is where you win or lose this battle. An unprepared machine is a recipe for a tipped-over disaster. Let’s get the washer ready to move.
First, pick a path. Clear any clutter between the washer and the pedestal. You do not want to trip over a laundry basket while holding 150 pounds. Next, lay down your cardboard or blankets to create a free-slide zone.
Disconnecting Hoses and Power Cords
This sounds obvious, but you would be surprised how often people forget. Turn off the water supply valves. Then, disconnect the hot and cold water hoses from the back of the machine. Water will spill out of the hoses, so have a towel ready.
Unplug the power cord. Tuck the cord and hoses into the back of the machine so they don’t dangle on the floor. You do not want anyone to trip on them mid-lift.
How to Position the Pedestal Correctly
Placement matters more than you think. If the pedestal is too close to the wall, you won’t have room to stand. If it is too far out, you will have to lift the washer higher to reach it.
Slide the pedestal into its final spot. We found that leaving about two feet of open space around the pedestal gives you and your partner enough room to work. Make sure the feet of the pedestal are level on the floor.
Mastering the Two-Person Lift Technique
Here is where the teamwork kicks in. You need to talk to each other the entire time. Clear communication prevents injuries and dropped machines.
Position your lifting strap under the washer. Slide the strap underneath the front lip and pull it through to the back. You want the strap to sit low on the machine to keep the center of gravity stable.
Using the Strap Correctly
Now, bend at your knees, not your waist. Grab the handles of the strap with your palms facing up. When you lift, use your leg muscles to push your body upward. Keep the washer close to your chest so you don’t have to reach out.
Bending at the Knees, Not the Back
This is the golden rule of lifting. The Washington State Department of Labor and Industries advises keeping the natural curve of your lower back when lifting heavy objects. Your legs are the strongest muscles in your body. Let them do the work.
Many experts say that keeping your head up and chest out helps lock your spine into a safe position. Do not hold your breath as you lift. Exhale as you push up.
The Step-by-Step Lift and Align Process
Okay, this is the main event. You have your gear ready and your partner is in position. You’ve got this. Follow these steps slowly and smoothly to get the washer up onto the pedestal.
- The Countdown: Get in position on opposite sides or the back and front of the washer. Agree on a count of three.
- The First Lift: On three, lift the washer straight up, just high enough to clear the ground. Stop. Pause. Check your balance.
- The Move: Take short, shuffling steps toward the pedestal. Do not twist your torso. Move your feet instead of twisting your spine.
- The Hover: Once you are over the pedestal, do not lower it yet. Hold it steady while you align the feet of the washer with the mounting holes on the pedestal.
- The Drop: Slowly lower the washer down. Keep your arms straight and let your legs absorb the weight as you squat down.
- The Shimmy: Set one side down first. Then gently nudge the other side down. Do not drop it from a height.
If the washer does not sit perfectly flush, do not panic. You can gently rock and shift the machine to get it centered. Just make sure your fingers are clear of the pinch points between the washer and the pedestal.
Aligning the Feet with the Pedestal Holes
Most pedestals have a lip or specific foot placement guides. Before you lower the washer all the way, get one foot in the correct spot. Then, use a small pry bar or screwdriver as a lever to nudge the other foot into place if needed.
You want the washer to sit fully on the rubber pads of the pedestal. If it is hanging off the edge, you will get vibration issues later.
Securing the Washer to the Pedestal
This step is crucial for safety. Most washers on pedestals are held in place by gravity alone, but many pedestal kits come with metal brackets and screws. Using these locking brackets prevents the washer from walking off the pedestal during a high-speed spin cycle.
Check your pedestal manual for the mounting clips. Install them with a socket wrench. We found that securing the machine with hardware is a much safer option than just resting it on top.
Reconnecting the Hoses and Testing
Now that the washer is secure, you are in the home stretch. Reconnect the water hoses to the back of the washer. Hand-tighten them first, then use pliers to give them an extra quarter turn. Be careful not to overtighten them, as you can strip the threads or crush the rubber washers.
Plug the power cord back into the wall outlet. Before you run a full cycle, check for leaks. Turn on the water supply valves and look at the connection points. If you see any drips, tighten the hoses just a bit more.
Final Safety Checklist Before You Celebrate
You are almost done. Take a moment to follow this quick checklist. It takes less than a minute and saves you from future headaches.
- Level Check: Place a bubble level on top of the washer. Adjust the pedestal legs if it is tilted.
- Spin Test: Run a quick spin cycle with an empty drum to check for unusual shaking.
- Hose Clearance: Make sure the hoses are not pinched between the wall and the washer.
- Pull Test: Try to rock the washer back and forth. It should not move at all.
- Store Tools: Put away your lifting strap and gloves so you don’t trip on them.
- Open the Door: Make sure the washer door opens fully without hitting the wall or nearby furniture.
A Quick Comparison of Lifting Methods
We found that different setups call for different approaches. Here is a simple look at your options.
| Method | Best For | Risk Level |
|---|---|---|
| Two-Person Manual Lift | Standard washers on a flat floor | Medium (risk of back strain) |
| Lifting Strap + Two People | Heavy machines or tight spaces | Low (reduces back strain) |
| Appliance Dolly | Moving on stairs or long distances | Medium (tipping risk) |
| Professional Movers | Very tight spaces or medical conditions | Low (safest option overall) |
The table shows that the lifting strap method offers the best balance of safety and control for DIYers. If you have any back issues, just hire someone. Your spine is worth more than the cost of a pro.
Conclusion
Lifting a washer onto a pedestal doesn’t have to be a back-breaking ordeal. You just need the right plan and a reliable partner. We walked you through the gear, the prep, and the exact lifting steps that keep you safe and your machine scratch-free.
You already know the golden rules from our guide: never lift alone, always use a strap, and keep your legs doing the heavy lifting. Don’t skip the final safety checklist, either. A quick level check and spin test today will save you from a wobbly machine tomorrow.
Your next step is simple. Grab your gloves, call a friend, and set aside twenty minutes to get the job done right. Your future self (and your lower back) will thank you.
Frequently Asked Questions
Can I lift a washer onto a pedestal with just one person?
You really shouldn’t try this solo. A washer weighs 150 pounds or more, and even with a strap, you risk slipping or twisting your back. We always recommend at least two people. If you absolutely have to move it alone, use a furniture slider to push it closer to the pedestal and call a neighbor for the final lift.
How long does it take to put a washer on a pedestal?
You can finish the whole job in about 20 to 30 minutes. That includes disconnecting hoses, prepping the floor, and doing the actual lift. For your first time, plan for 45 minutes so you can move slowly and check every connection before you power up.
Do I need to buy a specific lifting strap for a washer?
You need a strap rated for more than the weight of your machine. Look for a webbing strap with padded handles and a 300-pound minimum rating. A simple ratchet strap with sleeves works well. Skip the rope or bungee cords, they won’t grip the machine and can snap under pressure.
What happens if the washer doesn’t line up with the pedestal holes?
Don’t force it down. Gently lower one side first, then use a flathead screwdriver as a lever to nudge the other foot a half-inch left or right. You can also adjust the legs on the washer slightly to match the pedestal’s footprint. Keeping the machine level is more important than perfect hole alignment.
Can I just leave the washer on the pedestal without bolts?
Gravity holds it in place, but a spin cycle creates serious vibration. We found that using the mounting brackets from your pedestal kit is always the safer choice. If your kit doesn’t include brackets, run a full spin test and watch for “walking.” If the washer moves at all, order the locking hardware before using your machine daily.