How to Paint Bathtub Tile [A Complete DIY Guide]
Are you tired of looking at those outdated, dingy bathroom tiles every morning? Maybe they’re pink from the 1950s or an unfortunate shade of avocado green that hasn’t been fashionable for decades. Whatever your situation, you don’t have to live with ugly tile—and you don’t need to empty your bank account on a full bathroom renovation either. Painting your bathtub tile is an affordable DIY solution that can completely transform your bathroom in just a weekend.
I’ve helped dozens of homeowners breathe new life into their bathrooms with a fresh coat of paint, and I’m going to walk you through exactly how to do it yourself. This guide will take you step by step through the process, from preparation to the final seal, ensuring you get professional-looking results without the professional price tag.
Why Consider Painting Your Bathtub Tile
Before diving into the nitty-gritty, let’s talk about why painting your bathtub tile might be the perfect solution for your bathroom woes.
Cost Savings vs. Full Replacement
Let’s face it—bathroom renovations are expensive. A full tile replacement can easily cost between $1,000 and $3,000, depending on the size of your bathroom and the materials you choose. And that’s not including the cost of labor if you hire a professional. In comparison, painting your tile yourself typically costs between $100 and $300 for all supplies. That’s potentially saving over 90% of the cost!
When I painted my own bathroom tile last year, I spent just $175 on supplies, and the transformation was remarkable. My bathroom went from dated to modern in just one weekend—a change that would have cost me at least $2,000 with conventional renovation methods.
Extended Lifespan for Outdated Tile
Another compelling reason to paint your tile is to extend its life. Maybe your tile is structurally sound but aesthetically challenged. A good paint job can add 5-7 years to the life of your existing tile, postponing the need for a full renovation.
Think about it—that’s potentially thousands of dollars saved simply by taking a weekend to apply a fresh coat of paint. Plus, you’ll get to enjoy a bathroom that feels new and rejuvenated without the hassle of demolition and installation.
Essential Supplies for Painting Bathtub Tile
Before you start your tile transformation project, gathering the right supplies is crucial. Here’s everything you’ll need:
Choosing the Right Paint
Not all paints are created equal, especially when it comes to bathroom surfaces that face constant moisture, temperature changes, and cleaning products. For bathtub tile, you’ll need a specialized paint that can handle these unique challenges:
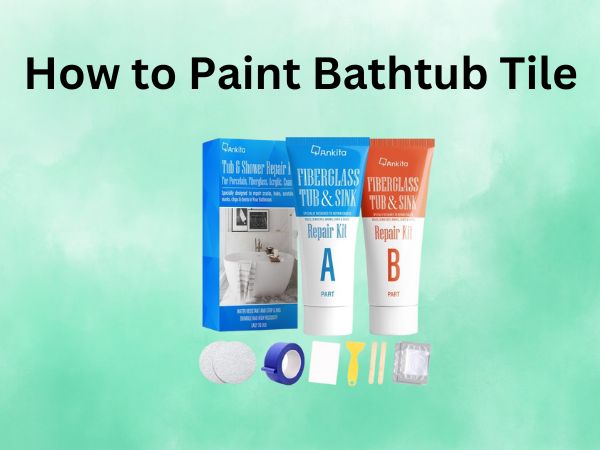
- Epoxy paint: This is my top recommendation for bathtub tiles. Epoxy creates a hard, durable surface that resists water, cleaning products, and general wear and tear.
- Urethane paint: Another excellent option that offers superior durability and water resistance.
- Latex paint designed for bathrooms: If you choose latex, make sure it’s specifically formulated for high-moisture areas and pair it with a quality primer and sealer.
I personally prefer Rust-Oleum Tub & Tile Refinishing Kit, which combines the primer and paint in one product specifically designed for bathroom surfaces. Whatever brand you choose, make sure it explicitly states it’s suitable for bathroom tile.
Preparation Tools and Materials
- Fine-grit sandpaper (220-grit)
- Medium-grit sandpaper (120-grit)
- TSP (trisodium phosphate) cleaner
- Mildew remover
- Caulk and caulk gun
- Painter’s tape
- Drop cloths
- Rubber gloves
- Safety goggles
- Respirator mask (tile paint can have strong fumes)
- Paint trays
- Small foam rollers (high-density foam works best)
- Small paintbrushes for detail work
- Plastic putty knife
- Vacuum with brush attachment
- Lint-free cloths
- Ventilation fan or portable fan
I can’t stress enough how important proper preparation is. Skimping on these supplies might save you a few dollars upfront, but it could cost you the entire project in the long run. Trust me, I learned this the hard way when I tried to cut corners on my first tile painting project—the paint began peeling within months.
Step-by-Step Preparation Process
Preparation is where the magic happens—or where projects fail before they even begin. Follow these steps meticulously for the best results.
Cleaning the Tile Surface
- Remove all items from your tub area and cover the tub with drop cloths.
- Use painter’s tape to protect any areas you don’t want to paint (fixtures, edges, etc.).
- Mix TSP according to package directions and scrub all tile surfaces thoroughly.
- If you notice any mildew, apply a mildew remover and let it sit according to product instructions.
- Rinse all surfaces thoroughly with clean water—any residual cleaner can prevent paint adhesion.
- Allow the surface to dry completely (at least 24 hours). This is crucial—trapped moisture is the enemy of a good paint job.
When I clean tile before painting, I like to do a “water test” after everything has dried. Splash a bit of water on the tile—if it beads up, there might still be soap residue or oils on the surface. If that happens, clean again with TSP and rinse thoroughly.
Repairing Damaged Tiles
Before painting, you’ll need to address any damage to ensure a smooth, long-lasting finish:
- Remove any loose or cracked caulk with a putty knife.
- Fill small cracks or chips in the tile with epoxy filler designed for ceramic or porcelain.
- Allow repairs to dry completely according to product instructions.
- Replace any severely damaged tiles if possible, as paint won’t fix structural issues.
- Apply new caulk where needed (usually along the tub edge or in corners) and allow it to dry completely.
Remember, paint can hide discoloration and outdated colors, but it can’t conceal significant damage. Taking the time to make repairs now will ensure your painted surface looks smooth and professional.
Sanding and Creating a Proper Surface
Now for the step many DIYers try to skip—don’t! Sanding creates the texture needed for paint adhesion:
- Using 120-grit sandpaper, lightly sand all tile surfaces. You’re not trying to remove the glaze completely; you just want to create a slightly rough texture.
- Pay special attention to the center of each tile, as these areas can be slicker than the grout lines.
- After sanding, vacuum all surfaces with a brush attachment to remove dust.
- Follow up with a damp lint-free cloth to capture any remaining dust particles.
- Allow the surface to dry completely again before moving to the painting phase.
I’ve found that using a sanding block rather than just sandpaper helps ensure even pressure and prevents accidentally applying too much force in any one area. The goal is a uniform scuffing of the surface, not removing material.
The Painting Process Explained
With preparation complete, it’s time for the transformation to begin! This is where your bathroom starts to take shape.
Primer Application Techniques
Even if you’ve chosen an all-in-one product, many separate epoxy paints still require a primer:
- Ensure your bathroom is well-ventilated. Open windows if possible and use fans to circulate air.
- Put on your respirator mask, gloves, and safety goggles.
- Mix the primer according to manufacturer instructions (many epoxy primers require mixing multiple components).
- Start with the highest tiles and work your way down, using a foam roller for flat surfaces.
- Use a small brush for corners, edges, and grout lines.
- Apply the primer in thin, even coats—thick application leads to drips and uneven drying.
- Allow the primer to dry completely according to the product instructions (usually 1-4 hours).
I generally apply primer in the morning, then start with paint in the afternoon. This timing ensures the primer is completely dry but still within the optimal window for paint adhesion.
Paint Application Methods
Now for the most satisfying part—adding color to your tiles:
- Mix your paint according to manufacturer instructions if required.
- Start again from the top and work down in small sections (about 3×3 feet).
- Apply the first coat of paint using smooth, even strokes.
- Don’t overwork the paint—apply it and move on to avoid creating texture or pulling up partially dried paint.
- Allow the first coat to dry completely according to product instructions.
- Apply a second coat following the same process.
- Most bathtub tile will require at least two coats for optimal coverage and durability.
One trick I’ve learned over the years: keep a small artist’s brush handy for touch-ups. Even with careful application, you might miss small spots that become visible as the paint dries.
Brush vs. Roller vs. Spray Application
Each application method has pros and cons for bathroom tile:
- Foam rollers: My preferred method for most of the project. They provide even coverage and work well on flat tile surfaces. Use high-density foam rollers specifically, as standard rollers can leave texture.
- Brushes: Essential for detail work, corners, and grout lines. Use synthetic bristle brushes that won’t lose bristles in your paint.
- Spray application: Can provide the smoothest finish but requires significant masking and preparation. It’s also harder to control in small bathroom spaces and requires proper ventilation equipment. I only recommend this for experienced DIYers.
For most home bathtub tile projects, a combination of foam rollers and detail brushes will give you the best results with the least specialized equipment.
Sealing and Protecting Your Newly Painted Tiles
Some paint systems require a separate sealer, while others have the sealer integrated into the paint. Check your product instructions to determine if this step is necessary.
If you do need a separate sealer:
- Allow the final coat of paint to cure according to manufacturer instructions—usually 24-48 hours minimum.
- Apply the sealer using a clean foam roller in thin, even coats.
- Pay particular attention to areas that will receive direct water contact.
- Allow the sealer to cure completely before using the shower or tub—typically 3-7 days.
I cannot stress enough how important it is to follow the full curing time before using your bathroom. I’ve seen beautiful DIY paint jobs ruined because someone couldn’t wait the full recommended curing time before taking a shower.
Maintenance Tips for Painted Bathtub Tile
To extend the life of your newly painted bathroom tile:
- Wait at least 7 days before cleaning the painted surface.
- Use only non-abrasive cleaners—nothing with bleach or harsh chemicals.
- Clean with soft cloths rather than scratchy sponges or brushes.
- Avoid adhesive bath mats that could pull at the paint when removed.
- Fix any chips or damage promptly to prevent water from getting underneath the paint.
- Consider applying a new coat of sealer once a year for high-use bathrooms.
With proper care, your painted bathtub tile can look fresh and new for 5+ years before needing touch-ups.
Common Mistakes to Avoid
Learn from the mistakes I’ve made and seen others make:
- Inadequate preparation: Rushing through cleaning and sanding is the number one reason paint fails on bathroom tile.
- Painting over mold or mildew: These will continue to grow under the paint and cause it to bubble and peel.
- Using regular wall paint: Standard interior paint will fail quickly in the humid, wet bathroom environment.
- Applying thick coats: Thin, multiple coats adhere better and last longer than single thick applications.
- Not allowing proper drying time between steps: Patience is truly a virtue in tile painting.
- Skipping ventilation: The fumes from specialized tile paints can be strong and potentially harmful.
- Using the shower too soon: I’ve seen a week of work ruined by someone who couldn’t wait the full curing time.
FAQs
How long does painted bathtub tile last?
With proper preparation and maintenance, painted bathtub tile can last 5-7 years before needing a touch-up or repainting. However, high-use showers or bathrooms with poor ventilation may show wear sooner. Using a high-quality epoxy paint specifically designed for bathrooms and following all curing instructions will maximize longevity.
Can I paint over old painted bathroom tile?
Yes, but you’ll need to remove any loose or peeling paint first, then sand the entire surface to create a uniform texture. If the previous paint job is in good condition with no peeling, you can often sand it lightly and apply new paint directly over it. However, if there are multiple layers of old paint or any signs of failure, it’s best to strip the old paint completely before starting fresh.
What kind of paint finish is best for bathroom tile?
Semi-gloss or high-gloss finishes are ideal for bathroom tile as they are more moisture-resistant and easier to clean than matte finishes. Most specialized bathroom tile paints come in a gloss finish by default. Avoid matte or eggshell finishes in high-moisture areas like shower surrounds, as they can trap dirt and are harder to keep clean.
How soon can I use my shower after painting the tile?
Most epoxy and urethane bathroom tile paints require at least 3 days of curing time before exposure to water, but some may recommend up to 7 days for full cure. Check your specific product instructions and then add an extra day to be safe. Using the shower too soon is one of the most common causes of paint failure and can undo all your hard work.
Is it better to hire a professional or DIY for painting bathtub tile?
This depends on your comfort level with DIY projects and the condition of your bathroom. If you’re detail-oriented, willing to follow instructions precisely, and comfortable with basic home improvement tasks, painting bathtub tile is a very achievable DIY project. However, if your tile has significant damage, you’re dealing with unusual materials, or you simply want guaranteed results, professional services typically cost $500-$1,000 and come with warranties on the work.
Conclusion
Painting your bathtub tile is one of the most cost-effective ways to dramatically transform your bathroom. With careful preparation, the right supplies, and a patient approach, you can achieve professional-looking results that will last for years.
Remember that the key to success lies in the preparation—proper cleaning, repairs, and surface preparation make all the difference between a paint job that peels within months and one that lasts for years. Take your time, follow each step carefully, and you’ll be rewarded with a bathroom that looks brand new without the brand-new price tag.
Have you been putting off a bathroom update because of the cost? Now you have an affordable alternative that you can tackle in a single weekend. Your refreshed bathroom awaits!