How to Change GE Water Filter Refrigerator: A Complete Step-by-Step Guide
Understanding Your GE Water Filter and Why It Matters
Your GE refrigerator comes equipped with a water filter that serves a critical purpose: removing contaminants, sediment, chlorine, and other unwanted particles from your drinking water and ice. It’s basically a gatekeeper that ensures only clean, fresh water enters your glass or ice tray. Over time, this filter accumulates all the nasty stuff it’s been trapping, and it becomes less effective. That’s where replacement comes in.
How GE Water Filters Work
The filtration process is actually quite fascinating. Water enters the filter housing and passes through activated carbon and other filtration media. These materials act like tiny magnets, attracting and holding onto contaminants. Chlorine molecules, for instance, are absorbed by the activated carbon, while sediment gets physically trapped in the filter’s layers. Eventually, the filter becomes saturated and can’t do its job anymore, which is why regular replacement is essential.
Signs That Your GE Water Filter Needs Replacement
Not sure if it’s time to change your filter? Here are the telltale signs that your GE water filter is crying out for retirement.
Visible Warning Indicators
- Filter indicator light on your refrigerator’s display is illuminated or flashing
- The light changes color, often from green to red or yellow
- A filter replacement notification appears on your fridge’s screen
Quality Changes You’ll Notice
Beyond the warning lights, you might observe that your water tastes slightly chlorinated or metallic. Some people describe it as having a stale flavor. Your ice might develop an off-taste as well, or it could appear slightly cloudier than usual. These are your senses telling you that the filter isn’t performing at its peak anymore. The water pressure from your dispenser might also decrease noticeably, which happens when the filter becomes clogged with accumulated debris.
Tools and Materials You’ll Need for the Job
Here’s the beautiful part—you don’t need a toolbox filled with specialized equipment. This is one of those household tasks that requires minimal preparation.
Essential Items
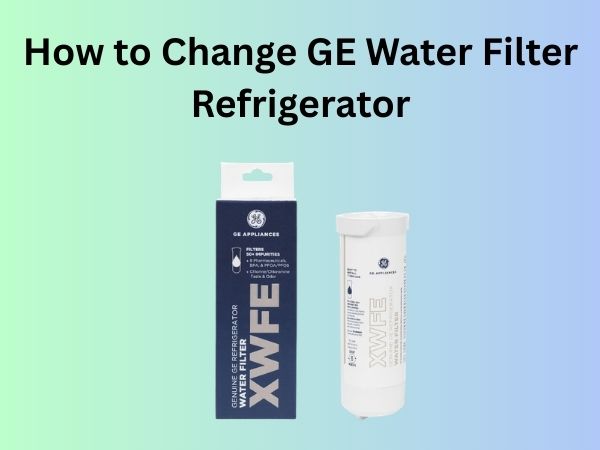
- A replacement GE water filter (make sure it matches your refrigerator model)
- A towel or cloth to catch any residual water
- Your refrigerator’s user manual (helpful but not absolutely necessary)
- A cup of water for testing after installation
That’s literally it. You won’t need any screwdrivers, wrenches, or electrical tools. GE designed this process to be user-friendly, and it shows.
Locating Your Water Filter: Different GE Models
Here’s where things can vary slightly depending on which GE refrigerator you own. The filter location isn’t universal across all models, so let me break down the most common placements.
Inside the Refrigerator Compartment
Many GE refrigerators have filters located inside the fridge itself, typically in the upper right corner or at the back of the interior. Look for a cylindrical or cartridge-shaped component that’s often white or black in color. You might need to move some shelves or containers to access it clearly. The filter housing usually has a twist-lock design, making it straightforward to remove.
Under the Refrigerator Base
Some models tuck the water filter underneath the fridge, accessible from the front lower grille. To reach this, you’ll need to open the lower grille panel and look inside. This location is practical if you want to minimize the space the filter takes up inside your fridge. It’s also easier to change without disturbing your food storage.
Inside the Freezer Section
Certain GE models place the filter inside the freezer compartment. This is convenient in some ways since you’re less likely to accidentally knock it while retrieving food. The downside is that you’ll need to work in cold temperatures, so having a towel handy becomes even more important.
Behind the Vegetable Drawer
Don’t overlook this possibility. Some refrigerators hide their filters behind the vegetable crisper drawer. Simply slide out the drawer, look behind where it was sitting, and you might find your filter location there.
Step-by-Step Instructions for Changing Your GE Water Filter
Now for the main event. Follow these detailed instructions to safely replace your water filter. This process typically takes between five to fifteen minutes, depending on your comfort level and filter accessibility.
Step One: Prepare Your Workspace
First things first—prepare for potential water spillage. Place your towel or cloth beneath the filter location. This catches any water that might drip out when you remove the old filter. It’s not usually a massive amount of water, but it’s better to be prepared. Also, make sure you have your new replacement filter nearby and already unpacked.
Step Two: Locate and Access Your Filter
Based on the information I provided earlier, find your specific filter location. If you’re having trouble, consult your refrigerator’s model number on the back or inside the fridge door. You can then search this number online or in your manual to confirm the exact filter position. Once you’ve located it, clear any obstructions around it so you have full access.
Step Three: Turn the Old Filter Counterclockwise
This is the critical step. Most GE filters have a simple twist-lock mechanism. Place your hand on the filter and gently turn it counterclockwise. You should feel some resistance initially—this is normal. Don’t force it aggressively. Instead, apply steady, firm pressure. Most filters will complete a quarter-turn or half-turn before they disengage from the housing. As you turn, support the filter with your other hand to prevent it from falling.
Step Four: Gently Remove the Old Filter
Once the filter has twisted free from its housing, carefully pull it straight out toward you. Water might still be trapped inside or dripping from the connection point, so keep your towel ready. Set the old filter aside—you can dispose of it in your regular trash, as most GE filters are not recyclable.
Step Five: Inspect the Filter Housing
Take a moment to examine the empty housing where your filter was sitting. You might see a small rubber gasket or seal inside. This is perfectly normal and should remain in place. If for some reason it’s loose or missing, contact GE customer service before installing your new filter. Any debris or sediment inside the housing can be gently wiped out with a damp cloth.
Step Six: Install Your New GE Water Filter
Now comes the moment when you’re replacing the old with the new. Before inserting the new filter, check that any protective caps or seals are removed from the filter’s connection ends. These caps are there to keep the filter clean during shipping and storage. Grab your new filter and align it with the housing opening. Push it straight in, making sure the connection points line up properly.
Step Seven: Turn the New Filter Clockwise Until Seated
Once the filter is positioned in the housing, rotate it clockwise. You’ll feel resistance again—this is the twist-lock mechanism engaging. Continue turning until the filter feels snug and secure. Most filters will click or seat with a slight “pop” feeling when they’re properly installed. Don’t over-tighten it; once you feel it’s seated firmly, stop turning. Over-tightening can damage the filter housing.
Step Eight: Run Water Through Your Filter
This step is crucial and often overlooked. Run water from your refrigerator’s dispenser into a cup for about thirty seconds. This flushes out any loose carbon particles or manufacturing residue from the new filter. The water might appear slightly darker or discolored during this initial flush—this is completely normal and not a sign of a defective filter. Continue flushing until the water runs clear. Discard this initial batch of water rather than drinking it.
Resetting Your Filter Indicator Light
After installing your new filter, that little light on your refrigerator’s display is probably still telling you that replacement is needed. Time to reset it so it can track your new filter’s usage.
Finding the Reset Button
The reset mechanism varies by model. Some refrigerators have a dedicated reset button inside the fridge compartment, often located near the filter or on the back wall. Others require you to hold down a button on the control panel for several seconds. Check your user manual for the exact procedure for your specific model.
Common Reset Methods
- Hold the “Filter” or “Reset” button on the control panel for three to five seconds
- Press and hold the “Water Filter” button until the light changes
- Use the refrigerator’s touchscreen menu to reset the filter indicator
- Turn off the refrigerator for thirty seconds and then turn it back on (older models)
Once reset, the light should return to its normal color, typically green, indicating that your filter is fresh and ready to perform optimally.
Tips for Maintaining Your New Water Filter
Replacing your filter is only half the battle. Proper maintenance extends your filter’s lifespan and ensures consistently clean water.
Establish a Replacement Schedule
GE generally recommends replacing water filters every six months under normal usage. However, this can vary based on your water quality and consumption habits. If you have particularly hard or sediment-rich water, you might need to change it more frequently. Conversely, if you use less water, you could stretch it to nine months. Keep a note of your installation date to remind yourself when the next replacement is due.
Monitor Water Quality Regularly
Don’t wait until the warning light appears to pay attention to your water quality. Regularly taste your water and ice. If you notice degradation before the recommended interval, go ahead and change it early. Your family’s health is worth the investment in a fresh filter.
Keep Your Refrigerator Clean
Maintain proper refrigerator hygiene by wiping down the dispenser area and filter housing occasionally. This prevents bacterial growth and keeps your water dispensing mechanism functioning smoothly. A simple damp cloth works perfectly for this task.
Common Mistakes to Avoid During Filter Replacement
Even though changing a GE water filter is straightforward, people sometimes make preventable errors. Learn from others’ experiences.
Forgetting to Remove Protective Caps
This is surprisingly common. People install their new filters without removing the protective plastic caps that seal the connection points during shipping. If you do this, water simply won’t flow through your dispenser. Always check for and remove any protective seals before installation.
Turning the Filter in the Wrong Direction
Counterclockwise removes it; clockwise installs it. I know it seems obvious, but in the moment, especially if you’re in a hurry, people sometimes get confused. Remember: removal is counter (like opening), and installation is clockwise (like turning it in).
Over-Tightening the Filter
There’s a difference between secure and strangled. Over-tightening can crack the filter housing or strip the threading, making future replacements difficult or impossible. Tighten until snug, then stop.
Skipping the Initial Water Flush
Drinking water that hasn’t been flushed through a new filter means consuming activated carbon particles and manufacturing residue. Take the thirty seconds to flush your system before using your water.
Using the Wrong Filter Model
GE makes various water filter models, and they’re not all compatible with every refrigerator. Using an incorrect filter can result in improper fitting, poor water quality, or even leaking. Always verify your refrigerator’s model number and purchase the correct filter replacement.
Troubleshooting Common Issues
Sometimes things don’t go perfectly. Here’s how to handle common problems.
Water Still Tastes Off After Replacement
If your water quality hasn’t improved after installing a new filter and completing the flush cycle, first verify that you removed all protective caps. If they’re off, wait a few hours and try the water again. Sometimes it takes time for the filter to fully activate. If problems persist, you might have a water quality issue beyond what the filter can address, or your source water might be particularly contaminated.
Water Pressure Has Decreased
Low water pressure immediately after filter replacement usually means the filter hasn’t been properly seated or installed correctly. Remove the filter and reinstall it, ensuring you’ve rotated it clockwise until you feel it click into place. If pressure remains low after reinstallation, your old filter might have been severely clogged, and your pipes need time to clear out. Give it a few hours and check again.
Water is Leaking From the Filter Area
A leak indicates that your filter isn’t seated properly. Stop using the water dispenser immediately and remove the filter. Inspect the connection points for any cracks or damage. If the housing or filter appears damaged, contact GE support. If they look fine, reinstall the filter with a bit more attention to proper seating and rotation.
The Reset Light Won’t Turn Off
Try the reset procedure again, holding the button longer if necessary. If it still doesn’t reset, try unplugging your refrigerator for thirty seconds and plugging it back in. If the light remains stuck, there might be an electrical issue, and you should contact GE customer service for assistance.
Understanding Filter Replacement Frequency
Let’s dig a bit deeper into why the six-month recommendation exists and whether it applies to your situation.
Factors That Affect Filter Life
- Water quality in your area (harder water clogs filters faster)
- Daily water consumption (more use means faster filter saturation)
- Ice maker usage frequency
- Sediment levels in your municipal or well water
If you live in an area with exceptionally hard water, you might find yourself changing filters every four months. On the other hand, if you live in an area with excellent water quality and use very little water from your dispenser