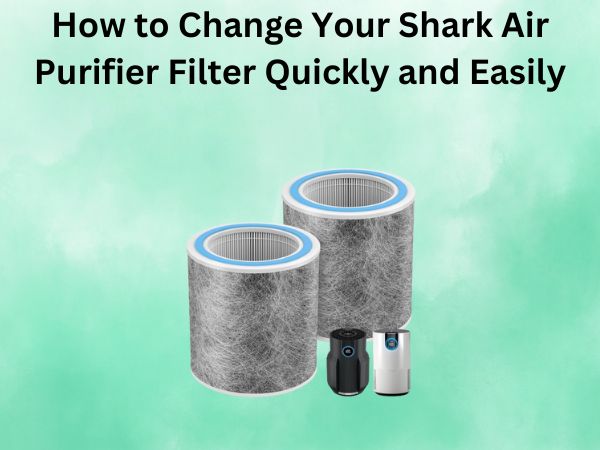
How to Change Your Shark Air Purifier Filter Quickly and Easily
As a seasoned air quality enthusiast, I know how important it is to keep your air purifier in tip-top shape. One of the most crucial maintenance tasks is regularly changing the filter – and let me tell you, it’s a total game-changer for the performance of your Shark air purifier. Today, I’m going to walk you through the simple steps to change your Shark air purifier filter quickly and efficiently, so you can breathe easier and keep your home’s air clean and fresh.
Table of Contents
Why Changing the Filter Matters
You might be wondering, “Do I really need to change the filter in my Shark air purifier? Can’t I just keep using the same one forever?” Well, I’m here to tell you that no, you can’t keep using the same filter forever – and you definitely shouldn’t. Over time, the filter in your air purifier becomes clogged with all the dust, dander, and other airborne particles it’s been trapping. This not only reduces the purifier’s efficiency, but it can also cause the motor to work harder, potentially leading to damage or reduced lifespan.
Changing your Shark air purifier filter on a regular basis is crucial for maintaining optimal air quality and ensuring your appliance continues to operate at its best. Neglecting this important task can result in a less effective air purifier, which means you and your family won’t be getting the clean, healthy air you deserve. Trust me, it’s a small investment of time that pays off in a big way.
How Often Should You Change the Filter?
Now, you might be wondering, “Okay, I get that I need to change the filter, but how often should I do it?” The answer can vary a bit depending on the specific model of Shark air purifier you have and the air quality in your home, but as a general rule of thumb, you should plan to replace the filter every 6-12 months.
If you have pets, smoke indoors, or live in an area with particularly poor air quality, you may need to change the filter more frequently – perhaps every 6 months or even sooner. On the other hand, if you live in a relatively clean, low-pollution environment and don’t have any major indoor air quality issues, you may be able to stretch it to 12 months before needing a replacement.
The best way to know when it’s time to change your Shark air purifier filter is to keep an eye on the filter indicator light. This handy feature will let you know when the filter is getting dirty and needs to be replaced. Pay attention to it, and don’t ignore those warning signs!
How to Change the Filter in Your Shark Air Purifier
Alright, let’s dive into the step-by-step process for changing your Shark air purifier filter. It’s really quite simple, I promise! Here’s what you need to do:
Step 1: Locate the Filter
The first step is to locate the filter in your Shark air purifier. Depending on the model, the filter may be accessible from the front, side, or back of the unit. Consult your user manual if you’re unsure where to find it.
Step 2: Remove the Old Filter
Once you’ve found the filter, it’s time to remove the old one. Gently pull it out of the air purifier, being careful not to damage or tear it. If your Shark air purifier has a pre-filter or other removable components, be sure to take those out as well.
Step 3: Insert the New Filter
With the old filter out, it’s time to install the new one. Carefully align the new filter with the air purifier’s housing and gently push it into place. Make sure it’s securely seated and not crooked or tilted.
Step 4: Replace Any Additional Components
If your Shark air purifier has a pre-filter or other removable components, be sure to put those back in place now. Follow the manufacturer’s instructions to ensure everything is properly reinstalled.
Step 5: Reset the Filter Indicator
Once the new filter is in place, you’ll need to reset the filter indicator light (if your model has one). Consult your user manual for specific instructions on how to do this – it’s usually a simple button press or combination of button presses.
Conclusion
And there you have it! Changing the filter in your Shark air purifier is a quick and easy task that can make a big difference in the performance and efficiency of your appliance. By following these simple steps and staying on top of regular filter changes, you can ensure your Shark air purifier continues to deliver clean, fresh air for you and your family to breathe easy.
FAQs
How do I know when it’s time to change the filter in my Shark air purifier?
Most Shark air purifiers have a filter indicator light that will let you know when the filter is dirty and needs to be replaced. Additionally, you should plan to change the filter every 6-12 months, depending on your home’s air quality and usage.
Can I wash the filter in my Shark air purifier?
No, you should not try to wash or clean the filter in your Shark air purifier. Filters are designed to be disposable and should be replaced with a new one when needed. Attempting to clean the filter can damage it and reduce its effectiveness.
What type of filter does my Shark air purifier use?
The type of filter used in your Shark air purifier will depend on the specific model you have. Consult your owner’s manual or the Shark website to determine the correct replacement filter for your appliance. Using the wrong filter can compromise the performance of your air purifier.
How do I dispose of the old filter from my Shark air purifier?
Most air purifier filters can be safely disposed of in your regular household trash. However, some filters may contain materials that require special disposal. Check the instructions that came with your Shark air purifier or contact the manufacturer if you have any questions about proper filter disposal.
Can I use a generic air purifier filter in my Shark air purifier?
No, it’s important to use the replacement filters specifically designed for your Shark air purifier model. Using a generic or off-brand filter can negatively impact the performance and efficiency of your appliance, and may even void the manufacturer’s warranty.