How to Clean Glacier Bay Water Dispenser Easily: A Complete Guide
Introduction to Glacier Bay Water Dispensers
If you’ve got a Glacier Bay water dispenser sitting in your kitchen or office, you’re probably enjoying the convenience of having cold or hot water at your fingertips. These machines are fantastic for staying hydrated throughout the day, but here’s the thing—they need regular cleaning to keep working properly and to ensure the water you’re drinking stays fresh and clean. Think of your water dispenser like a car; without regular maintenance, it won’t run smoothly for very long.
Glacier Bay dispensers come in various models, but they all share the same basic concept: they hold large water bottles and dispense filtered water at different temperatures. The problem many people face is that they’re unsure how to properly clean these machines without damaging them. That’s exactly what this guide is here to help you with.
Why Regular Cleaning Matters for Your Dispenser
Understanding the Hidden Dangers
You might think your water dispenser just sits there doing its job, but inside, all sorts of things are happening. Bacteria can develop, mineral deposits build up, and algae might even start growing if you’re not careful. Regular cleaning isn’t just about making your dispenser look nice—it’s about protecting your health. When you drink from an uncleaned dispenser, you’re potentially consuming contaminants that have accumulated over time.
Extending Your Dispenser’s Lifespan
Mineral buildup, particularly from hard water, can clog internal components and reduce your dispenser’s efficiency. When you clean your machine regularly, you’re essentially giving it a longer life. A well-maintained Glacier Bay dispenser can serve you faithfully for many years, whereas a neglected one might start failing within just a couple of years.
Tools and Supplies You’ll Need Before Starting
Before you dive into cleaning your Glacier Bay water dispenser, gather these essential items. Having everything ready will make the process smoother and faster.
- White vinegar (a natural cleaning powerhouse)
- Soft cloth or sponge (avoid abrasive materials)
- Small brush with soft bristles (for tight spaces)
- Bucket of warm water
- Dish soap (mild and gentle)
- Paper towels or clean microfiber cloths
- Rubber gloves (to protect your hands)
- Screwdriver (possibly, depending on your model)
- Bleach solution (optional, for stubborn stains)
- Distilled water (for final rinses)
Safety Precautions Before You Start Cleaning
Unplugging Your Machine
This is non-negotiable. Always unplug your Glacier Bay water dispenser from the electrical outlet before you begin any cleaning. You’re dealing with a machine that heats and cools water, which means electricity and water are both involved. That’s a combination you don’t want to mess with while cleaning. Give yourself peace of mind and eliminate any electrical hazard right from the start.
Allowing Time for Cooling Down
If your dispenser has been in use recently, the internal components might still be hot. Let the machine sit unplugged for at least 15 to 20 minutes before you start. This gives the heating element time to cool down and makes the whole cleaning process safer for you.
Removing the Water Bottle
Take out the water bottle currently installed in your dispenser. This prevents any accidental spills and gives you easier access to the components you need to clean. Set it aside in a safe place where it won’t tip over.
The Complete Step-by-Step Cleaning Process
Starting with External Cleaning
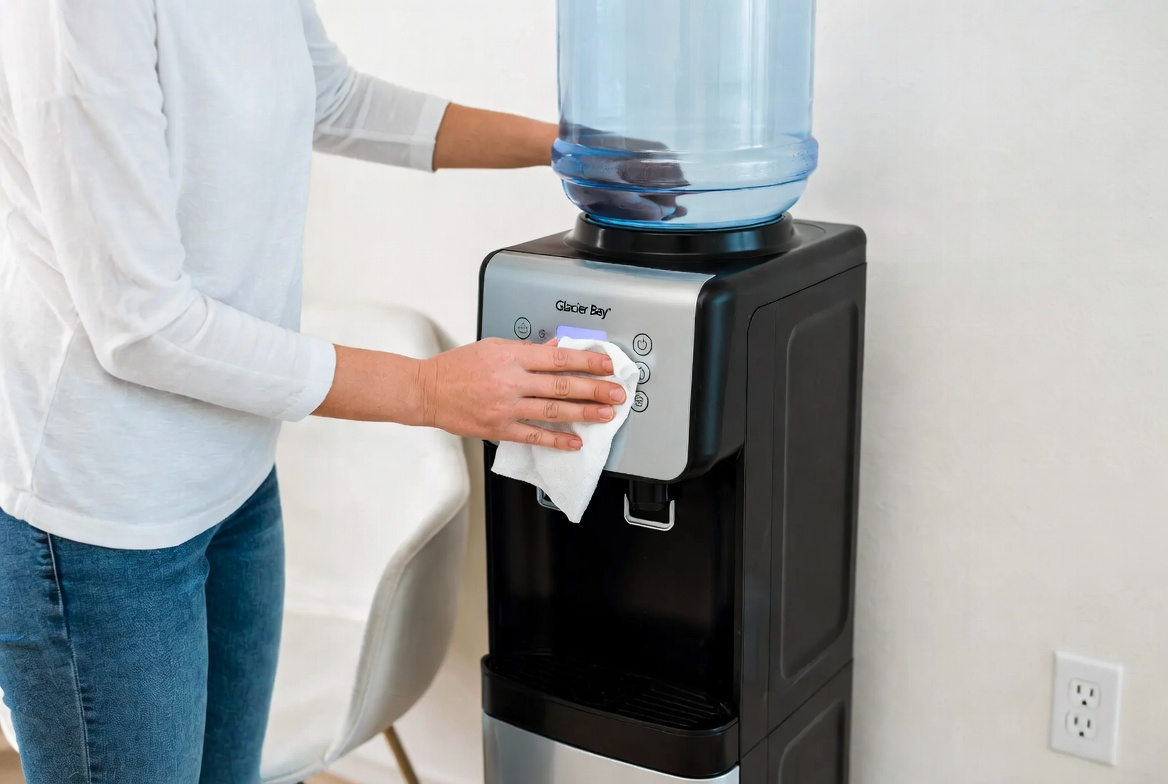
Begin your cleaning journey from the outside and work your way in. Using a soft cloth slightly dampened with warm soapy water, wipe down the exterior of your Glacier Bay dispenser. This includes the sides, back, and top surface. Pay special attention to areas where dust tends to accumulate. The external cleaning removes surface dirt and prepares you mentally for the more detailed work ahead.
For stubborn stains on the exterior, use white vinegar on your cloth and gently rub the affected area. Vinegar is acidic enough to break down deposits but gentle enough not to damage your machine’s finish. After wiping with vinegar, follow up with a damp cloth using plain water to remove any residue.
Cleaning the Water Reservoir: The Heart of Your Dispenser
Accessing the Reservoir
The water reservoir is where the magic happens, and it’s also where the most buildup occurs. Depending on your Glacier Bay model, you might need to remove a panel or access door to reach the reservoir. Check your user manual if you’re unsure. Some models have easily removable tops, while others might require a bit more effort.
The Vinegar Cleaning Method
This is where white vinegar becomes your best friend. Mix equal parts white vinegar and distilled water in a bucket. Using a soft brush or cloth, scrub the interior walls of the reservoir thoroughly. The vinegar will help dissolve mineral deposits that have built up over time. Work your way around the entire reservoir, making sure you reach all the corners and crevices.
Let the vinegar solution sit in the reservoir for about 15 to 20 minutes if you’re dealing with particularly stubborn buildup. This soaking time allows the acidic solution to break down deposits more effectively, making your scrubbing efforts more productive.
Rinsing the Reservoir Completely
After you’ve scrubbed and let the vinegar solution work its magic, rinse the reservoir multiple times with distilled water. You want to remove every trace of vinegar to ensure your water doesn’t taste or smell off. Fill the reservoir partway, swish it around, and drain it completely. Repeat this process at least three times.
Maintaining the Dispenser Nozzles: Where You Drink From
Why Nozzles Need Special Attention
The nozzles—those little spouts where the water comes out—are incredibly important. They’re also places where bacteria loves to hide. Because they’re constantly exposed to air and handled by multiple people, they accumulate more contaminants than you might realize.
Cleaning Individual Nozzles
Using a small soft-bristled brush, gently clean around each nozzle. If your dispenser has removable nozzles, take them off and soak them in a vinegar and water solution for 30 minutes. For non-removable nozzles, use your brush and a vinegar-soaked cloth to clean around and under them as best you can.
After cleaning with vinegar, use a damp cloth with plain water to rinse away the vinegar solution. Make sure no vinegar residue remains, as this could affect the taste of your water.
Tackling Hard Water Stains: Dealing with Mineral Buildup
Identifying Hard Water Problems
Hard water is water that contains high levels of minerals like calcium and magnesium. If you live in an area with hard water, you’ll notice white, chalky deposits forming on and inside your dispenser. These deposits look unpleasant and can actually reduce your machine’s efficiency over time.
The Vinegar and Soak Method
For stubborn hard water stains, vinegar is again your solution. Create a stronger vinegar mixture using two parts vinegar to one part water. Apply this to the affected areas and let it sit for 30 to 45 minutes. The acidity in the vinegar dissolves the mineral deposits much more effectively than plain water ever could.
Once the vinegar has had time to work, scrub gently with a soft cloth or brush. You should see the deposits start to disappear. For really stubborn stains on the exterior, you might need to repeat this process two or three times.
Prevention is Key
The best way to handle hard water stains is to prevent them from building up in the first place. Consider using distilled water instead of tap water if you live in a hard water area. This simple switch can dramatically reduce the mineral deposits that form inside your dispenser.
Deep Cleaning the Internal Components
Understanding What’s Inside
Beyond the reservoir and nozzles, your Glacier Bay dispenser has internal components that also need attention. These include the tubing that carries water throughout the machine and various valves and filters. While you can’t access everything easily, you can still perform a deep clean on the parts you can reach.
Running a Vinegar Cycle
Once you’ve reassembled your dispenser and plugged it back in, fill the reservoir with a vinegar and water solution. Let the machine run this solution through its system for a few minutes, dispensing it from both the hot and cold outlets. This helps clean internal tubing and components. Let the solution sit in the machine for 15 minutes, then flush the system thoroughly with fresh water.
Multiple Fresh Water Cycles
After running the vinegar solution through, you need to flush the system completely. Fill the reservoir with fresh distilled water and run it through the entire system. Do this at least four to five times to ensure all vinegar smell and taste is completely gone. This is crucial—you don’t want your drinking water tasting like vinegar.
Preventing Future Buildup and Maintaining Your Machine
Establishing a Cleaning Schedule
The key to keeping your Glacier Bay dispenser clean with minimal effort is establishing a regular cleaning routine. Aim to do a basic external clean weekly and a more thorough internal clean every month. If you use your dispenser heavily or live in a hard water area, you might need to increase this frequency.
Weekly Quick Maintenance
Each week, spend just five minutes wiping down the exterior and cleaning the nozzles. This prevents heavy buildup and keeps your machine looking fresh. It’s the difference between a quick maintenance task and a major cleaning project.
Monthly Deep Clean
Once a month, do the full cleaning process described earlier. Set a reminder on your phone if you tend to forget. Think of it as a spa day for your water dispenser—it keeps everything running smoothly and your water tasting great.
Troubleshooting Common Issues During Cleaning
What if Water Isn’t Dispensing After Cleaning?
Sometimes after cleaning, you might find that water doesn’t come out as freely as before. This usually means air has gotten trapped in the system. Don’t panic. Plug in your machine and let it run for a minute or two with an empty cup underneath. The air will bubble out, and normal water flow should resume.
Dealing with a Vinegar Smell
If your water smells like vinegar after cleaning, you haven’t rinsed enough. Keep flushing the system with fresh distilled water until the smell completely disappears. This might take more cycles than you initially thought, and that’s okay. Better to take extra time than to drink vinegar-flavored water.
Handling Stubborn Stains
If vinegar isn’t strong enough for particularly stubborn stains, you can try a diluted bleach solution. Use one part bleach to ten parts water, and apply it only to the exterior or reservoir—never use bleach in components you’ll drink from without extensive rinsing. Always handle bleach carefully and ensure proper ventilation.
When to Replace Filters in Your Dispenser
Understanding Your Filter System
Most Glacier Bay dispensers come with built-in filters that need replacement periodically. These filters catch impurities and improve water quality, but they don’t last forever. Depending on your water quality and usage, filters typically last between three to six months.
Signs Your Filter Needs Replacement
Watch for these indicators that it’s time for a new filter: water starts flowing more slowly, the water begins to taste or smell off, or you notice a visible change in water color or clarity. Don’t wait until your filter is completely clogged—replace it proactively.
Replacing the Filter
Check your user manual for your specific model’s filter replacement instructions. Most models make this process fairly simple. After replacing the filter, run several cycles of fresh water through the dispenser to flush out any filter particles.
Expert Tips for Long-Term Maintenance and Care
Use Distilled Water When Possible
If your dispenser uses distilled water for the bottle, you’re already ahead of the game. Distilled water has fewer minerals that create buildup, making your cleaning tasks much easier. If you’re dealing with hard tap water, consider investing in distilled water for your dispenser.
Keep Your Dispenser in the Right Location
Where you place your dispenser matters. Avoid direct sunlight, which can promote algae growth, and keep it away from heat sources that might stress the cooling system. A cool, shaded corner of your kitchen is ideal.
Don’t Ignore Small Problems
If you notice water isn’t as cold as usual, or the hot water isn’t hot enough, address it immediately. These can be signs of internal buildup that needs attention before it becomes a bigger problem.
Keep Records of Maintenance
Consider keeping a simple log of when you clean your dispenser and when you replace filters. This helps you maintain consistency and ensures you never forget maintenance tasks. You can use your phone’s notes app or a simple calendar reminder.
Conclusion
Cleaning your Glacier Bay water dispenser might seem like a daunting task at first, but once you understand the process, it becomes straightforward and manageable. The key takeaway is that regular maintenance—both quick weekly cleanings and deeper monthly cleanups—keeps your dispenser running efficiently and your water tasting fresh and clean. Remember that your water dispenser is an investment in your health and convenience, and it deserves proper care.
The vinegar-and-water solution is your greatest ally in this process. It’s affordable, effective, safe, and environmentally friendly. Combined with a soft brush and some elbow grease, it can tackle virtually any cleaning challenge your Glacier Bay dispenser throws at you. By following the steps outlined in this guide and establishing a regular maintenance routine, you’ll extend your machine’s lifespan significantly and always have access to clean, great-tasting water.
Don’t wait until your dispenser starts ma


