How to Cook Corn on the Cob in Water: The Complete Guide to Perfect Results Every Time
There’s something almost magical about biting into a perfectly cooked ear of corn on the cob. That sweet, tender kernel bursting with flavor is what summer memories are made of. But here’s the thing—cooking corn on the cob in water isn’t just about tossing it into a pot and hoping for the best. There’s actually a method to this madness, and I’m going to walk you through every step so you can achieve those restaurant-quality results right in your own kitchen.
Understanding Why Water-Boiling Is the Gold Standard
You might wonder why boiling in water is considered the go-to method for cooking corn. Well, think of water as a heat conductor that surrounds your corn evenly, cooking it uniformly from all angles. Unlike grilling or baking, boiling ensures that every kernel gets the same amount of heat and moisture, preventing those tough, overcooked spots or disappointing undercooked areas.
The beauty of this method is its reliability. Whether you’re cooking for two people or feeding a crowd at your backyard barbecue, the water-boiling technique remains consistent and foolproof when you follow the right steps.
Selecting the Best Corn for Boiling
Freshness Is Your Best Friend
The first rule of cooking amazing corn is starting with quality corn. When you’re at the farmer’s market or grocery store, look for ears that feel heavy for their size—this indicates they’re filled with moisture and are likely to be sweet and tender. The husks should be bright green and tightly wrapped around the ear, not dried out or brown.
Understanding Corn Varieties
Not all corn is created equal when it comes to cooking. Sweet corn varieties like Silver Queen, Honey and Cream, and Peaches and Cream are your best bets for boiling. These varieties have a higher sugar content and lower starch content, which means they’ll taste naturally sweeter and have a more tender texture when cooked.
- Sweet corn is ideal for boiling and eating fresh
- Field corn is better suited for cornmeal and animal feed
- Popcorn has different cooking requirements entirely
The Husking Question
Here’s where opinions differ among home cooks. Some people swear by boiling corn still in its husk, claiming it traps moisture and keeps the kernels juicier. Others remove the husk and silk beforehand for easier handling. Personally, I find that removing the husk and silk before boiling makes cleanup easier and allows the water to penetrate the kernels more effectively, though both methods work.
Preparing Your Corn for Cooking
Removing the Husk and Silk
If you’re choosing to remove the husk, start by holding the corn upright on a cutting board. Peel the green leaves down and away from the ear, working your way around until they’re completely removed. This is actually quite satisfying—it feels almost therapeutic.
Next comes the silk removal. This is the tricky part that frustrates many home cooks. Take a damp paper towel or soft brush and gently rub the ear under running water, working from top to bottom. The silk strands should come off with minimal effort. Don’t worry if a few strands remain—they’ll soften during cooking and become almost unnoticeable.
Trimming the Ends
Using a sharp knife, trim the stem end of each ear flat. This serves two purposes: it makes the corn easier to handle and removes any damaged kernels from the stalk end. A clean cut also looks more appealing when you’re serving your corn.
Setting Up Your Cooking Station
Choosing the Right Pot
You’ll want a large pot—and I mean genuinely large. A typical 6 to 8-quart pot works wonderfully for cooking four to six ears of corn. The pot needs to be tall enough to completely submerge your corn while allowing water to boil vigorously. If you try to cook corn in a small pot, you’re fighting an uphill battle because the water temperature will drop too much when you add the corn, and you won’t achieve that rolling boil you need.
Water Quantity Matters
Fill your pot with enough water to cover the corn by at least two inches. This might seem like a lot, but trust me on this. You need enough water so that when you add the corn, the temperature doesn’t drop dramatically. If the water stops boiling after you add the corn, you’ll end up with less tender results because the kernels won’t cook as evenly.
The Boiling Process: Step by Step
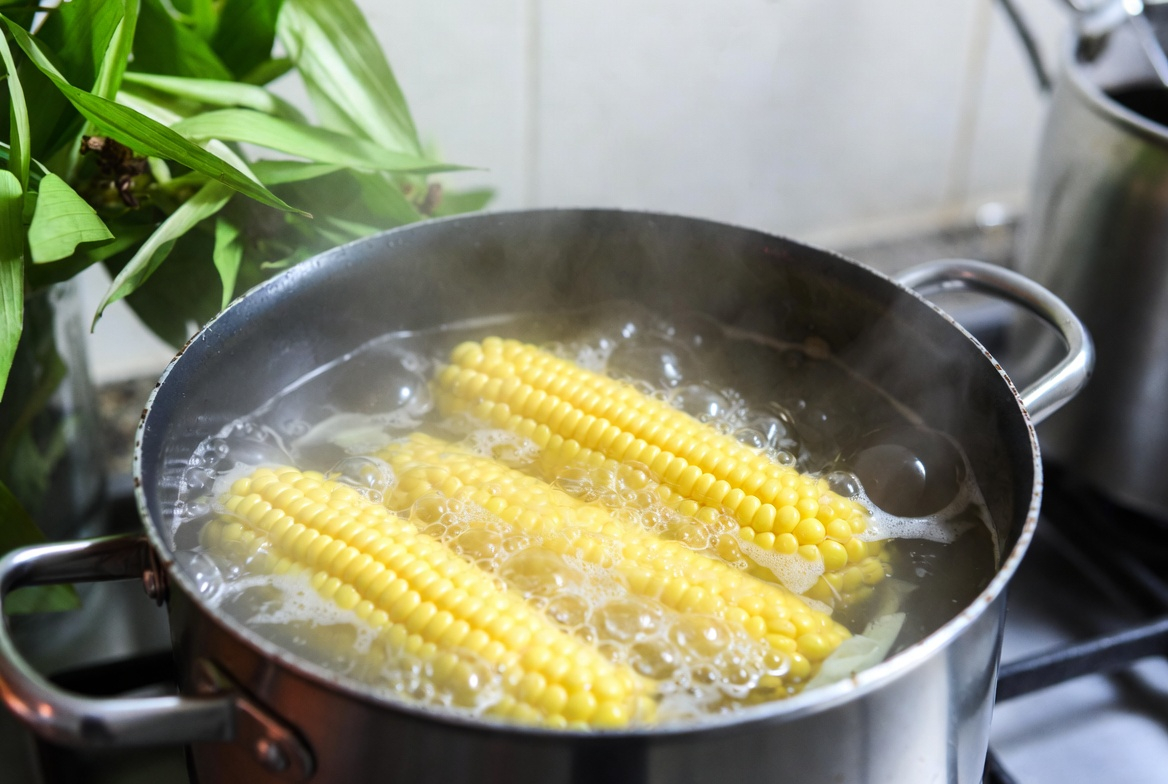
Getting the Water to a Rolling Boil
Place your pot on the stove over high heat. You want the water to reach a vigorous, rolling boil—not just a simmer, not just a gentle bubble, but a real rolling boil where the bubbles are breaking the surface with enthusiasm. This usually takes about eight to ten minutes, depending on your stove’s power and the pot’s size.
The Salt and Sugar Debate
Here’s where I’m going to give you my honest take: adding salt to the boiling water enhances flavor, and many people swear by adding a pinch of sugar or even a splash of milk. Personally, I add about one tablespoon of salt per gallon of water. Some people add a teaspoon of sugar to enhance sweetness, but if your corn is fresh and of good quality, you won’t need this.
Skip the honey, butter, or milk in the boiling water—these belong on the corn after it’s cooked, not during the cooking process. Adding these ingredients can actually affect the cooking time and texture.
Adding the Corn to the Pot
Once your water is at a rolling boil, carefully add your prepared corn ears. Use tongs to lower them in gently to avoid splashing boiling water. The water temperature will drop temporarily, but it should return to a boil relatively quickly. If you’ve filled the pot properly with enough water, this shouldn’t take more than a couple of minutes.
Timing: The Make-or-Break Factor
Finding Your Sweet Spot
This is where many home cooks go wrong. The cooking time depends on several factors: the size of your corn, how fresh it is, and whether you like it slightly tender or very tender. Generally speaking, I recommend boiling corn for seven to nine minutes for medium-sized ears, and up to twelve minutes for larger, thicker ears.
Here’s my foolproof test: after seven minutes, remove one ear with tongs and let it cool for a minute. Pierce a kernel with your fingernail—if the liquid that comes out is milky white (rather than clear), your corn is done. If it’s still clear, give it another two minutes and test again.
Avoiding the Overcooked Disaster
This is crucial: don’t overcook your corn. Many people leave it in the water for fifteen or twenty minutes, thinking longer cooking means more tender corn. That’s absolutely wrong. Overcooked corn becomes mushy, starchy, and loses its sweet flavor. The kernels become soft and mealy instead of tender and juicy. Once your corn reaches that perfect tender stage, remove it immediately.
Removing and Cooling Your Corn
Safe Removal Techniques
Use tongs to remove each ear from the boiling water. Place the ears on a clean kitchen towel or wire rack to cool slightly. Don’t put them directly on a cutting board or plate where the residual heat can continue softening them.
The Cooling Window
Let your corn cool for just two to three minutes. This is long enough that you can handle it without burning yourself, but not so long that it cools completely and becomes less enjoyable. The kernels are most tender and juiciest when eaten while still warm.
Adding Flavor: Butter and Beyond
The Classic Butter Finish
Once your corn has cooled enough to handle, roll each ear in softened butter. This is where the magic happens—the warm kernels absorb that creamy, rich butter flavor. Use good quality butter, and don’t be shy. Season with salt and freshly ground black pepper to taste.
Creative Flavor Combinations
If you want to get adventurous beyond basic butter and salt, try these combinations:
- Garlic butter with fresh parsley and lemon zest
- Cajun seasoning with smoked paprika and cayenne pepper
- Mexican-style with cotija cheese, lime juice, and chili powder
- Asian-inspired with sesame oil, soy sauce, and sesame seeds
- Herb blend with basil, dill, and oregano mixed into softened butter
Pro Tips for Consistent Success
Make Ahead Strategies
If you’re cooking for a crowd and need to manage timing, cook your corn in batches. You can keep the first batches warm by placing them wrapped in foil in a low oven set to 200 degrees. They’ll stay warm and tender for up to thirty minutes this way.
Dealing with Different Ear Sizes
If you have a mix of large and small ears, group similar-sized ones together and cook them separately. Large ears might need the full twelve minutes while smaller, thinner ears might only need seven minutes. This attention to detail is what separates good corn from exceptional corn.
Storage and Reheating
Leftover cooked corn keeps in the refrigerator for three to four days when stored in an airtight container. To reheat, either wrap in foil and warm in a 300-degree oven for five to ten minutes, or place in the microwave wrapped in damp paper towels for one to two minutes.
Common Mistakes to Avoid
Using Cold Water
Never add corn to water that isn’t already at a rolling boil. Starting with cold water extends the cooking time unpredictably and results in uneven cooking. You want that instant blast of heat to cook all the kernels uniformly.
Overcrowding the Pot
If you’re cooking more than six ears, seriously consider cooking in batches or using two pots. Cramming too much corn into one pot brings down the water temperature too much and prevents proper boiling.
Skipping the Fresh Corn Requirement
This method really shines with fresh corn. If your corn has been sitting in the produce section for two weeks, boiling won’t save it. Shop smart, buy fresh, and cook soon after purchasing for the best results.
Conclusion
Cooking corn on the cob in water is genuinely one of the simplest yet most satisfying cooking techniques you can master. It requires no special equipment, no complicated steps, and no advanced culinary knowledge. What it does require is attention to detail and respect for the ingredient. By selecting fresh corn, using adequate water, timing carefully, and avoiding common pitfalls, you’ll produce corn that tastes like it came from a summer fair or upscale restaurant.
The next time you’re at the market and see beautiful fresh corn, don’t hesitate. You now have all the knowledge you need to cook it perfectly. Whether you’re serving it at a family dinner, a casual gathering with friends, or just treating yourself to a simple weeknight meal, this technique will deliver consistently delicious results. That perfect bite of tender, juicy, buttery corn is just a few minutes of boiling away.
Frequently Asked Questions
Can I cook corn on the cob without removing the husk?
Yes, absolutely. Many people prefer boiling corn with the husk intact because it allegedly keeps the kernels more moist. If you choose this method, simply trim the stem end and remove any loose, damaged outer husks. Soak the whole ears in cool water for five to ten minutes before boiling—this prevents the husks from burning. The cooking time remains the same, seven to twelve minutes depending on ear size. After cooking, the husks will be easier to remove since the steam inside will have loosened them.
Is there a way to add more sweetness to boiled corn?
If your corn isn’t as sweet as you’d like, the issue is likely the freshness or variety rather than your cooking method. That said, you can add a tablespoon of sugar to your boiling water, or brush the cooked corn with a glaze made from melted butter mixed with a teaspoon of honey. For future purchases, ask your produce manager when the corn arrived, and always choose firm ears with tightly wrapped husks. Store corn in the refrigerator rather than at room temperature to preserve sweetness.
How long can I safely leave cooked corn in hot water?
It’s best to remove corn within five minutes of finishing cooking. Leaving it in hot water beyond that point continues the cooking process, making the kernels progressively mushier. If you need to keep corn warm for serving, remove it from the water and wrap it in foil, then place it in a warm oven set to 200 degrees. It will stay warm and tender for about thirty minutes this way without becoming overcooked.
What’s the difference between cooking corn in salted versus unsalted water?
Salted water adds flavor directly to the corn kernels during cooking, enhancing the natural sweetness and creating more complex taste. Unsalted water will cook the corn perfectly fine, but you’ll need to season heavily after cooking to achieve the same flavor level. I recommend using one tablespoon of salt per gallon of water for the best flavor development. The salt also slightly raises the boiling point of water, which can improve cooking consistency.
Can I cook frozen corn on the cob using the same method?
Frozen corn on the cob requires a different approach. First, don’t thaw it—cook it straight from frozen. Bring your salted water to a rolling boil, add the frozen ears, and boil for eight to ten minutes. Frozen corn takes slightly longer than fresh because of the temperature difference, but not dramatically longer. The quality won’t quite match fresh corn, but the method remains effective. Make sure your pot is large enough and filled with plenty of water, just as with fresh corn.
“`