How to Eliminate Air in Water Pipes: A Complete Guide to Clear Your Plumbing System
Have you ever turned on your tap and heard that annoying sputtering sound? Or worse, you’re getting inconsistent water pressure that makes showering feel like a guessing game? Well, you’re not alone. Air trapped in your water pipes is one of the most common plumbing issues homeowners face, and honestly, it’s far easier to fix than you might think.
When air bubbles get stuck in your water lines, they create pockets that interrupt the smooth flow of water throughout your home. Think of it like traffic congestion on a highway—when there’s an obstruction, everything backs up and slows down. But unlike rush hour traffic, you actually have the power to clear these air pockets yourself without calling an expensive plumber.
In this comprehensive guide, I’m going to walk you through everything you need to know about identifying, understanding, and eliminating air in your water pipes. Whether you’re dealing with this problem for the first time or you’re looking for a permanent solution, you’ll find practical, actionable advice right here.
Understanding What Causes Air in Your Water Pipes
Before we jump into solutions, let’s talk about why air gets trapped in your pipes in the first place. Understanding the root cause helps you not only fix the problem now but also prevent it from happening again in the future.
Common Sources of Air Entry
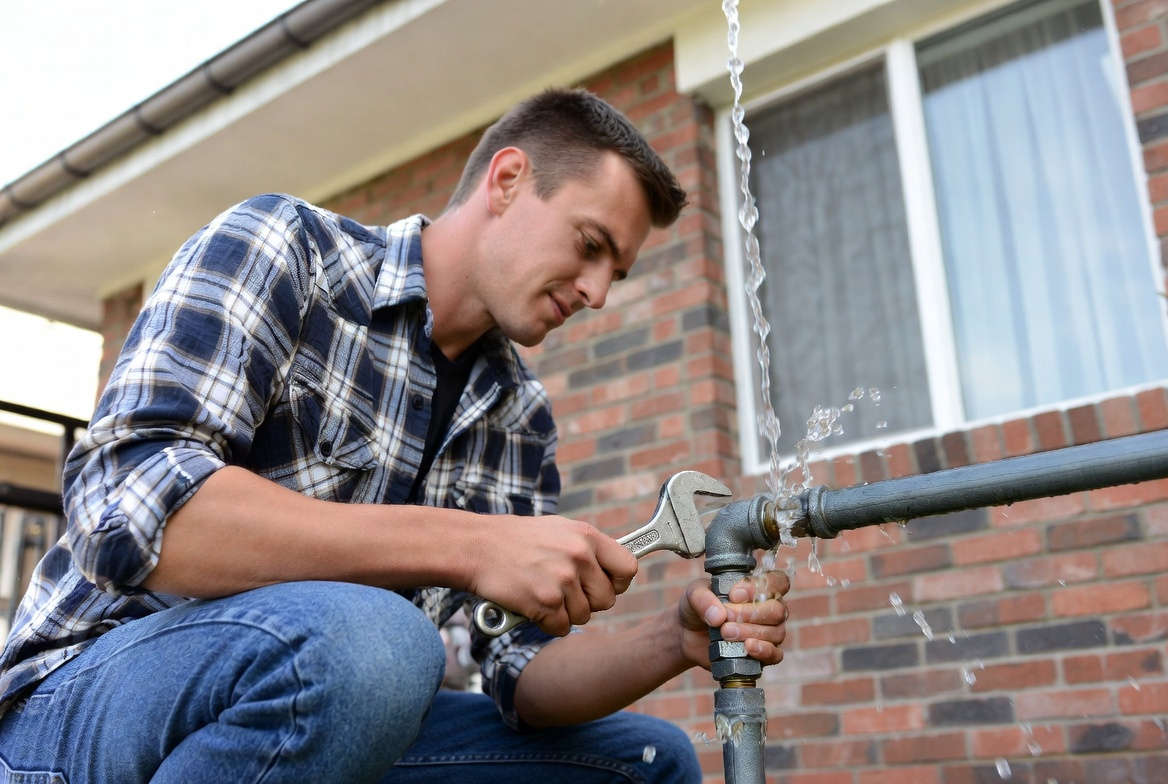
Air enters your water system through several different pathways. The most common culprit is maintenance work on your plumbing system. When a plumber repairs a section of pipe or installs new fixtures, they have to shut off the water. When they turn it back on, air that was sitting in those pipes gets pushed through your entire system.
Another frequent cause is low water pressure in your area. If your municipal water pressure drops—which sometimes happens during peak hours or due to water main breaks—air can be sucked into your pipes through tiny leaks or connections. It’s like how a straw doesn’t work properly if there’s not enough suction power.
High elevation changes in your plumbing can also trap air. If your home is built on a slope and your pipes run uphill at certain points, air naturally wants to rise and accumulate at the highest points of your system. This is especially common in homes with complex plumbing layouts or those built on hillsides.
Why This Happens After New Installations
When you get new pipes installed or your water main is repaired, air gets trapped during the refilling process. This is almost inevitable. The water company or your plumber will try to minimize this, but some air always finds its way in. It’s not a sign of poor workmanship—it’s just the physics of how water and air interact.
Recognizing the Signs of Air in Your Water Pipes
How do you know if air is actually your problem? Let me break down the telltale signs that should alert you to this issue.
Sputtering and Spitting Water
This is the classic symptom. When you turn on a faucet, instead of a smooth stream, you get a stuttering, spitting flow that sounds like your pipes are choking. Water comes out in bursts, sometimes forceful, sometimes weak. This sputtering typically lasts anywhere from a few seconds to a couple of minutes, then normalizes. It’s usually worse on the faucets closest to where the air entered your system.
Inconsistent Water Pressure
You turn on your shower and suddenly the pressure drops dramatically. Five minutes later, it’s back to normal. Air pockets in your pipes reduce the cross-sectional area available for water flow, creating pressure fluctuations throughout your home. You might notice one bathroom has strong pressure while another has weak pressure at the exact same time.
Banging or Knocking Sounds
Sometimes air in pipes creates water hammer—that sharp banging sound you hear when you shut off a faucet. Air compresses and expands as water flows around it, creating shock waves that reverberate through your pipes. It’s unsettling, but it’s usually harmless to your plumbing system.
Milky or Cloudy Water
When you fill a glass with water and it looks cloudy or white, this is often caused by air bubbles. It’s completely harmless to drink—if anything, it’s just aerated water. But it’s definitely a sign that air is in your system. Usually, if you let the water sit for a minute, the bubbles rise to the top and the water clears up.
Step-by-Step Method: How to Eliminate Air from Your Faucets
Let’s get into the practical stuff. This is the easiest method to try first, and it works surprisingly well for minor air problems.
The Basic Faucet Purging Technique
Start by identifying which faucet is most affected. Usually, it’s the one closest to where work was done on your plumbing system. Turn on that faucet to its highest setting and let it run for several minutes. I mean really let it run—we’re talking five to ten minutes of full blast.
What you’re doing here is forcing pressurized water through the lines to push out air bubbles. You might see sputtering, cloudiness, and hear strange noises. That’s exactly what should happen. Keep the water running until you get a smooth, clear stream with consistent pressure. Once that faucet is clear, move to the next one.
Work through all the faucets in your home systematically, starting with the ones closest to your water main or where plumbing work was done. Usually, the problem works its way out of your system within an hour or two using this method alone.
The Cold Water Priority Approach
Always start with cold water faucets before moving to hot water. Cold water lines are typically less complex and air tends to exit them more easily. The hot water system has an additional layer of complexity—your water heater itself—so air can get trapped there longer.
For hot water lines, run your hot water faucets for extended periods. If you have a water heater, the air might need extra time to work through that system. Some people find it helpful to adjust their water heater temperature up slightly (not dangerously high, just a few degrees) to increase pressure and help push air out faster.
Advanced Method: Using Your Water Main Shutoff Valve
If the simple faucet method doesn’t completely eliminate your air problem, this technique is more aggressive and usually very effective.
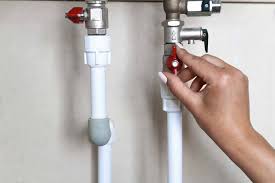
Locating Your Main Shutoff Valve
Your water main shutoff valve is typically located where the main water line enters your home. Common locations include the basement, crawl space, garage, or near your water meter. Look for a valve with a handle—it might be a lever handle or a round knob style. If you’ve never located it before, now’s a good time to find it, because knowing where it is useful for emergencies too.
The Shutoff and Restart Procedure
Once you’ve found your main valve, here’s what to do:
- Turn the main shutoff valve completely off. Turn it clockwise until it stops—don’t force it, just until you feel resistance.
- Turn on the lowest faucet in your home (this is usually a basement sink or outdoor faucet) and let it run until no water comes out. This relieves pressure in your lines.
- Now turn off that lowest faucet.
- Go back to your main shutoff valve and turn it back on slowly. Turn it counterclockwise gradually over the course of about thirty seconds. This allows water to re-enter your system slowly and evenly, pushing air out gently rather than forcing it in all at once.
- Once the valve is fully open, turn on that lowest faucet again and let water run from it for several minutes.
- Now repeat the faucet purging method from earlier, running all your faucets one by one.
This method mimics what professional plumbers do after they complete repair work. The slow, controlled reintroduction of water is far gentler on your system than just cranking the valve open quickly.
The Water Heater Purge: Tackling Hot Water Line Air
If air is stubbornly remaining in your hot water lines, your water heater might be the culprit. Air can get trapped in the tank itself, and getting it out requires a specific approach.
Why Water Heaters Trap Air
Your water heater has a dip tube that runs down into the tank—this is how cold water enters. During system refills, air can get trapped above this dip tube or in pockets within the tank itself. This air then gets distributed through your hot water lines every time you use hot water.
Purging Your Water Heater
First, turn off your water heater. If it’s gas, switch it to the pilot light setting. If it’s electric, flip the breaker to off. Never work on a pressurized water heater—safety first.
Locate the drain valve at the bottom of your water heater. Connect a garden hose to this valve and position the hose so water drains safely outside or into a floor drain. Open the drain valve and let water run out for a couple of minutes. Then close it.
Now here’s the key: turn your water main shutoff valve off again, then back on slowly as described earlier. This re-pressurizes your system. Then turn your water heater back on. Run your hot water faucets for several minutes to purge out remaining air.
This process flushes out trapped air that’s lodged in your water heater. It’s not complicated, but it does require patience and attention to detail.
Using a Pressurized Air Vent (The Professional Approach)
If you’re still dealing with persistent air issues after trying the methods above, there’s one more technique that works especially well for stubborn situations.
What is an Air Vent?
An automatic air vent is a small device that attaches to your plumbing system—usually at the highest point in your home—that automatically releases trapped air without releasing water. It’s a one-way valve that lets air out but keeps water in.
When You Should Install One
If your home has significant elevation changes in its plumbing, an air vent can be a permanent solution. These devices are inexpensive (usually under thirty dollars) and can be installed where your main water line enters your home or at the highest point in your system.
You might need a plumber to install it if you’re not comfortable working with your water lines, but it’s a straightforward installation that takes less than an hour. Once installed, it essentially eliminates this problem permanently because air automatically vents out rather than accumulating.
Timeline: How Long Does Air Elimination Take?
One question I hear constantly is: how long should this take? The answer depends on how much air is in your system and which method you’re using.
For Minor Air Problems
If you’re just dealing with occasional sputtering at one or two faucets, the simple faucet purging method usually clears things up within one to two hours. You run the affected faucets, maybe do a few cycles of the shutoff valve technique, and you’re done.
For Moderate Air Issues
After significant plumbing work or a water main break in your area, moderate air problems typically require several hours of work spread over a day or two. The air doesn’t all come out at once—it releases in waves as you cycle through faucets and pressure changes.
For Persistent Air Problems
Occasionally, air remains stubbornly trapped in your system for days or even weeks. This usually indicates air is trapped in a location that’s difficult for water pressure to reach, or your system has structural characteristics that naturally trap air. In these cases, installing an automatic air vent is your best permanent solution.
Prevention: Keeping Air Out of Your System
Now that you know how to eliminate air, let’s talk about preventing this problem from recurring.
After Any Plumbing Work
Whenever you have plumbing repairs done, ask your plumber to properly vent your system afterward. A good plumber will do this as standard procedure, slowly refilling the system and running faucets to purge air. If they don’t mention it, ask them to do it before they leave.
Monitoring Your Water Pressure
Keep an eye on your water pressure. If it suddenly drops significantly, this can indicate a leak somewhere in your system. Leaks can introduce air into your pipes. Check your water meter when all water is shut off—if it’s still moving, you have a leak that needs attention.
Regular Maintenance**
Have your plumbing system inspected every few years. A professional can identify weak points, potential leak sites, or areas where air naturally accumulates. Catching these issues early prevents future air problems.
When Should You Call a Professional Plumber?
Sometimes, despite your best efforts, you need professional help. Here’s when you should bring in an expert.
Persistent Problems After Multiple Attempts
If you’ve tried all the methods in this guide and air is still sputtering out of your faucets after forty-eight hours, something else is likely going on. There might be an actual leak you haven’t found, or structural issues with your plumbing that require professional diagnosis.
No Improvement in Water Pressure
If air elimination doesn’t restore your water pressure to normal levels, the problem might be something other than trapped air. Low pressure can also result from partially closed shutoff valves, mineral buildup in pipes, or water meter issues.
Unusual Sounds or Damage**
If you hear metallic clanging, see water leaks, or notice your water suddenly becoming discolored or foul-smelling, stop your DIY attempts and call a professional immediately. These could indicate serious plumbing problems beyond trapped air.
Conclusion
Air in your water pipes is genuinely one of the easiest plumbing problems you can solve yourself. Whether you’re dealing with sputtering faucets, inconsistent pressure, or milky water, the solutions are straightforward, inexpensive, and require nothing more than patience and basic tools that most homeowners already have.
Start with the simple faucet purging method—just run your affected faucets for extended periods. If that doesn’t completely solve your problem within a few hours, move on to the main shutoff valve technique, which mimics professional procedures and is highly effective. For hot water issues, address your water heater specifically. And if you’re in a situation where air keeps returning, consider installing an automatic air vent for a permanent fix.
The key thing to remember is that this is a normal, expected problem that happens to thousands of homeowners every year. It’s not a sign of serious plumbing problems, and it’s absolutely fixable with a little know-how and elbow grease. You’ve got this, and your patience will be rewarded with clear, consistent water pressure throughout your home.
Frequently Asked Questions About Air in Water Pipes
Is air in water pipes dangerous to drink?
No, air in water pipes is completely safe to drink. When you see cloudy or milky water caused by air bubbles, it’s just aerated water. The bubbles rise to the top if you let the water sit for a minute