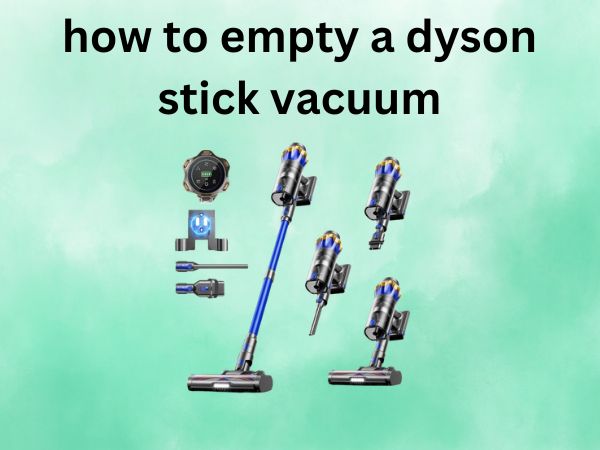
How to Empty a Dyson Stick Vacuum [Your Complete Step-by-Step Guide]
Ever found yourself staring at your Dyson stick vacuum, wondering if you’re doing it right? You’re not alone! Emptying a Dyson might seem straightforward, but there’s actually a proper technique that’ll keep your vacuum running like a dream and prevent those awkward debris-everywhere moments we’ve all experienced.
Let’s face it – your Dyson stick vacuum is probably one of your most-used cleaning tools. But like any hardworking appliance, it needs regular maintenance to keep performing at its best. Think of emptying the dust canister as giving your vacuum a breath of fresh air. When you know how to do it properly, you’ll extend your vacuum’s life, maintain its suction power, and make your cleaning routine much more efficient.
Table of Contents
Why Regular Emptying Is Crucial for Your Dyson’s Performance
Your Dyson isn’t just any ordinary vacuum – it’s a precision-engineered cleaning machine that relies on optimal airflow to work effectively. When that dust canister starts filling up, it’s like trying to breathe through a straw. The performance drops dramatically, and you’ll find yourself making multiple passes over the same spot.
The Science Behind Dyson’s Cyclone Technology
Dyson’s revolutionary cyclone technology works by spinning air at incredibly high speeds to separate dust and debris from the airflow. This process requires unobstructed pathways for maximum efficiency. When your canister is full, it disrupts this delicate balance, reducing suction power by up to 40%. That’s like having a sports car but only using half its engine!
The cyclones create a vortex that flings particles outward against the canister walls, where they lose momentum and fall to the bottom. But when there’s no room for debris to settle, it starts interfering with the airflow patterns, creating a domino effect that impacts the entire system’s performance.
Signs Your Dyson Needs Emptying
How do you know when it’s time to empty your Dyson? Here are the telltale signs that your vacuum is crying out for attention:
Your suction power feels weaker than usual, even on the highest setting. You might notice that pet hair isn’t being picked up as effectively, or that fine dust particles are being left behind. The vacuum might also start making different sounds – perhaps a higher-pitched whine or unusual vibrations.
Visually, you can see debris packed against the clear canister walls, or the dirt level has reached the maximum fill line. Some newer Dyson models even have indicator lights that’ll alert you when it’s time to empty. Don’t ignore these signals – your vacuum is basically asking for help!
What You’ll Need Before Starting
Before diving into the emptying process, let’s make sure you’re properly prepared. Think of this as setting up your workspace – a little preparation goes a long way toward a smooth, mess-free experience.
Essential Tools and Preparation
You won’t need much, but having the right setup makes all the difference. First, find a suitable location – preferably outdoors or near a large trash bin. If you’re indoors, choose an area that’s easy to clean up, like a kitchen or utility room with hard flooring.
Have a trash bag or bin ready and within arm’s reach. You might also want to keep a damp cloth handy for any dust that might escape, and consider wearing old clothes since this can be a dusty process. Some people prefer to wear a dust mask, especially if they have allergies or sensitivities.
Safety Considerations
Safety first! Always ensure your Dyson is turned off and unplugged from the charger before emptying. This isn’t just about preventing accidental activation – you want to make sure all the cyclones have completely stopped spinning before you start handling the canister.
If you’ve been using your vacuum for an extended cleaning session, give it a few minutes to cool down. The motor and cyclone assembly can get quite warm during operation, and you want to handle everything comfortably and safely.
Step-by-Step Guide to Emptying Your Dyson Stick Vacuum
Now for the main event! Let’s walk through the process step by step. Don’t worry if it feels awkward the first few times – like riding a bike, it becomes second nature with practice.
Locating the Dust Canister Release
Every Dyson stick vacuum has a red release button or lever – this is your key to accessing the dust canister. On most models, you’ll find this bright red mechanism near the cyclone assembly, usually positioned for easy thumb access while holding the vacuum.
The red color isn’t just for aesthetics – it’s Dyson’s universal signal for “press here to release.” Take a moment to familiarize yourself with its location and how it feels under your finger. Some models have a sliding mechanism, while others use a push-button system.
The Proper Emptying Technique
Here’s where technique really matters. Hold your Dyson over your trash bin or bag, making sure the canister opening is pointing downward into the receptacle. Position yourself so that you’re not directly above the bin – you want to avoid any dust clouds that might puff up.
Press and hold the red release button firmly. You’ll hear a satisfying click as the bottom of the canister opens. Don’t be surprised if debris doesn’t fall out immediately – sometimes it needs a little encouragement. Give the vacuum a gentle shake or tap the sides of the canister lightly to help stubborn debris break free.
Keep the release button pressed until you’re confident everything has fallen out. Some debris might cling to the cyclone cones or canister walls, and that’s normal. A few gentle taps usually does the trick.
Dealing with Stubborn Debris
Sometimes you’ll encounter debris that just doesn’t want to let go. Long hair wrapped around the cyclone assembly, sticky substances, or tightly packed fine dust can be particularly stubborn. Don’t force it – instead, try these gentle techniques.
For hair and string, you can often work it loose with your fingers or use a pair of scissors to carefully cut it away from the cyclones. Be gentle around the cyclone cones – they’re precision-engineered and shouldn’t be bent or damaged.
For sticky or caked-on debris, a soft brush or old toothbrush can help dislodge it. Work carefully and avoid using anything sharp or abrasive that might scratch the clear plastic canister.
Different Dyson Models: Specific Instructions
While the basic principle remains the same across Dyson stick vacuums, different models have their own quirks and features. Let’s break down the specifics for the most popular series.
V6 and V7 Series
The V6 and V7 series feature a straightforward single-action release system. The red lever is typically located at the top of the dust canister, and pressing it opens the bottom flap directly. These models have a smaller capacity than newer versions, so you’ll need to empty them more frequently.
One thing to note with these older models is that the release mechanism can sometimes stick if debris gets caught around the hinge area. A quick wipe with a damp cloth around the release mechanism usually prevents this issue.
V8 and V10 Series
The V8 and V10 introduced the “point and shoot” emptying system, which makes the process even more hygienic. The red button is positioned for easy one-handed operation, and the ejection system is designed to minimize dust clouds.
These models also feature a slightly larger canister capacity and improved debris flow design. The cyclone geometry was refined to prevent debris from getting stuck, making emptying smoother and more complete.
V11 and V15 Series
The newer V11 and V15 series represent the pinnacle of Dyson’s emptying technology. They feature an enhanced “point and shoot” mechanism with improved debris ejection and even better dust containment.
Latest V15 Detect Features
The V15 Detect takes things a step further with its laser dust detection and particle counting features. While these don’t directly affect the emptying process, they do help you understand when your vacuum needs attention. The LCD screen shows real-time debris pickup, which can help you gauge when emptying is needed.
Common Mistakes to Avoid
Learning what not to do is just as important as knowing the proper technique. Let’s cover the most common mistakes that can lead to messy situations or even damage your vacuum.
Don’t Wait Until It’s Full
This is probably the biggest mistake people make. Waiting until the canister is completely full is like waiting until your car runs out of gas before filling up – it’s not doing your equipment any favors, and it makes the job much harder.
When the debris level reaches about two-thirds full, it’s time to empty. At this point, the debris is still loose and flows out easily. Wait too long, and everything gets compacted, making emptying more difficult and potentially reducing your vacuum’s performance.
Proper Canister Handling
Never try to empty your Dyson by removing the entire canister unless your model specifically requires it. The built-in emptying mechanism is designed to be the primary method, and it’s much more hygienic and efficient than trying to manually remove debris.
Also, avoid tapping or banging the canister too aggressively. While gentle tapping is fine, excessive force can damage the delicate cyclone assembly or create cracks in the clear plastic canister.
Maintenance Tips for Optimal Performance
Regular emptying is just one part of keeping your Dyson in top condition. A few additional maintenance steps will ensure your vacuum continues performing like new for years to come.
Cleaning the Canister
Every few months, or if you notice buildup on the canister walls, give it a thorough cleaning. Remove the cyclone assembly (if your model allows) and wash the clear canister with warm, soapy water. Make sure it’s completely dry before reassembling – any moisture left behind can cause issues.
Use a soft brush to gently clean the cyclone cones, being careful not to bend or damage them. These components are precisely engineered, and maintaining their shape is crucial for optimal performance.
Filter Maintenance
Don’t forget about your filters! Most Dyson stick vacuums have washable filters that should be cleaned monthly and replaced annually. A clogged filter can reduce suction just as much as a full dust canister.
Remove the filter according to your model’s instructions and rinse it under cold water until the water runs clear. Gently squeeze out excess water and allow it to air dry completely – this usually takes about 24 hours. Never put Dyson filters in the dishwasher or dryer!
Troubleshooting Common Issues
Even with proper technique, you might occasionally run into issues. Here are solutions to the most common problems people encounter when emptying their Dyson stick vacuums.
When the Canister Won’t Release
If the red release button feels stuck or won’t activate, don’t force it. First, make sure the vacuum is completely turned off and has been sitting for a few minutes. Sometimes thermal expansion from heat can cause temporary sticking.
Check around the release mechanism for any debris that might be interfering with its operation. A small piece of hair or thread wrapped around the mechanism can prevent proper operation. Gently remove any visible obstructions and try again.
Dealing with Clogs
If debris isn’t falling out even with the canister open, you might have a clog somewhere in the system. Start by checking the obvious places – the cyclone entry points and the canister opening itself.
For clogs higher up in the system, you might need to remove the wand and check for blockages there. Use a flashlight to peer into the various openings, and remove any visible obstructions with a long, thin object like a straightened coat hanger.
Frequently Asked Questions
1. How often should I empty my Dyson stick vacuum? You should empty your Dyson when the debris level reaches about two-thirds full, or after every 2-3 cleaning sessions for average household use. Don’t wait until the maximum fill line – emptying before it’s completely full maintains better suction and makes the process easier.
2. Can I wash the dust canister with water? Yes, you can wash the clear plastic canister with warm, soapy water, but make sure to remove the cyclone assembly first if possible. Always allow it to dry completely (24+ hours) before reassembling. Never submerge the cyclone assembly or motor components in water.
3. Why isn’t all the debris falling out when I empty my Dyson? Some debris naturally clings to the cyclone cones or canister walls due to static electricity or the nature of the particles. Gentle tapping or shaking usually helps dislodge stubborn debris. For hair wrapped around cyclones, carefully remove it by hand or with scissors.
4. Is it normal for dust to puff out when emptying? A small amount of dust escape is normal, especially with very fine particles. To minimize this, empty your Dyson outdoors when possible, or hold it deep inside a large trash bag while pressing the release button. Newer models have improved dust containment systems.
5. What should I do if the red release button is stuck? First, ensure the vacuum is off and cooled down. Check for debris around the release mechanism and gently remove any obstructions. If it’s still stuck, the mechanism might need lubrication or professional service. Never force a stuck release button as this could damage the mechanism.
Conclusion
Mastering the art of emptying your Dyson stick vacuum isn’t just about keeping things tidy – it’s about maintaining peak performance and extending your vacuum’s lifespan. By following these steps and avoiding common mistakes, you’ll ensure your Dyson continues to be the cleaning powerhouse you invested in.
Remember, regular maintenance is key. Don’t wait until performance suffers to empty your canister, and take a few extra minutes periodically to clean the canister and filters thoroughly. Your Dyson will reward you with consistent, powerful cleaning performance for years to come.
The beauty of Dyson’s design lies in its simplicity and effectiveness. Once you’ve mastered these techniques, emptying your vacuum becomes a quick, routine task rather than a dreaded chore. Keep practicing, stay consistent with maintenance, and enjoy the satisfaction of a job well done!