How to Install a Portable Air Conditioner [In 2025]
Summer’s blazing heat got you sweating bullets? You’re not alone! Installing a portable air conditioner might seem like rocket science, but I’m here to tell you it’s actually easier than assembling that IKEA bookshelf that’s been haunting your closet. Let’s dive into this comprehensive guide that’ll have you chilling in cool comfort faster than you can say “beat the heat.”
Table of Contents
What You Need to Know Before Getting Started
Before we jump into the nitty-gritty, let’s get our ducks in a row. Installing a portable AC isn’t just about plugging it in and hoping for the best – though wouldn’t that be nice?
Understanding Portable Air Conditioner Basics
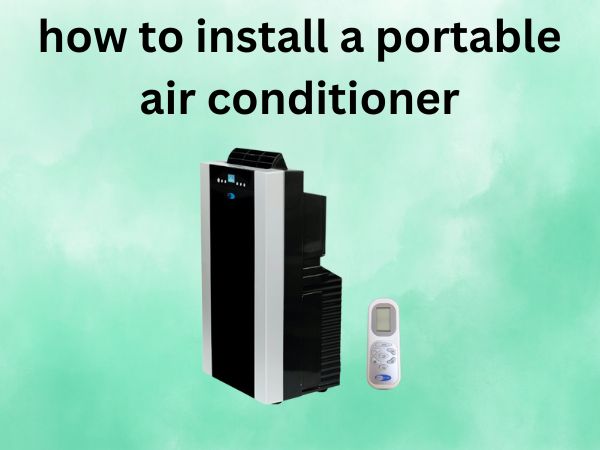
Think of a portable air conditioner as your room’s personal climate superhero. Unlike window units that hang precariously outside your window (giving you mini heart attacks every windy day), portable units sit comfortably on your floor like a loyal pet. They work by sucking in warm air, cooling it down, and blowing the cool air back into your room while expelling hot air outside through a hose.
The beauty of these units? They’re not permanent fixtures. You can move them from room to room like a cooling nomad, bringing relief wherever you go. Most units come with wheels, making them as mobile as a shopping cart – but infinitely more useful during a heatwave.
Tools and Materials You’ll Need
Here’s the good news: you won’t need a contractor’s toolbox for this job. Most installations require nothing more than what’s already in your junk drawer. You’ll typically need a screwdriver (usually Phillips head), a measuring tape, and maybe a level if you’re feeling fancy. Some units might require a drill for securing brackets, but that’s about as hardcore as it gets.
The manufacturer usually includes everything else: window kit components, exhaust hose, foam strips for sealing, and detailed instructions that are actually readable (unlike those furniture assembly guides written in hieroglyphics).
Choosing the Perfect Location for Your Portable AC
Location, location, location – it’s not just real estate advice! Where you place your portable AC can make the difference between arctic bliss and lukewarm disappointment.
Room Size Considerations
Size matters when it comes to cooling efficiency. Your portable AC needs to match your room’s square footage like Cinderella’s slipper. Too small, and it’ll work harder than a one-legged cat in a sandbox. Too big, and you’ll waste energy and money while creating an uncomfortable, overly humid environment.
Most manufacturers provide BTU (British Thermal Unit) ratings that correspond to room sizes. A 12,000 BTU unit typically handles rooms up to 450 square feet, while smaller 8,000 BTU units work best for spaces around 300 square feet. When in doubt, measure your room and consult the manufacturer’s sizing chart – it’s like using a GPS instead of asking for directions.
Window Accessibility
Your portable AC needs to breathe, and that breath goes out the window – literally. You’ll need a window that opens and is easily accessible for the exhaust hose. Casement windows, double-hung windows, and sliding windows all work, though some are easier to work with than others.
The window should be relatively close to where you want to position the unit. While exhaust hoses can extend, shorter is better – think of it like a garden hose. The longer it gets, the more pressure you lose, and the harder your unit has to work.
Power Requirements
Don’t overlook the electrical elephant in the room. Portable air conditioners are power-hungry beasts that need dedicated circuits to avoid tripping breakers. Most units require standard 115V outlets, but larger units might need 230V. Check your unit’s power requirements and ensure your chosen location has appropriate electrical access.
Avoid extension cords like the plague – they’re not just inconvenient, they’re potentially dangerous with high-power appliances. If your perfect spot lacks proper electrical access, consider having an electrician install an appropriate outlet.
Preparing Your Space
Preparation is half the battle won. Before you start wrestling with hoses and window kits, let’s set the stage for success.
Measuring Your Window
Grab that measuring tape and get intimate with your window dimensions. You’ll need the width of the window opening, and don’t forget to check if there are any obstructions like window cranks or security bars that might interfere with the installation.
Most window kits are adjustable and fit standard window sizes, but measuring twice and installing once saves headaches later. Some older or custom windows might require creative solutions or additional materials.
Clearing the Installation Area
Clear a path for your new cooling companion. Remove furniture, decorations, or anything else that might get in the way. You’ll need space to maneuver the unit (they’re heavier than they look) and room for proper airflow around it.
Think of it like setting up a dance floor – your AC needs space to work its magic without bumping into obstacles.
Step-by-Step Installation Process
Now we’re getting to the meat and potatoes! Follow these steps, and you’ll be basking in cool air before you know it.
Unboxing and Initial Setup
Unpack your unit like you’re unwrapping a present – because essentially, you are! Check that all components are included by comparing against the parts list in your manual. This typically includes the main unit, exhaust hose, window kit components, remote control, and various sealing materials.
Position the unit near your chosen window but don’t plug it in yet. Let it sit upright for at least an hour if it was transported on its side – the coolant needs time to settle, like letting a shaken soda go flat.
Installing the Window Kit
This is where the rubber meets the road, or in this case, where the plastic meets the window.
Adjustable Window Slider Setup
Most window kits include an adjustable panel that fits your window width. Extend or contract this panel to match your window opening – it should fit snugly without gaps. Think of it like adjusting a telescope; you want it to extend perfectly to fill the space.
The panel usually slides into the window track and should sit flush against both sides of the window frame. Some units include foam strips or weather stripping to create a tight seal – use them! Every gap is an escape route for your precious cool air.
Securing the Window Panel
Once positioned, secure the panel according to your kit’s instructions. This might involve screws, clips, or brackets. The goal is preventing the panel from shifting or falling out when the window is closed against it.
Close your window against the installed panel, ensuring it creates a tight seal. The window should lock securely with the panel in place – if it doesn’t, readjust until everything aligns properly.
Connecting the Exhaust Hose
Here’s where things get interesting – connecting your unit to the outside world.
Attaching Hose to Unit
The exhaust hose typically connects to the back of your portable AC unit with a twist-lock mechanism or clamp system. Make sure this connection is secure – a loose connection is like having a hole in your bucket.
Some hoses are adjustable in length, while others come in sections that connect together. Use only the length you need; excess hose creates unnecessary resistance and reduces efficiency.
Connecting to Window Kit
Connect the other end of the exhaust hose to the window kit adapter. This connection should be just as secure as the unit connection. Most adapters have flanges or collars that accept the hose with a twisting motion.
Once connected, gently pull on the hose to ensure both connections are secure. The hose should extend from unit to window without sharp bends or kinks – think smooth curves, not origami.
Testing Your Installation
Time for the moment of truth! Let’s see if your handiwork pays off.
Initial Power-Up
Plug in your unit and power it on. Most units have initial setup sequences or default settings that activate automatically. Don’t panic if it doesn’t immediately blow arctic air – it takes a few minutes to get going.
Set your desired temperature and fan speed, then wait patiently. Like a good cup of coffee, good cooling takes time. You should feel cool air within 5-10 minutes, with the room temperature dropping gradually over the next 30 minutes.
Checking for Air Leaks
Walk around your installation with your hand extended like you’re checking for rain. Feel around the window kit, hose connections, and unit itself for escaping air. Hot air leaking back into your room defeats the purpose and wastes energy.
Common leak spots include gaps around the window kit, loose hose connections, and poorly sealed window closures. Most issues can be fixed with additional foam strips or weather stripping.
Troubleshooting Common Installation Issues
Even the best installations sometimes have hiccups. Here’s how to solve the most common problems.
Poor Cooling Performance
If your unit runs but doesn’t cool effectively, check your installation first. Leaky connections or blocked airflow are usually the culprits. Ensure the exhaust hose isn’t kinked and that both intake and exhaust aren’t blocked.
Room size mismatch is another common issue. If your unit is undersized for your space, it’ll struggle like a hamster on a wheel – lots of effort, minimal results.
Excessive Noise
Some noise is normal, but excessive rattling or vibration usually indicates installation issues. Check that the unit sits level and stable, hose connections are secure, and the exhaust isn’t blocked.
Sometimes repositioning the unit slightly or adding vibration pads underneath can significantly reduce noise transmission through floors.
Water Leakage Problems
Most portable units generate condensate that needs drainage. Some have internal pumps that evaporate this water, while others require manual draining. Check your unit’s drainage system and ensure it’s functioning properly.
Excessive humidity in your room can overwhelm the unit’s ability to handle condensate, leading to leaks. Ensure proper ventilation and consider using a dehumidifier in extremely humid conditions.
Maintenance Tips for Optimal Performance
Your portable AC is like a car – regular maintenance keeps it running smoothly and efficiently.
Clean or replace filters monthly during heavy use. Dirty filters restrict airflow like trying to breathe through a dusty sock. Most filters are washable with mild soap and water, but let them dry completely before reinstalling.
Keep the unit’s air intakes and exhausts clear of dust and debris. A soft brush or vacuum with a brush attachment works well for this. Think of it as grooming your cooling pet – a little attention goes a long way.
Check hose connections periodically, especially after moving the unit. Vibration and movement can loosen connections over time, reducing efficiency and potentially causing problems.
Safety Considerations
Safety first, comfort second! Never operate a damaged unit or one with frayed electrical cords. Water and electricity don’t mix, so keep the unit away from areas where it might get wet.
Ensure adequate ventilation around the unit – they need air circulation to work properly and prevent overheating. Don’t block intake or exhaust vents with furniture or curtains.
If you smell gas, see sparks, or notice other electrical issues, unplug the unit immediately and consult a professional. Your comfort isn’t worth risking your safety.
Frequently Asked Questions (FAQs)
Q1: How long does it typically take to install a portable air conditioner? Most installations take 30-60 minutes for first-timers, with experienced installers completing the job in 15-30 minutes. The window kit installation usually takes the most time, especially if you’re being extra careful with measurements and sealing.
Q2: Can I install a portable AC in a room without windows? While challenging, it’s possible with creative solutions like installing the exhaust through a wall vent, ceiling, or door. However, these modifications often require professional help and may void your warranty. Standard window installation is always preferred.
Q3: Do I need to drain water from my portable air conditioner regularly? This depends on your unit type and humidity levels. Some units have self-evaporating technology that eliminates most drainage needs, while others require periodic emptying of a collection tank. Check your manual for specific drainage requirements.
Q4: Can I use an extension cord with my portable air conditioner? It’s strongly discouraged due to safety concerns and potential efficiency loss. Portable ACs draw significant power, and extension cords can overheat, cause voltage drops, or trip breakers. Always use a direct outlet connection when possible.
Q5: What should I do if my portable AC isn’t cooling effectively after installation? First, check for air leaks around all connections and seals. Ensure the exhaust hose isn’t kinked or blocked, and verify that your unit size matches your room dimensions. Also, check and clean the air filter, as a dirty filter significantly reduces cooling efficiency.
Conclusion
Installing a portable air conditioner doesn’t require an engineering degree or superhuman strength – just patience, attention to detail, and the right information. By following this guide, you’ve joined the ranks of DIY cooling champions who refuse to let summer heat win the battle.
Remember, every installation is unique, so don’t be afraid to adapt these instructions to your specific situation. When in doubt, consult your unit’s manual or contact the manufacturer’s support team. They’re usually happy to help customers succeed with their installations.
Now sit back, relax, and enjoy your newly conditioned air. You’ve earned it! Your friends will be impressed by your technical prowess, and your electric bill will thank you for choosing an efficient portable solution over cranking up the central air for just one room.