Install Window AC Unit: Step-by-Step Guide
Installing a window air conditioner is a manageable DIY project you can complete in about an hour. The key is to securely mount the unit and ensure a tight seal around the frame. With a few basic tools and careful steps, you can be enjoying cool air in no time.
Many homeowners wonder if they can handle this task themselves. Research shows that with the right preparation, you can often avoid calling a professional. We found that taking the time to measure your window and gather your materials beforehand makes the installation process much smoother and prevents common mistakes.
- Measure your window opening first.
- Gather necessary tools and materials.
- Assemble the window bracket if needed.
- Carefully place the AC unit into the window.
- Secure the unit and seal any gaps.
Ready to get started? Let’s walk through exactly how to install your window unit air conditioner step by step, making sure it’s safe and effective.
Setting Up Your Window AC Unit: A Step-by-Step Guide
Installing a window air conditioner might seem a bit daunting, but you can absolutely handle it. We found that with the right preparation and a clear plan, this DIY project is very doable. The goal is to make sure your unit is securely mounted and well-sealed. This guide will walk you through each step.
Pre-Installation Checklist and Preparation
Before you even think about lifting the air conditioner, let’s make sure you have everything ready. This initial prep work is key to a smooth installation. Think of it like packing for a trip – you don’t want to get to your destination and realize you forgot something important!
Gathering Your Tools and Materials
Having the right tools makes any job easier. For your window AC installation, you’ll typically need a few common items. You might already have most of these in your home toolbox.
- Screwdriver (Phillips and flathead)
- Measuring tape
- Level
- Pencil or marker
- Utility knife or scissors
- Drill with appropriate bits (optional, for pilot holes if needed)
- Work gloves and safety glasses
- A helper! (These units can be heavy)
Understanding Your Window Type
Not all windows are created equal, and this is important for AC installation. Most window units are designed for double-hung windows. These are windows where both the top and bottom sashes slide up and down. You’ll be using the bottom sash of the window to support the AC.
What to Do With the Packaging and Manual
Keep your AC’s owner’s manual handy. It will have specific details for your model. Research shows that following the manufacturer’s instructions is always the best first step. You’ll also want to keep the packaging nearby for a bit. Sometimes, you might need to return the unit, or parts of the packaging can be used as temporary support.
Mounting the Air Conditioner: The Core Steps
Now for the main event! This is where your AC unit starts to take its place. Remember, safety first. If the unit feels too heavy, please enlist your helper. A dropped AC unit can cause damage and injuries.
Assembling Support Brackets and Side Panels
Your new air conditioner likely comes with an accordion-style side panel or curtain. These panels help fill the gaps on either side of the unit once it’s in the window. You’ll usually slide these into place on the sides of the AC unit itself. Some units also come with an L-shaped bracket that installs on the outside of the window frame for extra support. We found that pre-assembling these makes the next steps much simpler.
Installing the Exterior Support Bracket (If Applicable)
Many units require an exterior bracket for stability. This bracket usually screws into the windowsill and the wall below it. Ensure it’s level and securely fastened. This is a key step for preventing the unit from falling out, especially if you live in an upstairs room. Many installation guides (like those from home improvement associations) stress the importance of this external support.
Positioning the AC Unit in the Window
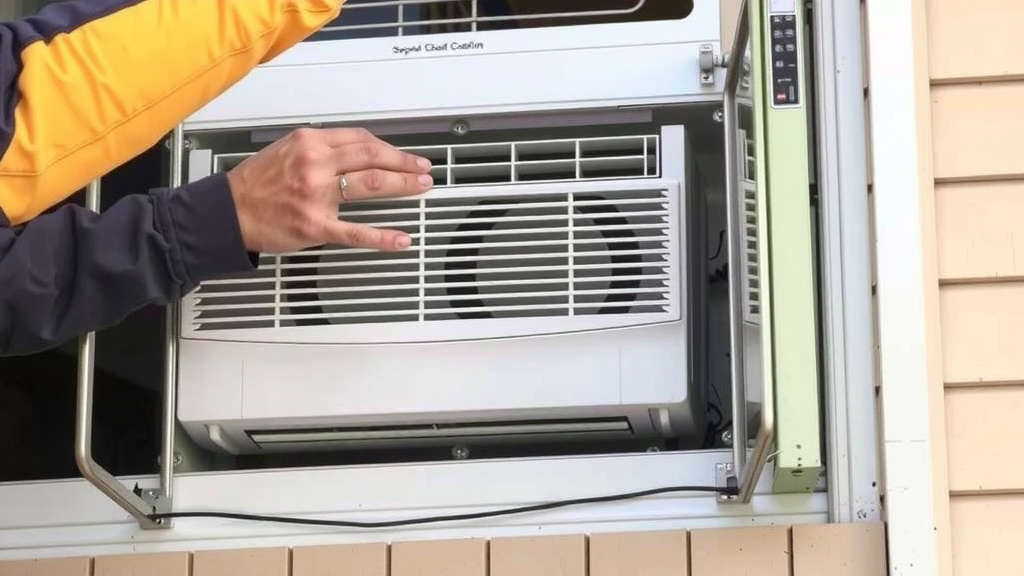
This is where your helper is essential. Carefully lift the air conditioner. You’ll want to rest its bottom edge on the windowsill. The top of the unit should be snug against the top of the window frame. Make sure the unit is tilted slightly backward. This allows any condensation to drain properly outside, not into your room. A slight tilt of about 1/2 inch is usually sufficient.
Securing the Unit to the Window Sash
Once the unit is in place, you’ll need to secure it. This typically involves closing the top window sash down onto the top of the AC unit. Then, you’ll use the provided hardware, usually screws, to attach the unit to the window frame and the sash. Research suggests that using all the included hardware ensures the best stability. Drill pilot holes if the screws are hard to drive in.
Expanding and Securing the Side Panels
Now, pull out those accordion-style side panels. You want them to extend and fill the space between the sides of the AC unit and the window frame. Once they are snug, secure them in place with the small screws provided. This step is vital for blocking out insects and preventing air leaks. We found that a tight fit here makes a big difference in efficiency.
Final Touches for Optimal Performance
You’re almost there! A few more steps will ensure your AC runs smoothly and efficiently, keeping your home cool and comfortable.
Sealing Any Remaining Gaps
Look for any small gaps around the unit, especially where the panels meet the window frame. You can use foam weatherstripping or a caulk rope to seal these minor leaks. This helps keep the cool air in and the hot air out, making your AC work less. Experts often recommend this for energy efficiency. Think of it as giving your AC a cozy blanket!
Checking the Drain Hose (If Applicable)
Some larger units might have a drain hose. Make sure this hose is routed correctly to drain water outside. If your unit doesn’t have a drain hose, it likely has a built-in system to evaporate the water or a collection pan that needs occasional emptying. Your manual will detail this.
Testing the Air Conditioner
Plug in your unit and turn it on. Set your desired temperature and fan speed. Listen for any unusual noises. Feel if the air coming out is cool. A successful test run means your installation is complete! If it’s not cooling or sounds strange, double-check all your connections and the unit’s placement. Many troubleshooting guides suggest checking the power source and the thermostat settings first.
Quick Installation Checklist
- Did you gather all necessary tools?
- Is the unit tilted slightly backward for drainage?
- Are the side panels fully extended and secured?
- Are all screws used to attach the unit to the window?
- Have you sealed any noticeable air gaps?
- Did you test the unit to ensure it’s working correctly?
Conclusion
You’ve successfully navigated the steps to install your window air conditioner! Remember, the key to a great installation lies in a secure mount and a tight seal. By taking the time to prepare your tools, understand your window, and follow each mounting step carefully, you’ve set yourself up for a cool and comfortable space. Don’t forget to periodically check your seals and ensure the unit is still tilted correctly. Now, go ahead and enjoy that refreshing cool air you worked hard for!
Frequently Asked Questions
How do I know if my window is suitable for a window AC unit?
Most window AC units are designed for standard double-hung windows, where both the top and bottom sashes slide vertically. You’ll need to measure your window opening to ensure the AC unit and its side panels will fit snugly. Check your unit’s manual for specific size requirements and recommendations.
Can I install a window AC unit by myself, or do I need a helper?
While some smaller units might be manageable alone, it’s highly recommended to have a helper, especially for larger or heavier models. These units can be awkward to lift and maneuver. A second person ensures safety and makes positioning the unit much easier and more secure.
What is the proper tilt for a window AC unit?
Your window AC unit should be tilted slightly backward, about a half-inch. This tilt is essential for proper drainage. It allows condensation to flow out of the unit and away from your home, preventing water from pooling inside or leaking into your room.
How do I ensure there are no air leaks around the AC unit?
After securing the unit and extending the side panels, inspect the edges carefully. Use foam weatherstripping or a caulk rope to seal any small gaps between the unit, the side panels, and the window frame. A good seal is vital for energy efficiency and optimal cooling performance.
What if my window unit isn’t cooling properly after installation?
If your unit isn’t cooling, first double-check that it’s plugged in securely and that the thermostat is set to a cooling mode and a lower temperature. Ensure the air filter is clean and not blocked. Also, verify that the side panels are fully sealed and that there are no major air leaks around the unit.
![7 Best Energy Efficient Central Air Conditioner [2026]](https://bathroomexplorer.com/wp-content/uploads/2026/06/7-best-energy-efficient-central-air-conditioner-2026-featured-768x432.jpg)