How to Clean Water Dispenser Top Load Properly: A Complete Guide
Introduction to Top Load Water Dispensers
Have you ever thought about what’s really happening inside your water dispenser? Most of us grab a cup of water without giving it much thought, but here’s the thing—your top load water dispenser is working hard behind the scenes to keep your water fresh and cool. Unlike bottom load models, top load dispensers require you to manually place water bottles on top, which means they’re more accessible but also more prone to accumulating dust and debris.
Top load water dispensers have become incredibly popular in homes and offices across the country. They’re convenient, they take up less floor space, and they deliver cold water at the touch of a button. But with great convenience comes great responsibility—and that responsibility is keeping your dispenser clean.
Why Cleaning Your Water Dispenser Matters
Think of your water dispenser like a water filter in reverse. Instead of filtering out impurities, a dirty dispenser actually introduces them. When you don’t clean your dispenser regularly, you’re essentially creating a breeding ground for bacteria, mold, and mineral buildup. These nasty intruders can affect the taste of your water, and in some cases, they can pose genuine health risks.
Here’s what happens when you neglect cleaning:
- Bacteria and mold growth inside the reservoir and internal pipes
- Unpleasant odors and strange tastes in your water
- Reduced efficiency of your cooling system
- Mineral deposits that clog the water lines
- Potential health issues from consuming contaminated water
Regular cleaning isn’t just about aesthetics—it’s about protecting your family’s health and making sure your dispenser runs smoothly for years to come.
The Health Connection
Water dispensers can be particularly vulnerable to contamination because they sit in the open and collect dust from the surrounding environment. The water bottle itself can introduce contaminants when you replace it, and the internal components are warm, dark, and moist—basically a five-star resort for bacteria.
Understanding the Components of Your Top Load Dispenser
Before you start cleaning, let’s talk about what you’re actually dealing with. Understanding the different parts of your dispenser will make the cleaning process much more effective.
The Water Bottle
The water bottle is the most obvious component. It’s what sits on top of your dispenser and supplies all the water. Even though bottled water is already treated, the bottle itself can accumulate dust and particles on the outside.
The Internal Reservoir
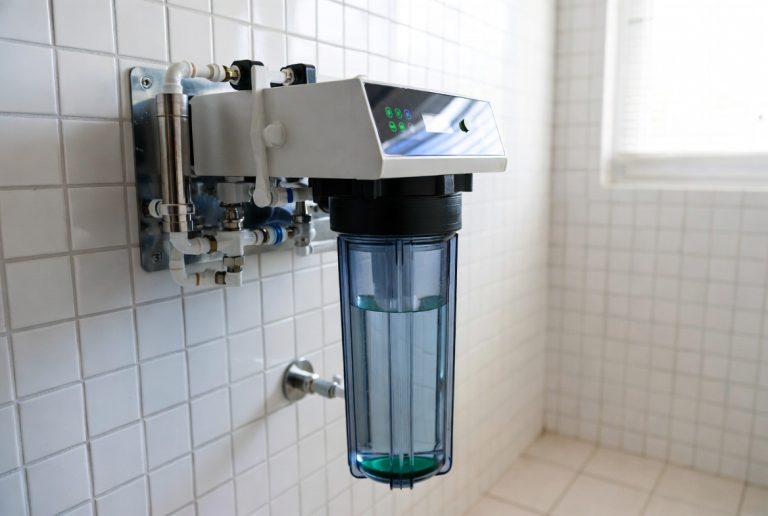
This is where the magic—and sometimes the mess—happens. The internal reservoir holds water between bottle changes and is connected to your cooling and heating systems. It’s also the part most likely to develop mold or bacteria if not cleaned properly.
The Cooling and Heating Systems
These components keep your water at the perfect temperature. They’re essential, but they can also accumulate mineral deposits if your water is hard.
The Drip Tray
That little tray at the bottom catches spilled water. Sounds innocent, but it’s often the grossest part of the entire dispenser if left uncleaned.
The Nozzles and Dispensing Valves
These are where your water actually comes out. They can get gunked up with mineral deposits and algae.
Tools and Materials You’ll Need
Let’s gather your supplies before you begin. You don’t need anything fancy—most of these items are probably already in your home.
- White vinegar (the hero of any cleaning project)
- Baking soda
- Distilled water
- Soft-bristled brushes or cleaning brushes
- Microfiber cloths or paper towels
- Rubber gloves
- A large bucket or basin
- A funnel (optional but helpful)
- A towel for drying
- A small flashlight (to see inside the dispenser)
Pro tip: Skip the harsh chemical cleaners. Vinegar and baking soda are your best friends here—they’re effective, safe, and non-toxic.
Safety Precautions Before You Start
Before you dive into cleaning, let’s talk safety. This is important.
Disconnect the Power
Always unplug your dispenser before you start cleaning. This isn’t optional. Working with water and electricity is never a good combination, no matter how careful you think you’re being.
Let It Cool Down
If you’ve been using the hot water function, give the dispenser some time to cool down before you start your cleaning project. The last thing you want is a steam burn.
Prepare Your Work Area
You’re going to spill water. Probably more than once. Put down some towels around your dispenser and make sure you have plenty of dry towels nearby.
Wear Protective Gear
Rubber gloves aren’t just for looking fancy—they protect your hands from bacteria and prevent the oil on your skin from transferring to internal components.
Step-by-Step Cleaning Process
Alright, now we’re ready to get into the nitty-gritty. Here’s how to properly clean your top load water dispenser.
Step One: Remove and Replace the Water Bottle
First, remove the current water bottle. Before you lift it, locate the bottle cap or protective covering. Once you’ve removed the bottle, leave the dispenser empty for now. We’ll be refilling it with cleaning solutions.
Step Two: Drain All Remaining Water
Open the cold water tap and let all the water drain out. This might take several minutes, so be patient. You want to drain as much old water as possible from the system. Open the hot water tap too if your dispenser has one.
While you’re draining, place a bucket underneath to catch the water. This water isn’t suitable for drinking or cooking anymore, so don’t waste it—use it for plants or cleaning.
Step Three: Prepare Your Cleaning Solution
Here’s where vinegar becomes your best friend. Mix one part white vinegar with one part distilled water in a clean bucket. If your dispenser is particularly dirty or you notice significant mineral buildup, you can use a slightly stronger ratio of two parts vinegar to one part water.
Why Vinegar Works
Vinegar is acidic, which means it breaks down mineral deposits, kills bacteria, and dissolves mold. It’s been used as a natural cleaner for centuries, and for good reason.
Step Four: Pour the Cleaning Solution Into the Reservoir
Carefully pour your vinegar solution into the top of the dispenser where the water bottle normally sits. Use a funnel if you have one to avoid spilling. Pour slowly and steadily.
Step Five: Activate the Dispenser
Turn your dispenser back on and let the cleaning solution run through the system. Open both the hot and cold water taps and let the vinegar solution flow through. This helps clean the internal pipes and dispenser nozzles.
Keep doing this for several minutes. You’ll notice the water that comes out becomes clearer as you go—that’s the cleaning solution doing its job.
Step Six: Let It Sit
Once you’ve run the cleaning solution through, turn off the dispenser and let the remaining solution sit inside for about 30 minutes to an hour. This gives the vinegar time to break down stubborn deposits and kill bacteria. Think of it like letting a stain soak before washing it out.
Step Seven: Repeat the Flushing Process
After the solution has sat, turn the dispenser back on and run the remaining vinegar solution through both taps again. Drain it completely.
Cleaning the Water Bottle and Cap
While the dispenser is sitting with the cleaning solution, don’t just stand around. Use this time to clean your water bottle and its cap.
Washing the Bottle
Rinse the outside of your water bottle thoroughly with warm water. Use a soft cloth to wipe away any dust or debris. Pay special attention to the neck of the bottle where it connects to the dispenser—this area collects a lot of dust.
Cleaning the Cap
The cap is easy to overlook, but it’s actually crucial. Soak it in your vinegar solution for a few minutes, then scrub it with a soft brush. Rinse thoroughly with distilled water.
Important Note About Bottles
Never use harsh chemicals or abrasive materials on your water bottle. The bottle is made of polycarbonate plastic, which can be damaged by aggressive scrubbing. Gentle is the way to go.
Sanitizing the Internal Reservoir
The reservoir is the heart of your dispenser, and it deserves special attention.
The Baking Soda Boost
After you’ve flushed out most of the vinegar solution, add a half-cup of baking soda to your dispenser and repeat the flushing process. Baking soda is mildly abrasive and works alongside vinegar to remove stubborn buildup.
Final Rinse with Distilled Water
Once you’ve finished with the vinegar and baking soda, it’s crucial to rinse the entire system with distilled water. Pour distilled water into the top and run it through both taps until the water coming out has no smell or taste of vinegar. This might require several rounds, but it’s worth it.
Why distilled water? Tap water contains minerals that you’re trying to remove in the first place. Distilled water is pure and won’t add anything unwanted to your system.
Maintaining the Drip Tray
Let’s be honest—the drip tray is where water sits and collects bacteria, mold, and all sorts of unpleasantness.
Removing and Cleaning the Tray
Most top load dispensers have a removable drip tray. Pull it out carefully and empty any standing water. Soak it in your vinegar solution for 15 to 20 minutes, then scrub it thoroughly with a brush. Pay special attention to the corners where water tends to stagnate.
Drying is Key
After washing, dry the tray completely with a clean towel. Moisture left in the tray becomes a breeding ground for mold. Dry it thoroughly before reinstalling.
Reassemble Carefully
Make sure the tray is properly seated when you put it back. If it’s not aligned correctly, water will spill onto the floor instead of into the tray.
Cleaning the Dispenser Nozzles
The nozzles are where water actually comes out, so they deserve extra care.
Visual Inspection
Use your flashlight to look closely at the nozzles. You might see mineral deposits or even a slight discoloration. This is normal and fixable.
Soaking the Nozzles
Soak a small cloth or paper towel in vinegar and wrap it around each nozzle. Let it sit for 15 to 20 minutes. The vinegar will dissolve mineral deposits without requiring you to take anything apart.
Gentle Brushing
With a soft toothbrush or small cleaning brush, gently scrub around the nozzle opening. You’re not trying to force anything—just gently help the vinegar do its job. If something is really stuck, apply more vinegar and wait longer rather than scrubbing harder.
How Often Should You Clean Your Dispenser
Here’s a question many people ask: how often is too often, and how often is not enough?
The Ideal Schedule
For most households, a thorough cleaning every three to six months is ideal. If you use your dispenser heavily—like in an office setting—you might want to do it monthly.
Daily Maintenance
Between deep cleanings, empty and clean the drip tray weekly. Wipe down the exterior of the dispenser with a damp cloth to prevent dust accumulation.
Signs Your Dispenser Needs Cleaning Now
- Strange tastes or odors in the water
- Visible mold or discoloration inside the reservoir
- Slow water flow from the taps
- Algae growth (usually greenish)
- Water not getting as cold as it should
If you notice any of these, don’t wait for your scheduled cleaning—do it right away.
Common Mistakes People Make
Let me share some common cleaning mistakes I’ve seen people make, so you don’t repeat them.
Using Tap Water Instead of Distilled Water
This defeats the purpose of cleaning. Tap water contains minerals that will redeposit in your dispenser. Always use distilled water for the final rinse.
Forgetting to Empty the Drip Tray
So many people clean the main reservoir but neglect the drip tray. This is like washing your hands but not drying them—the bacteria just sits there waiting to cause problems.
Using Harsh Chemicals
Bleach and other harsh chemicals can damage your dispenser’s internal components and leave residues that contaminate your water. Stick with vinegar and baking soda.