How to Cook Chicken on Stove With Water: A Complete Guide to Tender, Juicy Results
Why Water-Poaching Chicken Is the Best Kept Secret in Home Cooking
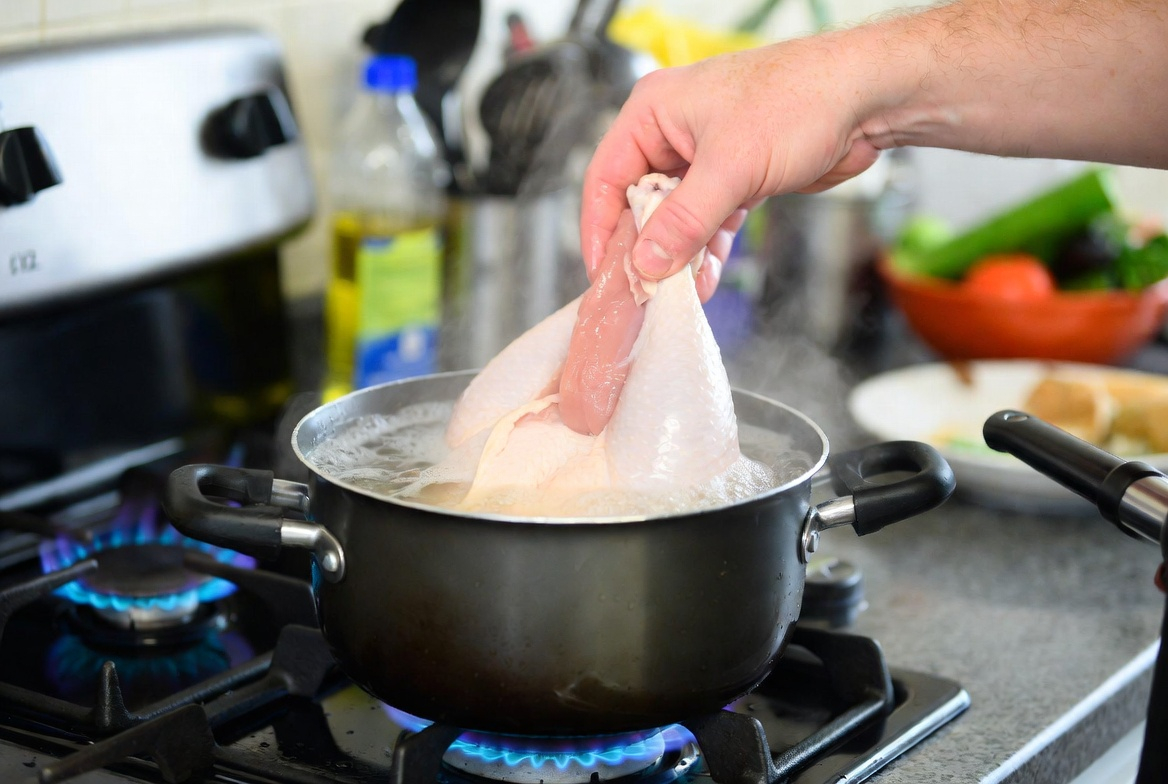
Have you ever wondered why restaurant-quality chicken sometimes tastes better than what you make at home? Often, it comes down to the cooking method. When you boil or poach chicken in water, you’re essentially creating a gentle, moist cooking environment that prevents the meat from drying out. This is dramatically different from pan-frying or baking, where the outside can overcook while the inside remains undercooked, or vice versa.
The beauty of water-poaching is its simplicity and reliability. Think of it like giving your chicken a warm bath rather than throwing it into a hot pan. The water distributes heat evenly, cooks the meat thoroughly, and keeps everything incredibly moist. Plus, this method is budget-friendly because you’re not using expensive oils or butter, and you can use the cooking liquid for making broth or soup.
The Science Behind Moist, Tender Chicken
When chicken is exposed to dry heat, the proteins on the surface contract rapidly and squeeze out moisture. Water-based cooking works differently. The water temperature stays consistent, allowing the proteins to denature slowly and evenly while the water helps retain moisture inside the meat. This is why poached chicken remains juicy even if you cook it slightly longer than you intended.
Essential Equipment and Ingredients You’ll Need
The great news? This cooking method requires minimal equipment. Let me break down exactly what you need to get started:
Kitchen Equipment Checklist
- A large pot or Dutch oven with a lid
- Enough capacity to hold chicken covered with water
- A meat thermometer for accuracy
- A knife for cutting and prepping
- A cutting board
- A slotted spoon for removing chicken
- Tongs for handling the chicken safely
Ingredient Essentials
Beyond chicken and water, you’ll want to have some basic seasonings on hand. Here’s what I always keep ready:
- Salt and black pepper
- Optional vegetables like carrots, celery, and onions for flavor
- Optional herbs such as bay leaves, thyme, or parsley
- Optional garlic cloves for added depth
Selecting the Right Chicken for Perfect Results
Not all chicken is created equal when it comes to cooking on the stove. The type you choose will significantly impact your final result. Let me explain the options:
Whole Chicken Versus Cut Pieces
You can use either a whole chicken or individual pieces. Whole chickens take longer to cook but yield more flavor and allow you to use the bones and skin for making stock afterward. Cut pieces, such as breasts, thighs, or drumsticks, cook faster and are often more convenient if you’re short on time. I typically use bone-in, skin-on pieces because they stay juicier than boneless, skinless varieties.
Fresh Versus Frozen Chicken
Fresh chicken works perfectly for this method. If you’re using frozen chicken, make sure to thaw it completely in the refrigerator beforehand. Never cook frozen chicken in water without thawing, as it will take significantly longer and may cook unevenly, leaving you with undercooked sections.
Quality Matters
Higher-quality chicken will naturally taste better. If possible, choose chicken from a reputable source. The color should be pale pink, and there should be no off odors when you open the package.
Preparation Steps Before You Start Cooking
Proper preparation is key to success. Don’t skip these steps because they set the foundation for excellent results:
Cleaning and Patting Dry
Start by rinsing your chicken under cool running water. This removes any residue from packaging. Pat the chicken completely dry using paper towels. Why? Because this helps the seasoning adhere better and ensures even cooking. If you’re using a whole chicken, make sure to clean the interior cavity as well.
Trimming Excess Fat and Skin
I recommend removing any excess skin or fat hanging off the chicken. You don’t need to remove all the skin because it adds flavor, but trim anything that looks particularly loose. This prevents the water from becoming overly greasy.
Seasoning Your Chicken
Season your chicken inside and out if you’re using a whole bird. For pieces, season both sides generously with salt and pepper. Many people undersalt their chicken, so don’t be timid with the seasoning. You can always taste and adjust after cooking.
The Step-by-Step Cooking Process
Now let’s get to the actual cooking. Follow these steps for perfect results every single time:
Step One: Fill Your Pot With Water
Place your chicken in a large pot and cover it completely with cold water. The water should be about two inches above the chicken. Using cold water is important because it allows the chicken to cook gradually and evenly. Fill the pot about three-quarters full to prevent water from boiling over.
Step Two: Bring to a Boil
Place the pot on your stovetop over high heat. Leave the pot uncovered. As the water heats, you’ll see white foam or scum rising to the surface. This is impurities being released from the chicken. Skim this off with a spoon or let it settle. Some people prefer to remove the chicken, drain it, rinse it, and start fresh with clean water to avoid any bitter flavors, though this isn’t absolutely necessary.
Step Three: Add Seasonings
Once the water reaches a full boil, add your seasonings to the pot. I like to add cut vegetables such as one diced onion, two or three carrot sticks, two or three celery stalks, a few garlic cloves, and a couple of bay leaves. These ingredients infuse the cooking liquid with flavor that soaks into the chicken. Don’t skip this step if you want deeply flavored chicken.
Step Four: Reduce Heat and Simmer
Once everything is boiling, reduce the heat to medium or medium-low. You want a gentle simmer, not a rolling boil. A gentle simmer means small bubbles are breaking the surface regularly, but it’s not aggressively bubbling. Put a lid on the pot to help retain heat and moisture, though you can leave it partially uncovered if you prefer.
Step Five: Cook for the Appropriate Time
This depends on what type of chicken you’re cooking. A whole chicken typically takes thirty to forty-five minutes, depending on size. Chicken breasts usually need fifteen to twenty minutes. Thighs and drumsticks take about twenty to thirty minutes. I’ll give you more detailed timing information in the next section.
Step Six: Check for Doneness
Use a meat thermometer to check the internal temperature. This is the most reliable way to know when your chicken is done without overcooking it. The safe internal temperature for chicken is one hundred sixty-five degrees Fahrenheit.
Step Seven: Remove and Cool
Using tongs or a slotted spoon, carefully remove the chicken from the hot water and place it on a clean cutting board. Let it rest for a few minutes before handling. This allows the juices to redistribute throughout the meat, keeping it moist.
Precise Timing Guidelines for Different Cuts
Timing varies depending on what you’re cooking. Here’s a breakdown to help you get it just right:
Cooking Times by Chicken Type
- Whole Chicken: Thirty to forty-five minutes depending on weight. A four-pound chicken typically needs forty minutes.
- Chicken Breasts: Fifteen to twenty minutes. Thicker breasts may need a few extra minutes.
- Chicken Thighs: Twenty to twenty-five minutes. Thighs are forgiving because the higher fat content keeps them moist.
- Chicken Drumsticks: Twenty to twenty-five minutes. These cook similarly to thighs.
- Mixed Pieces: Start with thighs and drumsticks, then add breasts halfway through cooking since they cook faster.
These times are guidelines, not absolutes. Altitude, pot size, and water temperature can all affect cooking time. Always verify doneness with a thermometer rather than relying solely on time.
How to Know Your Chicken Is Perfectly Cooked
There are several ways to determine doneness. Using multiple checks ensures you never serve undercooked chicken or dry, overcooked chicken:
The Thermometer Method
Insert a meat thermometer into the thickest part of the chicken without touching bone. The internal temperature must reach one hundred sixty-five degrees Fahrenheit. This is the foolproof method and my personal preference.
The Visual Method
Look at the juices that run from the chicken when pierced. If they’re clear and not pink, the chicken is done. If they’re pink, it needs more time.
The Texture Method
Fully cooked chicken should be opaque throughout with no pink remaining. The meat should be tender when pierced with a fork or knife.
Common Mistakes That Ruin Your Chicken
I’ve made these mistakes before, and I’ve learned from them. Let me help you avoid them:
Cooking at Too High a Temperature
If your water is at a rolling boil for too long, the chicken can become tough and stringy. Gentle simmering is your friend. A vigorous boil is actually working against you.
Overcrowding the Pot
If you pack too much chicken into the pot, the water temperature drops, and the chicken cooks unevenly. Leave space between pieces and ensure everything is covered with water.
Not Seasoning Adequately
Some people worry about salt, but properly seasoned chicken tastes exponentially better. Add salt to the water and to the chicken itself. You can always reduce salt in future meals if needed.
Skipping the Vegetables
Adding vegetables and herbs transforms the cooking liquid into something flavorful. Don’t skip this step thinking it’s optional. Your chicken will taste noticeably better with these ingredients.
Starting with Boiling Water
Always start with cold water. Starting with boiling water can cause uneven cooking with an overcooked exterior and undercooked interior.
Flavor Variations and Seasoning Ideas
While basic salt and pepper work perfectly, don’t be afraid to experiment. Here are some flavor combinations I love:
Asian-Inspired Chicken
Add soy sauce, ginger, scallions, and star anise to your cooking water. This creates a subtly flavored chicken perfect for Asian dishes.
Mediterranean Style
Use lemon juice, garlic, oregano, and bay leaves. This combination gives you bright, fresh flavors.
Cajun Spiced
Season with cayenne pepper, paprika, garlic powder, and onion powder for a spicy kick.
Classic Herb Blend
Thyme, rosemary, parsley, and garlic create a timeless combination that works with virtually any cuisine.
The beauty of this cooking method is that you can customize the flavor profile to match whatever dish you’re preparing. Experiment and find what you enjoy most.
Proper Storage and Reheating Techniques
Cooked chicken can be stored properly for several days, making this an excellent meal prep option:
Storing Your Cooked Chicken
Place cooled chicken in an airtight container and refrigerate it for up to four days. If you’re saving the cooking liquid, strain it and store it separately for up to four days as well. This liquid makes excellent broth for soups and sauces.
Freezing for Later
Cooked chicken freezes beautifully. Place it in freezer bags or containers and freeze for up to three months. The cooking liquid can also be frozen in ice cube trays for convenient portions.
Reheating Without Drying It Out
The best way to reheat chicken is gently in a pan with a little of the reserved cooking liquid, or you can place it in a microwave-safe container with a bit of liquid and cover it with a damp paper towel. This retains moisture and prevents the dry, rubbery texture that sometimes happens with reheating.
Creative Ways to Use Your Perfectly Cooked Chicken
Now that you have beautifully cooked chicken, what do you do with it? The possibilities are nearly endless:
Quick Meal Ideas
- Shred it and mix with mayonnaise and celery for chicken salad
- Dice it and add to grain bowls with vegetables and your favorite dressing
- Slice it and layer in sandwiches or wraps
- Add it to soups for extra protein
- Mix it with barbecue sauce for pulled chicken sandwiches
- Chop it and add to pasta dishes
- Use it as