How to Mount Your Window Air Conditioner: A Step-by-Step Guide
Mounting a window air conditioner yourself is totally doable and a great way to save money on installation costs. With the right tools and a little help, you can have your new AC unit securely installed and cooling your room in no time. We’ve found that most DIY installations are straightforward if you follow the steps carefully.
Getting your window AC unit set up properly is key for both efficient cooling and your peace of mind. You want to make sure it’s stable and safe, especially during windy weather. Many people worry about the weight, but we found that with a second person, lifting and securing it becomes much easier and safer.
- Measure your window opening first.
- Gather necessary tools like a drill and level.
- Secure the unit with provided brackets.
- Ensure the unit is slightly tilted for drainage.
- Seal any gaps around the unit.
Ready to get your room chilly? Let’s walk through exactly how to mount your window air conditioner step by step.
Setting Up Your Window Air Conditioner: A Step-by-Step Guide
Installing a window air conditioner doesn’t have to be a headache. We found that with a little preparation and the right approach, you can get your unit humming in no time. This guide will walk you through the process, ensuring your AC is installed safely and efficiently.
Before You Begin: Essential Preparations
Getting ready is half the battle. You’ll want to make sure your window is suitable and that you have all the necessary tools and parts. This preliminary work makes the actual installation much smoother.
Checking Your Window Compatibility
Not all windows are created equal, and that’s especially true for AC installations. Most window units are designed for standard double-hung windows. These windows have two sashes that slide up and down.
You’ll need to measure the window opening carefully. Measure the width and height. You want to ensure the AC unit will fit snugly within the frame. Many manufacturers provide specific dimensions for their units. Always check these against your window measurements before you buy.
We also found that older windows might need some extra reinforcement. If your window frame seems loose or damaged, it’s best to address that first. A sturdy frame is essential for supporting the weight of the AC.
Gathering Your Tools and Materials
Having everything on hand before you start means fewer trips to the hardware store. This is where you’ll want to be prepared.
You’ll typically need:
- A Phillips head screwdriver.
- A drill with appropriate drill bits.
- A level.
- A tape measure.
- Work gloves.
- A helper! This is probably the most important “tool.”
Your air conditioner should come with installation hardware. This usually includes side curtains or panels, mounting brackets, and screws. Double-check your box to make sure everything is there.
Understanding the AC Unit’s Tilt
This might seem odd, but your window AC unit needs to be installed at a slight downward tilt. Many experts recommend a tilt of about 1/4 to 1/2 inch towards the outside. This is crucial for proper drainage. Condensation naturally forms as the AC cools the air. If the unit is level or tilted inwards, this water can leak into your room.
We found that using a level with a built-in inclinometer or even a simple ruler can help you get this tilt just right. It’s a small detail that makes a big difference.
Mounting the Window Air Conditioner: Step-by-Step
With your preparations complete, you’re ready to get your AC into its new home. Remember, working with a partner makes this much safer and easier, especially when lifting the unit.
Preparing the Window Opening
First, open your window. If it’s a double-hung window, you’ll typically open the bottom sash. You might need to remove any screens that are currently in place. Store them somewhere safe so you don’t lose them.
Some installations might require you to lower the window sash slightly to meet the top of the AC unit once it’s in place. We found that having a helper hold the sash up or in place can be very useful during this step.
Installing Support Brackets (If Applicable)
Your AC unit likely came with support brackets. These are vital for stability. There are a few types, but most attach to the windowsill and the exterior wall or the window frame itself.
Follow the manufacturer’s instructions for your specific brackets. You’ll likely need to drill pilot holes. Measure carefully to ensure the brackets are level and securely fastened. They need to bear the weight of the AC unit.
Some units also have an L-bracket that goes on the outside. This provides additional support. If your kit includes this, make sure it’s firmly attached.
Lifting and Positioning the AC Unit
This is the part where your helper really shines. Window AC units can be heavy and awkward. Lift with your legs, not your back. Carefully slide the unit into the window opening.
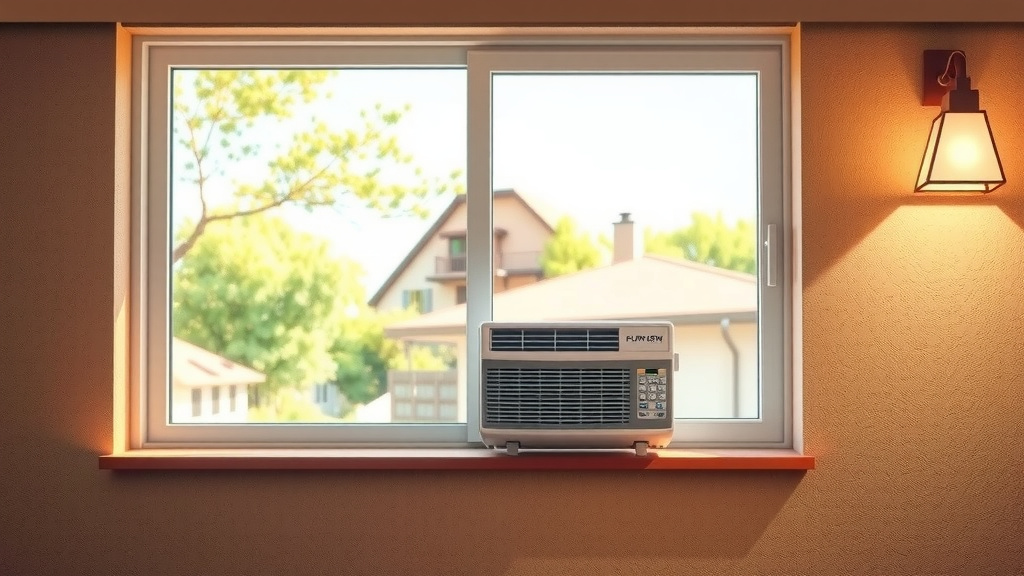
The goal is to position the AC so its bottom edge rests on the windowsill, and the top of the unit fits snugly against the upper sash of the window. Many units are designed to slide into place with minimal force. Don’t try to jam it in if it doesn’t fit easily.
Securing the Unit and Side Panels
Once the unit is in place, you’ll use the provided screws or clamps to secure it. This might involve screwing through the unit’s mounting flange into the windowsill or window frame. Again, consult your manual.
Next, you’ll install the side curtains or panels. These usually slide into channels on the sides of the AC unit and then extend to meet the window frame. They help seal off the remaining space. Secure these panels with the provided screws.
Ensuring the Correct Tilt
Before you fully seal everything up, double-check that tilt we talked about earlier. Place your level on the top of the unit. It should slope slightly downwards towards the outside. Adjust the unit or the supports if needed. This ensures proper water drainage.
Sealing Gaps for Efficiency
Even with the side panels, there can be small gaps. These allow cool air to escape and warm air or pests to enter. We found that using foam insulation strips or weatherstripping can seal these gaps effectively.
Apply the sealing material around the edges where the AC unit meets the window frame and sash. This improves efficiency and comfort. It’s a simple step that can make a noticeable difference in your energy bills.
Final Checks and First Run
You’re almost there! Just a few more things to do before you can enjoy that cool air.
Testing for Stability
Gently push and pull on the unit to ensure it’s stable. It shouldn’t wobble or feel loose. If it does, re-check your mounting screws and brackets. A secure installation is paramount for safety.
Turning on the AC
Plug in your air conditioner. Turn it on and set your desired temperature. Listen for any unusual noises. You should feel cool air blowing from the unit shortly after it starts.
We found that running the AC for a few minutes on a lower setting initially is a good idea. This allows the system to stabilize. You’re all set to beat the heat!
Quick Installation Checklist
Here’s a handy checklist to make sure you haven’t missed a step:
- Window opening measured and confirmed compatible?
- All tools and parts gathered?
- Helper available for lifting?
- Support brackets installed securely?
- AC unit properly seated and tilted outwards?
- Side panels installed and sealed?
- Unit tested for stability?
Conclusion
You’ve successfully learned how to mount your window air conditioner, saving yourself installation costs and gaining a valuable DIY skill. Remember, preparation is key, from measuring your window correctly to gathering the right tools and securing the unit with support brackets and side panels. That slight outward tilt for drainage is a pro tip we found makes a big difference. Double-check for stability and seal any gaps for maximum efficiency. Now, go enjoy your cool and comfortable space!
Frequently Asked Questions
How do I know if my window is compatible with an air conditioner?
Most window AC units are designed for standard double-hung windows. You’ll need to carefully measure your window’s width and height to ensure the unit will fit snugly. Check the manufacturer’s specifications against your measurements before purchasing.
Do I really need a helper to install a window AC unit?
Yes, we highly recommend a helper! Window AC units can be heavy and awkward to maneuver. Having a second person makes lifting, positioning, and securing the unit much safer and easier for everyone involved.
Why does the AC unit need to be tilted?
The unit must be tilted slightly downwards towards the outside to allow for proper drainage of condensation. If it’s level or tilted inward, water can leak back into your room, which is something you definitely want to avoid.
What can I use to seal the gaps around the window AC unit?
You can effectively seal gaps using foam insulation strips or weatherstripping. These materials help prevent cool air from escaping and warm air, pests, or drafts from entering, improving your unit’s efficiency.
How can I test if the AC unit is securely mounted?
Once installed, gently push and pull on the unit to check for any wobbling or looseness. If it feels unstable, re-check your mounting screws and support brackets to ensure they are tight and properly secured for safety.
![7 Best Rated Personal Air Conditioner [2026]](https://bathroomexplorer.com/wp-content/uploads/2026/06/7-best-rated-personal-air-conditioner-2026-featured-768x432.jpg)