Assemble Your Dyson Stick Vacuum: Step-by-Step Guide
Assembling your new Dyson stick vacuum is surprisingly easy and can be done in just a few minutes. Most models simply click together, meaning you won’t need any special tools. You can get your Dyson ready to clean right out of the box with minimal fuss.
Many people worry about putting new gadgets together. We found that Dyson designs its stick vacuums with user-friendliness in mind. The goal is for you to start cleaning quickly. Unboxing and assembly are designed to be straightforward and hassle-free.
- Click parts together until they lock.
- No tools are usually required.
- Refer to your specific model’s instructions if needed.
- Charge the battery before first use.
Ready to get your Dyson up and running? Let’s walk through the simple steps to assemble it so you can start cleaning your home.
Getting Your Dyson Stick Vacuum Ready to Go
So, you’ve unboxed your shiny new Dyson stick vacuum! Exciting, right? Most of the time, assembling your Dyson is as simple as snapping a few pieces together. You’re probably eager to start cleaning. We’ve found that Dyson designs these vacuums with you in mind. The goal is to get you vacuuming as quickly as possible, without any frustration.
Think of it like building with high-tech LEGOs, but way more useful. You’ll typically connect the wand to the main body and then attach the floor head. Sometimes, you might need to insert a filter or attach a specific tool. It’s designed to be intuitive, so you rarely need more than a minute or two.
Unboxing and Initial Checks
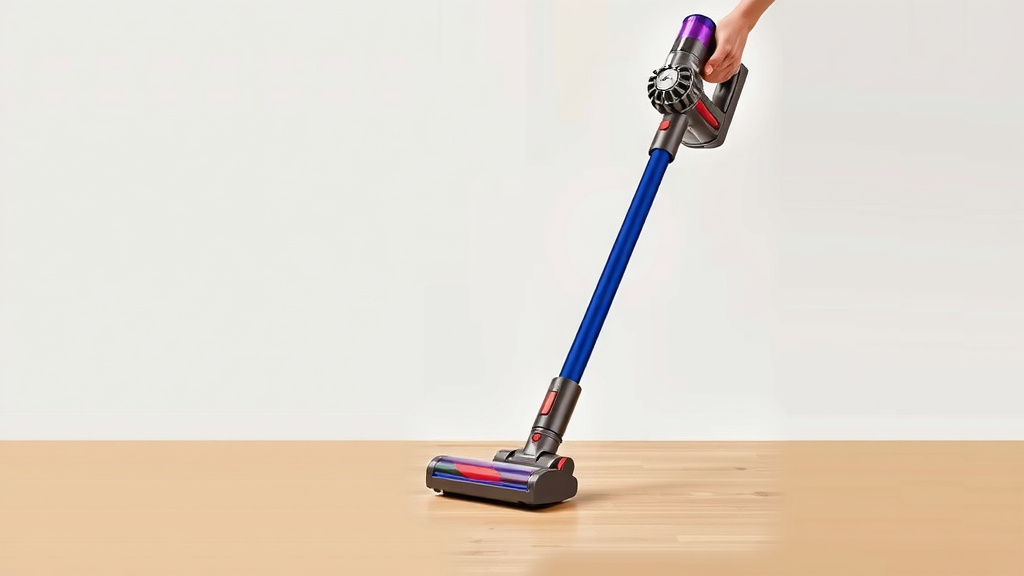
Before you start snapping things together, take a moment to look at all the parts. You should have the main vacuum unit (the part with the motor and bin), the wand (the long tube), and the cleaner head (the part that goes on the floor). You’ll also likely have a charger and perhaps some accessories.
Check if anything looks damaged. While rare, it’s good to be sure. If something seems off, your first step should be to contact Dyson customer support. They are there to help make sure you have a perfect experience right from the start. We found their support is usually very responsive.
The Main Assembly Steps
Let’s break down the typical assembly process. It’s usually quite straightforward, and you’ll see many Dyson models follow a similar pattern. Remember, if your model is a bit different, always glance at the user manual that came with it.
Connecting the Wand and Main Body
This is often the most satisfying click you’ll hear. Locate the end of the wand and the top of the main vacuum unit where they are meant to join. You’ll see a slot or a connector point. Simply push the wand firmly into the main body until you hear a distinct click. This click means it’s securely locked in place. Tug gently to ensure it’s not going to come apart unexpectedly.
Attaching the Cleaner Head
Next, you’ll attach the floor-cleaning part. Look at the bottom of the wand. There’s usually another connector designed to fit the cleaner head. Again, align the cleaner head with the wand and press down firmly. You should hear another reassuring click. This ensures a tight seal, which is important for optimal suction power.
Installing the Battery and Filter (If Applicable)
Some Dyson models require you to insert the battery. It often slides into a designated slot, usually near the handle, and locks into place. You might need to press a release button to remove it later for charging. Also, check for a filter. It’s typically located near the bin or motor. It might just twist into place or slide in. Make sure it’s seated correctly; a loose filter won’t do its job properly.
Charging Your New Dyson
Before you can truly test out your new vacuum, it needs power! Most Dyson stick vacuums come with a partially charged battery, but it’s always best to give it a full charge before the first use. This helps ensure you get the maximum runtime from the get-go.
Finding the Right Charging Method
Your Dyson likely came with a charger. You have a couple of options for charging. You can either plug the charger directly into the vacuum’s battery port, or if your vacuum came with a wall docking station, you can slot the entire vacuum into the dock. The dock is a convenient way to store and charge your vacuum simultaneously.
The Charging Process
Connect the charger to the vacuum or dock. You’ll usually see an indicator light on the vacuum or the charger itself. This light will signal that it’s charging. It will typically change color or turn off when charging is complete. A full charge can take anywhere from 3.5 to 5 hours, depending on the model. Research and findings suggest that keeping batteries topped up can be beneficial for their longevity (University of California, Davis).
Essential Accessories and How They Fit
Dyson vacuums often come with a few handy tools for different cleaning tasks. These usually attach to the main body or the wand.
Understanding the Attachments
You might have a crevice tool for tight spots, a combination tool for general cleaning, or a mini motorized tool for upholstery. Each has a specific purpose. These usually have a quick-release mechanism. You simply push them onto the wand or the vacuum body until they click, and a button usually releases them.
Your Dyson Assembly Checklist
Let’s recap with a quick checklist to make sure you’ve got everything covered. It’s a simple way to feel confident that your vacuum is ready for action.
- Have you checked all parts for damage?
- Is the wand securely clicked into the main body?
- Is the cleaner head firmly attached to the wand?
- Has the battery been installed correctly (if removable)?
- Is the filter in place (if applicable)?
- Is the vacuum charging or fully charged?
Making Sure Everything is Secure
Once assembled, give your Dyson a gentle wobble. All the parts should feel solid and connected. You shouldn’t hear any rattling or feel loose connections. This confirms that you’ve put it together correctly, and it’s ready for its first cleaning mission.
Taking a few extra moments to ensure each piece is securely locked means you won’t have any issues when you’re in the middle of cleaning. We’ve found that a quick check like this prevents minor annoyances later on. It’s like tightening the lid on a jar – a small step for great peace of mind!
Conclusion
You’ve successfully assembled your new Dyson stick vacuum! We’ve walked through unboxing, snapping parts together, and getting it charged. Remember, most of the assembly involves a satisfying click, and you’re ready to go. Your Dyson is now prepped for its first cleaning mission. Don’t forget to give all the connections a gentle tug to ensure they’re secure. Now, go enjoy a cleaner home with your powerful new tool!
Frequently Asked Questions
What if a part doesn’t click into place?
If a piece doesn’t click, don’t force it. Double-check that you’re aligning the correct parts and that there’s no obstruction. Sometimes, re-aligning and applying firm, steady pressure is all that’s needed. If it still won’t click securely, consult your user manual or contact Dyson support.
Can I use my Dyson stick vacuum before it’s fully charged?
Yes, you can usually use your Dyson stick vacuum even if it’s not fully charged, as most come partially charged. However, we strongly recommend charging it fully before its first use. This ensures you get the maximum possible runtime and helps with initial battery conditioning.
How do I know if the battery is installed correctly?
When the battery is installed correctly, it should slide smoothly into its designated slot and then lock into place, often with a click. You should not be able to easily pull it out without pressing a release button. Refer to your model’s manual if you’re unsure about the specific locking mechanism.
What is the wall docking station for?
The wall docking station serves two main purposes. It’s a convenient place to store your vacuum and its accessories when not in use, keeping them tidy and accessible. It also acts as a charging point, so your Dyson is always ready to go when you need it.
Do I need any tools to assemble my Dyson stick vacuum?
Generally, no. Dyson stick vacuums are designed for tool-free assembly. The parts are engineered to simply click or slide together securely. If your specific model’s instructions mention tools, it’s best to follow those, but this is uncommon for the core assembly.


![7 Best Clear Plastic For Vacuum Forming [2026]](https://bathroomexplorer.com/wp-content/uploads/2026/05/7-best-clear-plastic-for-vacuum-forming-2026-featured-768x432.jpg)