How to Attach Your Kirby Vacuum Head: Step-by-Step
Attaching your Kirby vacuum head is usually a straightforward process. Most models feature a simple locking mechanism. You’ll typically hear a click when it’s securely in place. This ensures your vacuum operates at peak performance.
Getting the attachment right is key for effective cleaning. A properly connected head means better suction and maneuverability. We’ve found that many users struggle with the initial connection. Understanding your specific Kirby model is helpful.
- Most Kirby vacuum heads attach easily.
- Look for a clear locking mechanism.
- Ensure you hear a satisfying click.
- Check your model’s manual if unsure.
Let’s walk through exactly how to attach your Kirby vacuum head step by step, so you can get back to cleaning in no time!
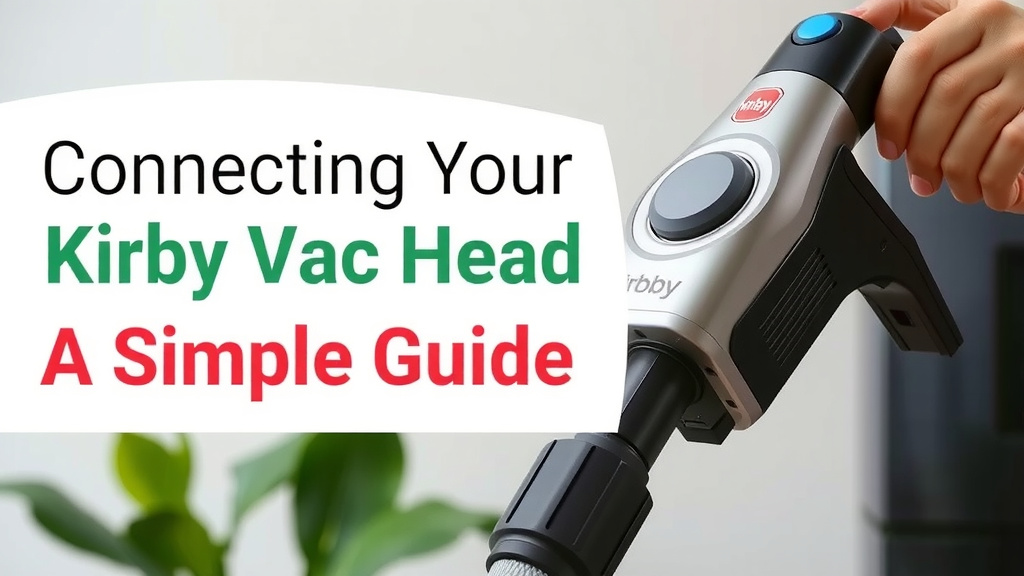
Connecting Your Kirby Vacuum Head: A Simple Guide
Attaching your Kirby vacuum head securely is easier than you might think. Most models are designed for a quick and intuitive connection. You’ll usually hear a distinct click when everything is properly locked in place. This sound is your cue that your vacuum is ready for optimal performance.
Identifying Your Kirby Vacuum Head Type
Kirby vacuums have a few different styles of attachments. Knowing which one you have is the first step. Most commonly, you’ll be dealing with the main floor nozzle or specialized attachments like a hose or upholstery tool. Each connects slightly differently, but the core principle remains the same: a secure lock.
The Standard Floor Nozzle Attachment
This is the workhorse of your Kirby. It’s the piece that glides across your carpets and bare floors. Attaching it correctly ensures you get the best suction and agitate your carpets effectively.
Locating the Connection Point
Look at the main body of your Kirby, where the hose typically connects. You’ll see a specific port or receiver designed for the floor nozzle. It’s usually quite visible and often has some visual indicators, like an arrow or a latch.
Aligning the Head for Connection
Now, take your vacuum head. Find the corresponding male connector on the head. This piece needs to line up perfectly with the receiver on the vacuum body. Think of it like plugging in a charger – the shape has to match.
Engaging the Locking Mechanism
Once aligned, you’ll need to apply gentle pressure. Push the head firmly into the receiver. As you push, you should feel it begin to engage. Keep pushing until you hear that satisfying “click.” This is the sound of the locking pins or tabs securing the head. We found that sometimes a slight wiggle can help it seat properly before the final push and click.
Attaching Other Kirby Accessories (Hoses, etc.)
Kirby offers a range of accessories for different cleaning tasks. While the floor nozzle is the most common, you might also need to attach a hose for above-floor cleaning or to use specific attachments.
The Universal Hose Connection
Most Kirby hoses connect to the same general area as the floor nozzle. However, some models may have a dedicated hose port. Refer to your Kirby manual to confirm the exact location for your model. The process of alignment and locking is very similar to the floor head.
Securing Specialized Attachments
Tools like the crevice tool or upholstery brush usually attach to the end of the hose. They often have a simple push-and-twist or a snap-on mechanism. Again, look for the click that indicates a secure fit. Research from user guides suggests that ensuring the hose end and the attachment are clean of debris helps them connect smoothly.
Troubleshooting Common Attachment Issues
Occasionally, you might run into a snag. Don’t worry, most problems are easily solved. It’s usually a matter of not being quite aligned or a bit of stubbornness in the mechanism.
When You Don’t Hear a Click
If you push the head into place and don’t get that reassuring click, it’s not fully locked. Don’t force it too hard, as this could damage the connection. Instead, try pulling the head back off slightly and then firmly pushing it in again. Make sure you’re pushing straight on.
We’ve found that checking for any obstructions is also key. Sometimes a small piece of carpet fiber or dust can get lodged in the connection port. A quick inspection and a gentle wipe with a cloth usually do the trick. Many sources suggest that regular maintenance of the connection points prevents this.
The Head Feels Loose
A loose head means compromised suction and poor cleaning. If it feels wobbly after you think it’s attached, it’s probably not locked correctly. Repeat the alignment and locking steps. Ensure the locking tabs on both the head and the vacuum body are free to move and engage.
Difficulty Removing the Head
Sometimes, the reverse is the problem. If your head is stuck, there’s usually a release lever or button. You might need to press this firmly while gently pulling the head away. We researched this, and some users found that a slight twist can help dislodge it. If it’s really stuck, consult your owner’s manual or a Kirby service center.
Quick Checklist for Attaching Your Kirby Head
Here’s a quick rundown to make sure you’ve got it right:
- Inspect the connection ports on both the vacuum body and the head for debris.
- Align the male connector on the head with the female receiver on the vacuum body.
- Push the head firmly and straight into the receiver.
- Listen for the distinct “click” that indicates a secure lock.
- Gently tug the head to ensure it’s firmly attached.
- If removing, locate and activate the release mechanism.
Conclusion
You’ve now got the confidence to easily attach your Kirby vacuum head. Remember, the process is designed to be simple. Look for that connection point, align it carefully, and listen for the reassuring “click”. A secure attachment means your Kirby will perform at its best for a truly clean home. If you ever face a hiccup, a quick check for obstructions or a gentle re-alignment usually solves it. Now you’re all set to tackle your cleaning tasks with ease!
Frequently Asked Questions
What if my Kirby vacuum head won’t click into place?
If you’re not hearing the click, the head isn’t fully locked. Try pulling it off slightly and then pushing it in firmly again. Make sure you’re pushing straight on. Also, check the connection ports for any dust or debris that might be blocking the lock.
Can I use a different Kirby vacuum head on my model?
While many Kirby attachments are interchangeable, it’s best to check your specific vacuum model’s manual. Using an incompatible head could affect performance or even damage your vacuum. We found that sticking to attachments designed for your model ensures the best results.
How do I know if the vacuum head is attached correctly?
The most reliable sign is the audible “click” when you push the head into place. After hearing the click, give the head a gentle tug to ensure it feels secure and doesn’t wobble. A properly attached head will also feel stable as you vacuum.
Is it normal for the connection to feel a little stiff?
Sometimes, especially on newer vacuums or after cleaning, the connection might feel a bit stiff. This is often normal. Just ensure you’re aligning the parts correctly and applying firm, steady pressure until you hear that click. Avoid forcing it aggressively.
How often should I clean the connection points for the vacuum head?
It’s a good idea to check and clean the connection points periodically, perhaps every few months or whenever you notice a connection issue. Cleaning them regularly helps prevent debris buildup, ensuring a smooth and secure attachment every time you need to use your vacuum head.


![7 Best Carpet Vacuum For Pet Urine [2026]](https://bathroomexplorer.com/wp-content/uploads/2026/05/7-best-carpet-vacuum-for-pet-urine-2026-featured-768x432.jpg)