Connect Your Sander to a Vacuum for Dust-Free Sanding
Yes, you can absolutely attach a vacuum to a sander to keep dust under control! This simple setup can dramatically reduce airborne dust by as much as 90%. It makes your sanding projects cleaner and safer for your lungs.
Connecting your shop vacuum to a sander is a smart move for any DIYer or professional. It helps maintain a clearer view of your work surface. Plus, it keeps your workspace much tidier, saving you cleanup time later. Many modern sanders even come with built-in dust collection ports designed for this purpose.
- Most sanders can connect to a shop vacuum.
- This drastically reduces airborne dust.
- It improves visibility of your sanding area.
- It saves you a lot of cleanup time.
Let’s walk through exactly how to connect your vacuum to your sander step by step, so you can start enjoying a dust-free sanding experience.
Connecting Your Vacuum to a Sander: A Step-by-Step Guide
You’re ready to tackle that sanding project, but the thought of dust clouds filling your workshop makes you pause. Don’t worry, connecting your shop vacuum to your sander is simpler than you might think. This setup is a real **dust-fighting hero**. It can capture up to 90% of the dust right at the source. That means less cleanup and cleaner air for you to breathe.
Understanding the Basics of Dust Collection
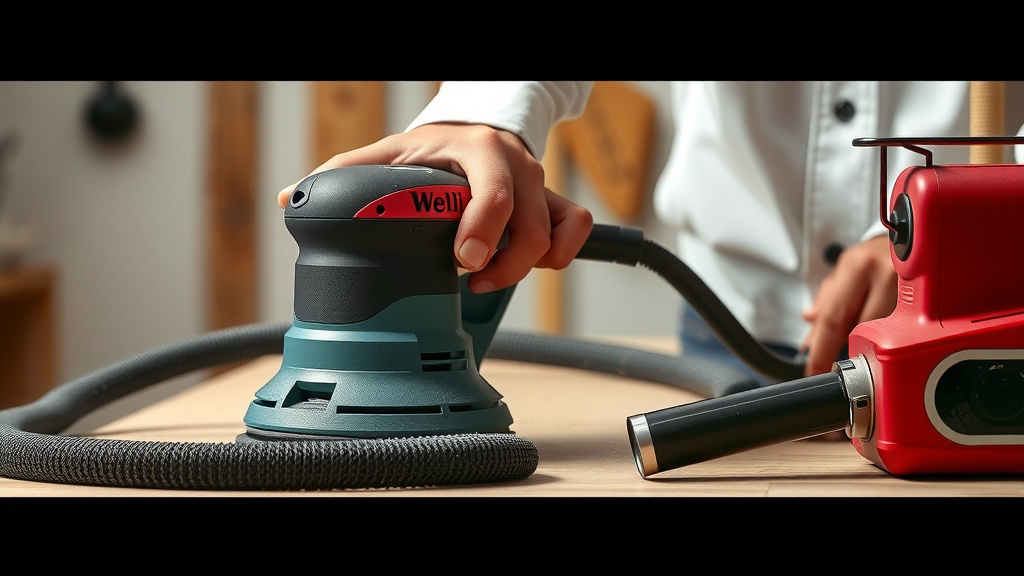
Most modern sanders are designed with dust collection in mind. They have a port specifically for attaching a vacuum hose. Your shop vacuum acts as the powerhouse, sucking up the dust generated as the sander works. This isn’t just about tidiness; it’s about **protecting your respiratory health**. Fine wood dust can cause serious long-term problems.
Why Dust Collection Matters So Much
Breathing in wood dust isn’t good for you. The American Lung Association notes that dust can irritate your lungs and airways. For people with asthma or other respiratory conditions, it can be especially dangerous. Even for healthy individuals, prolonged exposure can lead to **chronic issues**. A good dust collection setup is a key part of working safely.
The Benefits Beyond Health
Beyond health benefits, a dust-free workspace means you can actually see what you’re doing. No more dust obscuring your sanding lines or hiding imperfections. This leads to a better finish on your projects. Plus, think about the time you’ll save not having to constantly wipe down surfaces or sweep the floor. It truly makes the entire process more enjoyable.
Choosing the Right Tools for the Job
Before you can connect anything, you need the right equipment. This usually involves your sander, your shop vacuum, and a way to connect them. Think of it like a plumbing project, but for dust! Getting the right adapters can make all the difference between a tight seal and a frustrating mess.
Your Sander’s Dust Port
First, take a good look at your sander. Most orbital, random orbit, and belt sanders have a dust collection port. It’s usually a nozzle or a hole where dust is expelled. Some sanders have a small cloth bag attached. You’ll need to remove this bag to attach your vacuum hose. The size and shape of this port can vary greatly between models.
The Shop Vacuum Is Your Dust Buddy
A standard household vacuum often doesn’t have the power or the filtration needed for sanding dust. You’ll want a shop vacuum, sometimes called a dust extractor. These are built to handle fine debris and have much larger capacities. Look for one with a good filtration system, ideally with a HEPA filter, to capture the smallest particles.
Hoses and Adapters: The Critical Link
This is where things can get a little tricky, but don’t fret. Sanding hoses are typically 1-1/4 inch or 2-1/2 inches in diameter. Sander ports can be different sizes and shapes. You’ll likely need an adapter to create a snug fit. You can find these at hardware stores or online. Sometimes, a bit of creative use of tape can create a temporary seal if you’re in a pinch.
| Sander Type | Typical Hose Size | Common Adapter Needs |
|---|---|---|
| Random Orbit Sander | 1-1/4 inch | May need adapter for shop vac hose |
| Orbital Sander | 1-1/4 inch or 1-7/8 inch | Often needs adapter for larger shop vac hoses |
| Belt Sander | Up to 2-1/2 inch | Less likely to need adapters for common shop vacs |
This table gives you a general idea, but always check your specific tool’s manual.
Putting It All Together: The Connection Process
Now for the main event! Connecting your vacuum to your sander involves a few simple steps. The goal is to create a sealed connection so that all the dust goes into the vacuum, not into the air.
Step 1: Prepare Your Sander
If your sander has a dust bag, remove it. You’ll see the port where the bag was attached. Make sure the port is clean and free of any debris that could block airflow. This is your main attachment point. Some sanders might have a smaller port that requires a specific adapter. Always consult your sander’s manual if you’re unsure.
Step 2: Connect the Hose
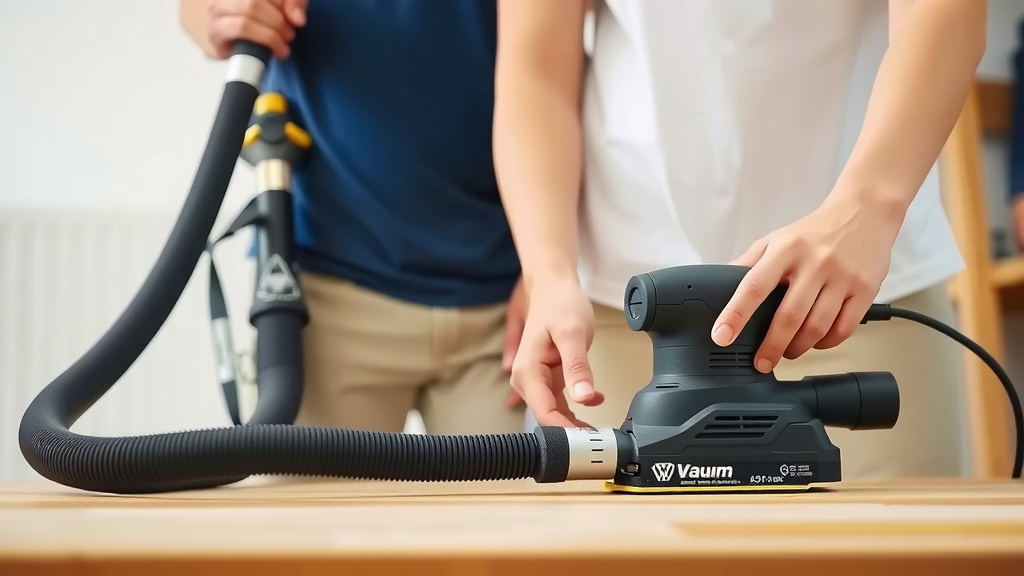
Take your shop vacuum hose. If the end of the hose matches your sander’s port size, you can often just push it on firmly. If it doesn’t fit directly, now is the time to use your adapter. Slide the adapter onto the hose or the sander port, depending on the adapter type. Then, connect the hose to the adapter.
Achieving a Secure Fit
A **tight seal** is crucial. If there are small gaps, dust will escape. You can often secure the connection with a hose clamp. For a quick fix, strong duct tape can work wonders. Wrap it around the connection point several times. You want to ensure there’s no air leakage. A loose connection defeats the purpose.
Step 3: Connect to the Vacuum
The other end of your shop vacuum hose connects to your vacuum cleaner itself. Most shop vacuums have a specific port for attaching the hose. Make sure this connection is also secure. If your vacuum has multiple ports, consult your manual to find the one designed for suction.
Step 4: Test the Connection
Before you start sanding, turn on your shop vacuum. Then, turn on your sander. You should feel suction at the sander’s dust port when the sander is running. Listen for any obvious leaks. A quick check ensures everything is working as it should. This is your **pre-sanding ritual**.
Troubleshooting Common Issues
Even with careful setup, you might run into a snag. Don’t get discouraged! Most problems are easily fixed.
Weak Suction? Check These First
If you’re not getting much suction, start with the basics. Is the vacuum turned on? Is the hose connected securely at both ends? Many experts suggest checking the vacuum’s filter. A clogged filter drastically reduces airflow. Also, ensure the dust collection bin in the vacuum isn’t full.
Hose Doesn’t Fit Properly
This is where adapters shine. If you can’t find a direct adapter, consider using a universal adapter or even creating a custom one. Some people have success with foam pipe insulation or thick rubber gaskets to fill small gaps. Your goal is an **airtight seal**.
Sander Still Kicking Up Dust?
If dust is still escaping around the sander head itself, it might be an issue with the sander’s design or wear and tear. Ensure the sanding pad is clean and that the sandpaper is properly attached. Some sanders are simply better at dust collection than others.
Here’s a quick checklist to make sure you’re all set:
- Confirm your shop vacuum is working properly.
- Remove the dust bag from your sander.
- Check that your sander’s dust port is clear.
- Use the correct hose and adapter for a tight fit.
- Secure connections with clamps or tape if needed.
- Test suction before you begin sanding.
Conclusion
You’ve now seen how connecting your shop vacuum to your sander is a straightforward process that makes a huge difference. You learned about the tools you need, like the right sander port, a capable shop vacuum, and those essential hoses and adapters. Following the step-by-step guide ensures a secure, dust-capturing seal. This setup not only protects your lungs but also gives you a clearer view of your work and saves you cleanup time. Don’t let dust control your projects; take control of the dust!
Your next step? Gather your equipment and make that connection. You’ll be sanding with cleaner air and a tidier space in no time. Happy sanding!
Frequently Asked Questions
What type of vacuum works best for sanding dust?
A shop vacuum is your best bet. Household vacuums often lack the power and filtration needed for fine sanding dust. Shop vacuums are built to handle larger debris and have better filtration systems, preventing dust from recirculating.
Do I need special adapters to connect my vacuum hose to the sander?
Most likely, yes. Sanding hoses and sander dust ports come in various sizes. You’ll often need an adapter to create a tight, airtight seal. These are readily available at hardware stores or online.
How can I ensure a secure fit if my hose and port don’t match perfectly?
A tight seal is key to preventing dust escape. If an adapter isn’t perfect, you can use strong duct tape to wrap around the connection and seal any small gaps. Hose clamps also provide a very secure connection.
My sander still kicks up dust even with the vacuum attached. What could be wrong?
Check for leaks in your hose connections first. If the seal is good, the issue might be with the sander itself. Ensure the sanding pad is clean and the sandpaper is attached correctly. Some sander designs are simply better at dust collection than others.
Is it safe to leave the vacuum running constantly while sanding?
Yes, it’s not only safe but recommended. Leaving the shop vacuum running creates continuous suction, capturing dust as it’s generated. This maximizes dust collection efficiency and keeps your workspace cleaner throughout the sanding process.

![7 Best Handheld Vacuum For Bed Bugs [2026]](https://bathroomexplorer.com/wp-content/uploads/2026/05/7-best-handheld-vacuum-for-bed-bugs-2026-featured-768x432.jpg)