How to Change Water Filter GE Fridge: A Complete Step-by-Step Guide
Why Your GE Refrigerator’s Water Filter Deserves Your Attention
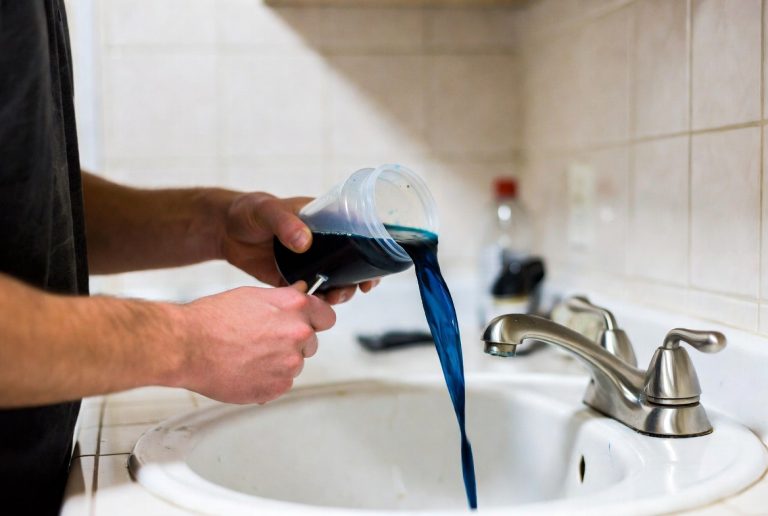
Think of your refrigerator’s water filter as the lungs of your appliance’s hydration system. Just like lungs need clean air to function properly, your fridge needs a clean filter to deliver fresh, healthy water and ice. Over time, sediment, chlorine, and other impurities accumulate in the filter, making it work harder and less efficiently. Have you noticed your water tasting a bit off lately? That’s your filter waving a red flag, telling you it’s time for a replacement.
A clogged or expired water filter doesn’t just affect taste and odor—it can actually reduce the flow of water to your ice maker and dispenser. Some GE refrigerators have smart filter indicators that light up when replacement is due, typically after filtering between 300 to 1000 gallons of water, depending on your model. Ignoring this maintenance task is like ignoring your car’s oil change reminder; eventually, something’s going to break down.
Identifying Your GE Refrigerator Model and Filter Type
Before you rush off to buy a replacement filter, you need to know exactly what you’re looking for. This is where many people stumble. Not all GE refrigerators use the same filter, and buying the wrong one is frustrating and wasteful.
Where to Find Your Model Number
Your GE refrigerator’s model number is usually located on a sticker inside the fridge, typically on the wall behind the crisper drawers or on the back wall near the top. You can also find it on the back of the unit or in your user manual. The model number typically starts with letters like GE, GTS, GSS, or GSH, followed by numbers. Write this number down—you’ll need it when shopping for your replacement filter.
Common GE Filter Types Explained
GE uses several different filter styles, each designed for specific refrigerator models. The most common types include:
- GXRTQ Filter: Found in many newer GE models, this cartridge-style filter sits horizontally inside the fridge
- GXRQ Filter: An older style still used in some models, similar positioning to the GXRTQ
- GE SmartWater Filter: Used in select models, offers advanced filtration technology
- GXRV Filter: A side-by-side refrigerator filter type
- MXRC Filter: Used in some French door models
The easiest way to identify your filter type is to check your refrigerator’s manual or call GE customer service with your model number. Alternatively, you can look inside your fridge at the current filter to see what type you have.
Gathering Your Tools and Supplies Before Starting
Here’s the good news: changing a GE refrigerator water filter doesn’t require a toolbox full of equipment. In fact, you probably don’t need any special tools at all. Let me break down what you should have ready.
Essential Items You’ll Need
- A replacement filter that matches your GE model exactly
- A clean towel or cloth to catch any remaining water
- A bucket or container for water drainage
- Your refrigerator’s user manual (optional but helpful)
- A glass of water for flushing purposes
Optional Items That Make the Process Easier
- Rubber gloves to keep your hands clean
- A small flashlight if your filter location is dimly lit
- Paper towels for cleanup
That’s really it. Unlike some appliance repairs, you won’t need wrenches, screwdrivers, or electrical knowledge. The designers at GE created these filters to be user-friendly, which is actually great news for you.
Preparing Your Refrigerator for the Filter Change
Before you dive into the actual replacement, take a few minutes to prepare your fridge. This prevents accidents and makes the process smoother.
Safety First: What You Need to Do
First, unplug your refrigerator from the electrical outlet. Now, I know what you’re thinking—do I really need to do this? Yes, absolutely. Even though you’re not working with electrical components directly, it’s the safest approach. Some GE models have automatic shutoff mechanisms that trigger when the filter housing is opened, and unplugging ensures nothing unexpected happens.
Next, turn off the water supply to your refrigerator if you know where it is. For most homes, this is a small valve behind the refrigerator where the water line connects. This prevents any spurting when you remove the old filter.
Clearing Your Workspace
Move any items stored near or in front of your water filter. If your filter is located inside the fridge, remove shelves or containers that might block your access. This gives you plenty of room to work without knocking things over.
Place your bucket or towel underneath the filter location. Trust me on this—there’s always a little water remaining in the old filter, and you don’t want it dripping onto your kitchen floor or inside the refrigerator.
Locating Your Water Filter: Different GE Models, Different Locations
Here’s where things get interesting. GE refrigerators hide their water filters in different places depending on the model, which can throw people off guard.
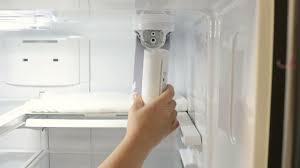
Inside-the-Fridge Filter Location
Many GE refrigerators, particularly their French door and side-by-side models, have filters located inside the refrigerator compartment. Usually, you’ll find this filter in the upper right corner of the fridge, behind the crisper drawer or in a dedicated filter housing. The filter typically looks like a cylindrical cartridge about six inches long. To access it, you might need to remove the crisper drawer completely.
Base Grille Filter Location
Some GE models, especially older ones, feature a filter that sits behind the base grille at the bottom front of the refrigerator. To access this, you’ll need to open the grille panel by either sliding it out or unclipping it. This style is less common in newer models but still appears in certain refrigerator lines.
Top-Back Filter Location
A few GE models place the water filter at the top back of the refrigerator, inside the fridge compartment. This requires you to reach behind anything stored at the top, so it’s worth clearing that area first.
Using Your Manual to Pinpoint Exact Location
If you can’t find the filter by looking, consult your user manual. Most manuals have a diagram showing exactly where the filter sits in your specific model. If you don’t have the manual handy, you can usually download it from the GE website using your model number.
Removing Your Old Water Filter: The Actual Process
Now comes the main event. Removing the old filter is usually straightforward, though the exact method depends on your filter type.
For Cartridge-Style Filters (Most Common)
Once you’ve located your filter, look for a plastic housing around it. Most GE cartridge filters twist out of their housing counterclockwise. Simply grab the filter firmly and turn it to the left. You shouldn’t need much force—usually, a quarter to a half turn is enough to break the seal. Continue twisting until the filter comes completely free from the housing.
As you remove it, tilt it downward slightly so any remaining water drips into your bucket or cloth. Once it’s completely out, set the old filter aside. Don’t throw it away yet—you might want to keep the packaging from the old filter in case you need to reference the part number later.
For Push-Button Release Filters
Some newer GE models use push-button releases instead of twist-out designs. Look for a small button near the filter housing. Press this button firmly, and the filter should slide out toward you. You might need to press and wiggle it slightly if it’s stuck.
Handling Water Spillage
Here’s a pro tip: most of the water in the old filter will stay inside, but inevitably, a little bit drips out. That’s why we placed a bucket there in the first place. If water spills inside the fridge, grab your cloth and wipe it up immediately to prevent water damage or food contamination.
Installing Your New GE Water Filter Correctly
Before you install the new filter, do yourself a favor and inspect the housing where the old filter was sitting. Use your cloth to wipe away any debris or dust that’s accumulated inside. A clean housing ensures a proper seal with your new filter.
Preparing the New Filter
Remove the new filter from its packaging. You might notice a plastic cap or protective covering on one end of the filter—this is normal. Some filters have a protective cap that you need to remove before installation. Others don’t have caps at all. Check your new filter’s instructions to be sure.
Hold the new filter up to the light for a moment. You’ll notice that most cartridge filters have a threaded section on one end and a flat end on the other. The threaded end goes into the housing, while the flat end typically has rubber seals. This design ensures water flows through the filter media and not around it.
Installing Step by Step
Align the new filter with the housing opening. The threaded end should face into the housing. Gently push the filter into the housing until you feel slight resistance—the rubber seals are creating a seal with the housing. Now, turn the filter clockwise. You’ll feel it getting tighter as you turn. Stop when you feel firm resistance—about a quarter turn is usually enough. Don’t over-tighten it; you’re just sealing it snugly, not cranking it with all your might.
For push-button style filters, you’ll align the filter with the housing and push it in firmly until you hear or feel it click into place. The button mechanism locks it automatically.
Confirming Proper Installation
Once installed, gently try to turn or wiggle the filter. It should feel solid and secure, not loose or wobbly. If it seems loose, remove it and reinstall it, twisting a bit further this time.
Flushing Your New Filter and Testing the System
Here’s a step many people skip, but you really shouldn’t. After installing a new filter, you need to flush out the air and any residual material from the filter media.
The Flushing Process
Plug your refrigerator back in. If you turned off the water supply earlier, turn it back on now. Wait a few minutes for water pressure to build up in the system. Then, go to your water dispenser and run water into a glass for about five minutes continuously. You might notice the water looks slightly cloudy or discolored—this is normal. It’s just the filter settling and any carbon dust clearing out.
Fill your glass and discard it. Repeat this process several more times. After about 10 to 15 minutes of running water, your water should look clear and taste clean. This flushing process ensures you’re not drinking filtered carbon or other residue.
Testing the Ice Maker
After flushing the water line, check your ice maker. If it’s equipped to make ice, it might take 12 to 24 hours to produce the first batch of ice with the new filter. This is normal. The system needs time to fill the ice maker reservoir and freeze the water properly.
Resetting Your GE Refrigerator’s Filter Indicator Light
Most modern GE refrigerators have a filter status light on the control panel. This light indicates when it’s time to replace the filter. After installing your new filter, you need to reset this light so it can start counting down to the next replacement.
Locating the Reset Button
The reset button or function varies by model, but common locations include:
- On the water filter housing itself, there’s often a small button labeled “RESET”
- On the refrigerator’s control panel, there’s a dedicated filter reset button
- On the icemaker itself, if it has a separate filter
Different Reset Methods
For filters with onboard reset buttons, simply press and hold the button for a few seconds until the light turns off or changes color. For control panel reset buttons, press the button until the filter status indicator resets.
If you can’t find a physical button, some GE models use a menu-based reset accessible through the digital control panel. Consult your manual for the specific key sequence—it usually involves pressing arrow keys and a select button in a particular order.
Confirming Successful Reset
The filter light should either turn off or change from red to green, depending on your model. If the light doesn’t reset after your attempt, try again. Some lights require a longer button press. If it still won’t reset, your model might use a different method outlined in your user manual.
Troubleshooting Common Issues During Filter Replacement
Despite following all the steps correctly, sometimes things don’t go as planned. Here are solutions to common problems.
The Filter Won’t Twist Out
If your filter seems stuck, don’t force it. Excessive force can damage the housing. Instead, try twisting it back clockwise slightly—it might be over-tightened. Then try again with a steady, firm twisting motion. If it’s still stuck, run warm water over the filter housing to loosen any mineral deposits that might have hardened around the seal.
Water Leaks From the Filter Housing
A leak usually means the filter isn’t seated properly or the rubber seals are damaged. Remove the filter and check the seals on both the filter and the housing. Look for cracks or deformation. If the seals look fine, reinstall the filter, making sure it’s twisted all the way in until you feel resistance.
The New Filter Won’t Go In
This typically happens when you’re trying to push the filter into the housing at the wrong angle. The threading needs to align perfectly. Try inserting the filter at a slight angle, then straightening it as you twist clockwise. If the housing seems blocked, there might be debris inside—remove the filter and clean the housing thoroughly.
No Water Coming Out After Installation
After installing a new filter, air gets trapped in the system. Run the water dispenser for several minutes to pur