How to Clean Toilet Water Tank the Right Way: A Complete Guide
Why Cleaning Your Toilet Tank Matters More Than You Think
Your toilet tank is essentially a reservoir that holds water between flushes. Over time, mineral deposits, rust, mold, and bacteria can accumulate inside. This isn’t just an aesthetic problem—it’s a functional one. When your tank gets too dirty, several things can happen.
The Performance Problem
A dirty tank can cause your toilet to run longer than necessary. You know that sound when your toilet keeps running after you flush? That’s often a sign that sediment has built up inside the tank, affecting how the fill valve and flapper operate. It’s like trying to run a marathon in muddy shoes—everything just works harder and less efficiently.
The Health and Hygiene Factor
Bacteria and mold love damp environments, and your toilet tank is basically paradise for them. While your tank doesn’t directly touch your drinking water in most cases, you’re still coming into contact with whatever’s growing in there every time you flush. That’s reason enough to keep it clean.
Water Quality and Appearance
Discoloration, sediment, and rust particles can make their way into your toilet bowl, leaving stains and making the water look less than inviting. Nobody wants to use a toilet that looks dirty, even if the dirt is technically invisible.
Understanding What’s Inside Your Toilet Tank
Before you start cleaning, it helps to understand what you’re working with. Your toilet tank contains several components, and knowing what they are will make the cleaning process easier.
The Main Components
- Fill valve: This controls the water entering the tank
- Flapper: The rubber seal that lets water flow into the bowl
- Float: The mechanism that tells the tank when it’s full
- Overflow tube: Prevents the tank from overflowing
- Tank walls: Where mineral deposits and rust typically accumulate
These components work together in a delicate balance. When sediment builds up, it can interfere with how they function, which is why cleaning is so important.
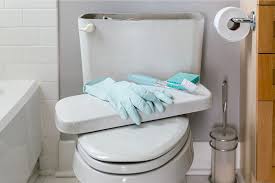
Gathering Your Tools and Materials
You don’t need fancy equipment to clean your toilet tank. In fact, most people have everything they need at home already. Let me break down what you’ll want to gather before you start.
Essential Tools
- Rubber gloves (definitely wear these)
- A scrubbing brush with stiff bristles
- An old toothbrush for detailed work
- A bucket or container for water
- Rags or sponges
- Safety glasses (optional but recommended)
Cleaning Solutions You Can Use
Here’s where you have options. You can go with commercial cleaners, or you can use things from your pantry.
Natural Options
- White vinegar: Excellent for mineral deposits
- Baking soda: Great for scrubbing and deodorizing
- Lemon juice: The acid breaks down stains naturally
- Dish soap: Helps cut through grime
Commercial Options
- Tank cleaning tablets
- Toilet bowl cleaners
- Rust removers (for stubborn mineral deposits)
My personal recommendation? Start with white vinegar and baking soda. They’re safe, effective, and you probably already have them at home.
The Step-by-Step Process to Clean Your Toilet Tank
Now we get to the actual cleaning. Don’t worry—it’s simpler than you might think. Just follow these steps in order, and you’ll have a sparkling clean tank.
Step 1: Turn Off the Water Supply
This is crucial. Look behind your toilet for a small valve on the water line. Turn it clockwise until it stops. This prevents water from refilling your tank while you’re working. You should also flush the toilet to empty the tank completely.
Step 2: Remove Loose Debris
Put on your rubber gloves and take a look inside the tank. You might see sediment on the bottom or debris floating around. Use a small container to carefully scoop out any loose particles. This step makes everything else easier.
Step 3: Apply Your Cleaning Solution
If you’re using vinegar, pour about two cups into the tank. Let it sit for about thirty minutes. This gives the acid time to work on mineral deposits and stains. If you’re using a commercial cleaner, follow the product instructions.
Step 4: Scrub the Walls
Using your scrubbing brush, work around the inside walls of the tank. Pay special attention to areas where you see discoloration or buildup. Don’t be gentle—these brushes are made to handle it. Use your old toothbrush to get into tight spaces and corners.
Step 5: Clean the Components
Gently scrub the fill valve, flapper, and float mechanism with your brush. Be careful not to damage these parts, as they’re essential to your toilet’s function. Just remove any visible buildup and sediment.
Step 6: Drain and Rinse
Using your bucket, carefully pour water into the tank to rinse away all the cleaning solution and loosened debris. You might need to do this several times until the water runs clear. This is important because you don’t want cleaning residue remaining in your tank.
Step 7: Turn the Water Back On
Once you’re satisfied with the cleanliness, turn the water valve back on counterclockwise. Let the tank fill completely, then flush a few times to ensure everything is working properly.
Tackling Stubborn Stains and Mineral Deposits
Sometimes, regular cleaning isn’t enough. If you’ve got stubborn stains or heavy mineral buildup, you need a stronger approach.
The Vinegar and Baking Soda Combo
For really tough deposits, try this method: Pour your vinegar into the tank and let it sit for an hour. Then, sprinkle baking soda directly on the wet surfaces. The combination creates a fizzing action that helps break down mineral deposits. Scrub thoroughly and rinse.
Using Rust Removers
If you’re dealing with rust stains, you might need a commercial rust remover. These products are specifically designed to dissolve rust without damaging your tank. Follow the instructions carefully and make sure your space is well-ventilated.
The Overnight Soak Method
For heavy buildup, turn off the water and let a strong cleaning solution sit in the tank overnight. Sometimes, giving these deposits extra time to soften makes them much easier to remove. Just make sure you rinse extremely thoroughly the next day.
When You Should Call a Professional Plumber
While DIY tank cleaning works for most situations, there are times when you should bring in a professional.
Signs You Need Professional Help
- Your toilet continuously runs no matter what you do
- You see cracks or damage inside the tank
- There’s a leak coming from the tank itself
- You notice strange discoloration or buildup that won’t come clean
- Your tank is making unusual noises
A professional plumber has specialized tools and knowledge that can handle issues beyond simple cleaning. They can diagnose underlying problems and fix them properly.
Prevention: Keeping Your Tank Clean Between Cleanings
Once you’ve done the hard work of cleaning your tank, wouldn’t it be nice to keep it that way? Here are some strategies for maintaining that cleanliness.
Use Tank Cleaning Tablets
These small tablets sit in your tank and slowly release cleaning agents with each flush. They’re great for preventing buildup between deep cleanings. Just drop one in and forget about it.
Install a Water Filter
If you have hard water, mineral deposits are going to be a recurring problem. Consider installing a whole-house water filter or at least a filter on the line feeding your toilet. Softer water means less sediment buildup.
Regular Inspections
Check your tank occasionally. Peek inside every few months to see if debris is accumulating. Catching problems early makes them easier to address.
Keep the Lid On
This might seem obvious, but keeping your tank lid in place prevents dust and debris from falling in. It also keeps kids and pets out of the water.
Common Mistakes People Make When Cleaning Toilet Tanks
Even with the best intentions, people sometimes approach tank cleaning the wrong way. Let me share what not to do.
Mistake 1: Using the Wrong Chemicals
Never mix bleach with ammonia or vinegar. The chemical reaction creates toxic fumes that can seriously harm you. If you’re going to use commercial cleaners, read the label and make sure you’re not mixing anything dangerous.
Mistake 2: Forgetting to Turn Off the Water
I mentioned this earlier, but it bears repeating. If you don’t shut off the water supply, your tank will refill while you’re cleaning, making the job impossible and potentially wasting a lot of water.
Mistake 3: Being Too Aggressive with Components
Your flapper and fill valve are important. Don’t scrub them so hard that you damage them. Gentle but thorough is the way to go.
Mistake 4: Not Rinsing Thoroughly
Cleaning solution residue can affect how your toilet functions. Make sure you rinse multiple times until the water is clear.
Mistake 5: Ignoring Safety Precautions
Always wear gloves and consider wearing safety glasses. You’re working with water and chemicals, even if they’re mild ones. Better safe than sorry.
Additional Tips for Optimal Toilet Tank Health
Beyond cleaning, there are other things you can do to keep your toilet tank in great condition.
Monitor Water Quality
If your home has hard water, you’re going to see mineral buildup more frequently. Knowing this helps you plan more regular cleaning schedules.
Address Leaks Immediately
A leaking flapper means water is constantly running, which can cause minerals to concentrate and buildup to accelerate. Fix leaks as soon as you notice them.
Use Appropriate Toilet Paper
Believe it or not, some toilet papers are harder on your plumbing system than others. Using septic-safe, dissolving toilet paper reduces the strain on your entire system.
Conclusion
Cleaning your toilet tank might not be the most glamorous home maintenance task, but it’s definitely one of the most important. By following the steps I’ve outlined, you can keep your toilet running smoothly and efficiently for years to come. Remember, you don’t need expensive equipment or harsh chemicals. Simple tools and household items like vinegar and baking soda often work just as well as anything you’d buy at the store.
The key is consistency. Regular maintenance prevents major problems from developing. Make it part of your home care routine, maybe twice a year, and you’ll avoid dealing with serious issues. Your toilet is one of the hardest working fixtures in your home, and it deserves a little appreciation in the form of regular cleaning.
So go ahead—gather your supplies, turn off that water valve, and give your toilet tank the attention it deserves. You’ll be amazed at the difference a clean tank makes in how your toilet performs. Plus, you’ll have the satisfaction of knowing you tackled a task many people avoid. That’s something to be proud of.
Frequently Asked Questions About Toilet Tank Cleaning
How often should I clean my toilet tank?
Most people should aim to clean their toilet tank two to three times per year. However, if you have hard water or notice buildup more frequently, you might want to clean more often. Using maintenance tablets between deep cleanings can help extend the time between major cleaning sessions.
Is it safe to use bleach in my toilet tank?
Bleach can be used in small amounts for disinfecting, but never mix it with other cleaners, especially vinegar or ammonia. Always ensure good ventilation and follow product instructions carefully. If you’re concerned about safety, stick with natural options like vinegar and baking soda, which are equally effective for most cleaning jobs.
What’s that black stuff growing in my toilet tank?
That’s likely mold or mildew. It thrives in the moist, dark environment of your tank. Cleaning it out with vinegar or a commercial tank cleaner will remove it, but using maintenance tablets regularly helps prevent it from coming back. Make sure your bathroom has adequate ventilation to reduce overall moisture.
Can I clean my toilet tank without turning off the water?
Technically, you could, but I strongly don’t recommend it. Turning off the water gives you a dry workspace and prevents the tank from refilling while you’re working. It also saves water and makes the job much easier and more effective. It only takes a few seconds to shut off the valve.
Will cleaning my toilet tank help if my toilet keeps running?
Often, yes. Sediment and mineral buildup can interfere with the flapper and fill valve, causing the toilet to run continuously. Cleaning usually solves this problem. However, if the toilet still runs after cleaning, you might need to replace the flapper or fill valve,