How to Do a Water Change Aquarium the Right Way: A Complete Guide for Fish Keepers
If you’re reading this, chances are you’ve got an aquarium sitting in your living room, and you’re wondering just how often you should be changing that water. Maybe you’re a brand-new aquarium owner, or perhaps you’ve had your tank running for years but never quite felt confident about your water change routine. Either way, you’re in the right place. Let me tell you—a proper water change is the single most important maintenance task you can perform for your aquarium, and it’s far easier than you might think.
Think of your aquarium like a tiny ecosystem. Just like you wouldn’t want to live in a room where nobody ever opens the windows or cleans the air, your fish definitely don’t want to hang out in stagnant, dirty water. Water changes are basically giving your tank a fresh breath of air. In this guide, I’m going to walk you through everything you need to know about performing water changes the right way—from the tools you’ll need to the timing that works best for your specific setup.
Understanding Why Water Changes Matter So Much
Before we dive into the how, let’s talk about the why. Your aquarium is home to fish, plants, and beneficial bacteria. Over time, fish waste, uneaten food, and decaying plant matter accumulate in the tank. This creates nitrates and other harmful compounds that gradually build up no matter how good your filter is. A filter can only do so much—it’s not a magic solution.
Regular water changes dilute these harmful substances and remove them from the tank entirely. It’s like refreshing your water supply with clean, fresh H2O. Without consistent water changes, you’ll notice your fish becoming stressed, growth slowing down, and diseases becoming more common. Your water also becomes cloudier, smells worse, and generally becomes an unpleasant environment for aquatic life.
The Role of Nitrification and Waste Accumulation
Here’s something fascinating about aquarium chemistry: your filter works to convert toxic ammonia into nitrites, and then nitrites into nitrates through a process called nitrification. Nitrates are less toxic than ammonia or nitrites, but they still accumulate. The only real way to remove nitrates? You guessed it—water changes. No filter on the market can eliminate nitrates; they can only reduce the rate at which they build up.
How Often Should You Change Your Aquarium Water?
This is the question I get asked most often, and honestly, there’s no one-size-fits-all answer. It depends on several factors specific to your setup. Let me break it down for you.
Factors That Determine Water Change Frequency
- Tank size—smaller tanks need more frequent changes
- Number of fish—more fish means more waste
- Type of fish—some species are messier than others
- Filtration capacity—better filters allow longer intervals
- Live plants—they help consume waste and nutrients
- Feeding habits—overfeeding increases waste
General Guidelines for Different Tank Types
For most standard community aquariums, a good rule of thumb is to change about 25 to 30 percent of your water every week. This gives you a nice balance between maintaining beneficial bacteria (which live on surfaces and in your substrate) while still removing accumulated waste.
If you’ve got a heavily stocked tank with large, messy fish like goldfish or plecos, you might need to do 50 percent water changes twice a week. On the flip side, if you’re running a lightly stocked planted tank with excellent filtration, you might get away with 20 percent changes every two weeks. The key is observing your tank and adjusting based on what you see.
Gathering Your Water Change Supplies
You don’t need an expensive arsenal of equipment to perform a quality water change. In fact, you probably have most of what you need already lying around your house. Let me walk you through what makes the process smooth and efficient.
Essential Tools You’ll Need
- A bucket or siphon—for removing old water
- Another bucket—for holding fresh water
- A gravel vacuum (optional but highly recommended)—removes debris from substrate
- A thermometer—ensures water temperature matches
- Water conditioner—removes chlorine and chloramine
- Towels or rags—for spills and cleanup
- A timer or watch—helps you pace yourself
Choosing the Right Siphon
Let me be honest—a basic siphon tube is one of the cheapest and most effective tools you can buy. It’s literally just a tube that uses gravity and air pressure to pull water out of your tank. A gravel vacuum is essentially a siphon with a wider intake that lets you clean the substrate at the same time. If you’re just starting out, grab a simple siphon first. Once you’re comfortable with water changes, upgrade to a gravel vacuum when your budget allows.
Preparing Your Fresh Water Before Adding It
This step separates aquarists who keep healthy fish from those who constantly struggle with problems. Never, and I mean never, add untreated tap water directly to your aquarium. Tap water contains chlorine and chloramine, which are added by your municipality to make the water safe for human consumption. These chemicals will kill your beneficial bacteria and harm your fish.
The Water Conditioning Process
First, fill your bucket with fresh tap water and treat it with a water conditioner. These products chemically bind to chlorine and chloramine, neutralizing them instantly. Follow the dosage instructions on whatever brand you choose—they’re usually quite simple. Most conditioners also contain additives that help protect fish slime coats and reduce stress.
Matching Water Temperature
Here’s where a lot of people mess up. If your fresh water is significantly colder or warmer than your tank water, it’ll stress your fish. I’ve seen fish go into shock from sudden temperature changes. Use a thermometer to check your tank temperature, then adjust your fresh water accordingly. Ideally, your fresh water should be within one or two degrees of your tank temperature. If your tap water is too cold, let it sit at room temperature for a bit, or use warm (not hot) water to bring it closer to your tank’s temperature.
Step-by-Step Water Change Process
Alright, now we’re getting into the actual mechanics of doing a water change. I’m going to walk you through this like you’re doing it for the first time, but even if you’ve been keeping fish for years, there might be a tip or two that improves your routine.
Step One: Turn Off Your Equipment
Before you start removing water, turn off your filter, heater, and any air pumps. Why? Because you don’t want your filter running dry or your heater heating air instead of water. This protects your equipment and keeps it running smoothly for years to come.
Step Two: Remove the Old Water
Using your siphon or gravel vacuum, start removing water from the tank. If you’re using a gravel vacuum, push it gently into the substrate as you work. You’ll see dirt and debris get sucked up—that’s exactly what you want. Work around the tank, paying special attention to areas where waste tends to accumulate, like behind decorations and under plants.
Remove the percentage of water you’ve decided on. If you’re doing a 25 percent change on a 40-gallon tank, you’re removing 10 gallons. Keep going until you’ve removed the right amount.
Step Three: Clean the Tank Glass While You’re At It
While the water level is lower, this is the perfect time to wipe down the inside of your tank glass. Use an algae scraper or even a soft cloth to remove any buildup. This takes just a minute and makes your tank look crystal clear.
Step Four: Add Your Fresh Water Slowly
Now comes the moment of truth. Slowly pour your conditioned, temperature-matched water back into the tank. Don’t just dump it in all at once. Pour it gently, maybe over a small decoration or piece of driftwood to break the flow. This prevents disturbing your substrate, uprooting plants, and stressing out your fish. Taking five or ten minutes to add the water is far better than rushing and causing unnecessary turbulence.
Step Five: Turn Everything Back On
Once your water level is back to normal, turn your filter and heater back on. Check that everything is running smoothly. Your filter might make a little burbling sound as it gets going again—that’s completely normal.
Special Considerations for Different Tank Setups
Not all aquariums are created equal, and what works perfectly for a 20-gallon community tank might not be ideal for a 100-gallon planted setup or a small betta bowl. Let me address some specific scenarios you might be dealing with.
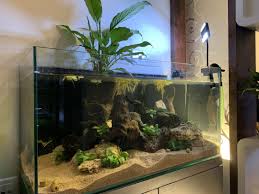
Water Changes in Planted Tanks
If you’ve got live plants, you might think you need to change water less often because plants consume nitrates. You’re partially right, but don’t skip water changes entirely. Plants do help, but they’re not miracle workers. Continue with regular water changes, but you might be able to stretch the interval slightly longer or reduce the percentage changed. Plants also benefit from fresh water and the trace minerals it contains, so don’t deprive them of regular refreshes.
Small Tank and Betta Bowl Challenges
Small tanks are deceivingly difficult. A five-gallon betta tank or a tiny desktop aquarium will accumulate waste much faster than a large tank because there’s less water to dilute the waste. You might need to do 50 percent water changes twice a week, or even perform smaller changes more frequently. The smaller your tank, the more often you’ll need to maintain it. That’s just the reality of keeping fish in confined spaces.
Saltwater and Brackish Tank Adjustments
If you’re keeping saltwater or brackish fish, you need to match not just temperature but also salinity. Use a hydrometer or refractometer to test the salinity of your fresh water before adding it. For saltwater tanks, you’ll typically mix marine salt into your fresh water before it goes into the tank. This adds an extra step, but the process remains fundamentally the same.
Common Mistakes to Avoid During Water Changes
I’ve made most of these mistakes myself, so I’m sharing them with you so you don’t have to repeat my learning curve. Let’s talk about what not to do.
Using Untreated Tap Water
I mentioned this before, but it bears repeating because it’s the number one mistake I see. Always treat your water. Always. No exceptions. Those chlorine and chloramine molecules are serious business, and they will mess with your beneficial bacteria and stress your fish.
Changing Too Much Water Too Quickly
Doing a massive water change of 50 or 75 percent can shock your system. Yes, occasionally you might need a large water change if something goes wrong, but regular maintenance should be gradual and gentle. Think of it like slowly adjusting to a new environment rather than being thrown into it.
Ignoring Water Temperature
Cold water shocking your fish is a real problem. I’ve seen fish develop diseases and behavioral problems after sudden temperature drops. Spend the extra minute to make sure your water temperature is right.
Forgetting to Turn Off Equipment
Running your filter or heater dry can damage them permanently. It’s such a simple thing to remember, but it’s easy to overlook when you’re focused on the water removal. Make it a habit—first thing you do is turn off your equipment.
Cleaning Your Filter Media During Water Changes
Here’s a pro tip: never clean your filter media with tap water during a water change. That’ll kill all your beneficial bacteria. If you need to clean it, use water from your old tank water that you just removed. Or better yet, do filter maintenance on a different day entirely.
Tools That Make Water Changes Easier
As you get more experienced with aquarium keeping, you might want to invest in some tools that streamline the process. These aren’t absolutely necessary, but they do save time and effort.
Aquarium Water Changers
There are powered water change systems available that automate a lot of the work. They simultaneously remove old water and add new water, which is incredibly convenient if you’ve got large tanks. However, they’re pricey, so they’re more of a luxury than a necessity.
Gravel Vacuums with Flow Control
Some gravel vacuums have valves that let you control water flow. This makes it easier to vacuum slowly without removing too much water too quickly. It’s a nice feature if you’re doing frequent maintenance.
Water Pumps for Refilling
If you’ve got a large tank and don’t want to carry heavy buckets, a submersible pump can move fresh water from a large container into your tank. It takes the physical strain out of the process.
Troubleshooting Water Change Problems
Sometimes things don’t go according to plan. Let me help you work through common issues.
Cloudy Water After a Water Change
If your water gets cloudy right after a change, it’s usually a bacterial bloom. This happens because you’ve introduced new nutrients and slightly disrupted the balance. It should clear within a day or two. Don’t panic or keep changing water—that’ll just make it worse.
Fish Acting Stressed After Water Changes
Stressed fish behavior right after a water change typically means the water temperature was off. Check your thermometer and make sure future batches of fresh water match more closely. If fish remain stressed for more than a few hours, something else is wrong—check your water parameters or whether you’ve accidentally added untreated tap water.
Difficulty Siphoning Water Out
If your siphon won’t start, make sure both ends of the tube are submerged in water before you try to create the siphon. Some people fill the tube with water first, then cover both ends with their fingers while positioning it. That guarantees it’ll work.
Advanced Water Change Strategies for Experienced Keepers
Once you’ve got the basics down, there are some advanced techniques that can help you maintain even better water quality.
The Two-Bucket Method for Planted Tanks
Some experienced aquarists who keep heavily planted tanks use a technique where they remove water into one bucket, then add fresh water from another simultaneously. This maintains water level and flow, which plants sometimes appreciate. It’s more work, but it produces excellent results.
Scheduled Maintenance Logs
Keeping a simple log of when you do water changes and what the tank conditions look like helps you spot patterns. Over time, you’ll understand exactly how often your specific setup needs maintenance. You might discover that you need changes more frequently in summer than winter, for example.
Conclusion
Water changes aren’t complicated, but they are absolutely essential to keeping a healthy aquarium. I’ve covered everything from why water changes matter to the specific steps you need to


