How to Draw Water Slides: A Complete Guide for Beginners
Have you ever looked at those magnificent water slides twisting and turning through the air and thought, “I wish I could draw that”? Well, you’re in luck. Drawing water slides might seem intimidating at first, but I’m here to tell you that with the right techniques and a bit of practice, anyone can master this skill. Whether you’re an aspiring artist, an architect, or just someone who wants to impress their friends with cool drawings, this guide will walk you through everything you need to know.
In this article, I’ll break down the entire process of drawing water slides from start to finish. We’ll explore the foundational concepts, dive into the specific techniques, and work through some practical exercises that’ll have you sketching impressive water slides in no time. Let’s get started.
Understanding Water Slide Fundamentals
Before you put pen to paper, it’s crucial to understand what makes a water slide visually interesting and structurally believable. Think of water slides as three-dimensional tubes or channels that twist, turn, and flow from a higher point to a lower point. They’re not just random squiggly lines—they follow specific principles of physics, perspective, and engineering.
What Makes a Water Slide Unique
Water slides are fundamentally different from drawing regular slides or ramps. The key distinction is that water slides have a continuous flow of water moving through them. This means you’ll need to consider how water interacts with the surface, how it creates splashes, and how light reflects off the water itself. The best water slide drawings capture the sense of movement and energy that’s inherent to these attractions.
The Three Essential Components
Every water slide drawing should include these three core elements:
- The structure itself—the physical shape and form of the slide
- The water flowing through it—showing movement and splash
- The surrounding environment—the sky, ground, and surrounding structures
When you focus on these three areas, your drawing will feel complete and dynamic rather than flat and lifeless.
Gathering Your Materials and Tools
You don’t need to be fancy about this. In fact, the best way to learn is often with simple materials. Let me tell you what I recommend for getting started.
Essential Drawing Supplies
Start with the basics. You’ll want a good pencil set that includes both hard and soft leads. Hard pencils like HB or 2H are perfect for initial sketches, while softer ones like 2B, 4B, and 6B are great for adding depth and shadow. An eraser is absolutely essential—don’t underestimate how important it is to have a good quality eraser that doesn’t damage your paper.
Next, grab some quality paper. Regular sketch paper works fine, but if you want to take it seriously, consider getting some thicker, higher-quality paper that can handle erasing and layering without falling apart. A ruler or straightedge will help you create clean lines, especially when drawing the structural elements of the slide.
Optional but Helpful Tools
If you want to elevate your drawings, consider adding these to your toolkit:
- Blending stumps for smooth shading transitions
- Colored pencils for adding vibrant colors to your finished work
- Markers for bold outlines and dramatic effects
- A compass for drawing circular curves and loops
- Tracing paper for refining sketches
Don’t feel pressured to buy everything at once. Build your collection gradually as you discover what works best for your personal style.
Mastering Basic Perspective and Structure
Now we’re getting into the meat of things. Understanding perspective is absolutely critical when drawing water slides because they exist in three-dimensional space. Without proper perspective, your slide will look flat and unconvincing.
One-Point Perspective for Linear Slides
Imagine you’re looking straight down a long, straight water slide. Everything appears to converge toward a single point in the distance. This is one-point perspective, and it’s perfect for drawing slides that go relatively straight ahead. Start by establishing your vanishing point—the spot where all parallel lines converge. Then, sketch the edges of your slide converging toward this point. The closer the edges get to the vanishing point, the more depth you’re creating.
When using one-point perspective, make sure your horizontal lines stay horizontal and your vertical lines stay vertical. It’s your diagonal lines that should converge toward the vanishing point. This creates the illusion that your slide is extending away from the viewer.
Two-Point Perspective for Dynamic Angles
Two-point perspective is where things get interesting. This is what you’ll use when your slide is twisted at an angle, showing both width and depth simultaneously. Two-point perspective uses two vanishing points, typically on opposite sides of your paper. This technique creates more dynamic, interesting drawings because it shows the slide from a more engaging angle.
To use two-point perspective effectively, establish both vanishing points first. Then sketch your basic slide structure using lines that converge toward each point. This takes a bit more practice than one-point perspective, but it creates far more compelling drawings.
Creating a Solid Foundation Sketch
Before you worry about water or details, focus on getting the basic structure right. Lightly sketch the outer edges of your slide first. Don’t press hard—you want to be able to erase easily. Draw the slide as a series of connected cylindrical or tubular shapes. Think of it like drawing a snake that winds and curves through space.
Pay attention to where the slide rises and falls. Water slides typically start high and end low, but they rarely descend in a straight line. They usually curve, twist, and sometimes even loop. Sketch these movements naturally, allowing the slide to follow the laws of physics while still being interesting and fun.
Defining the Water Slide Shape
Understanding Tubular and Flume Designs
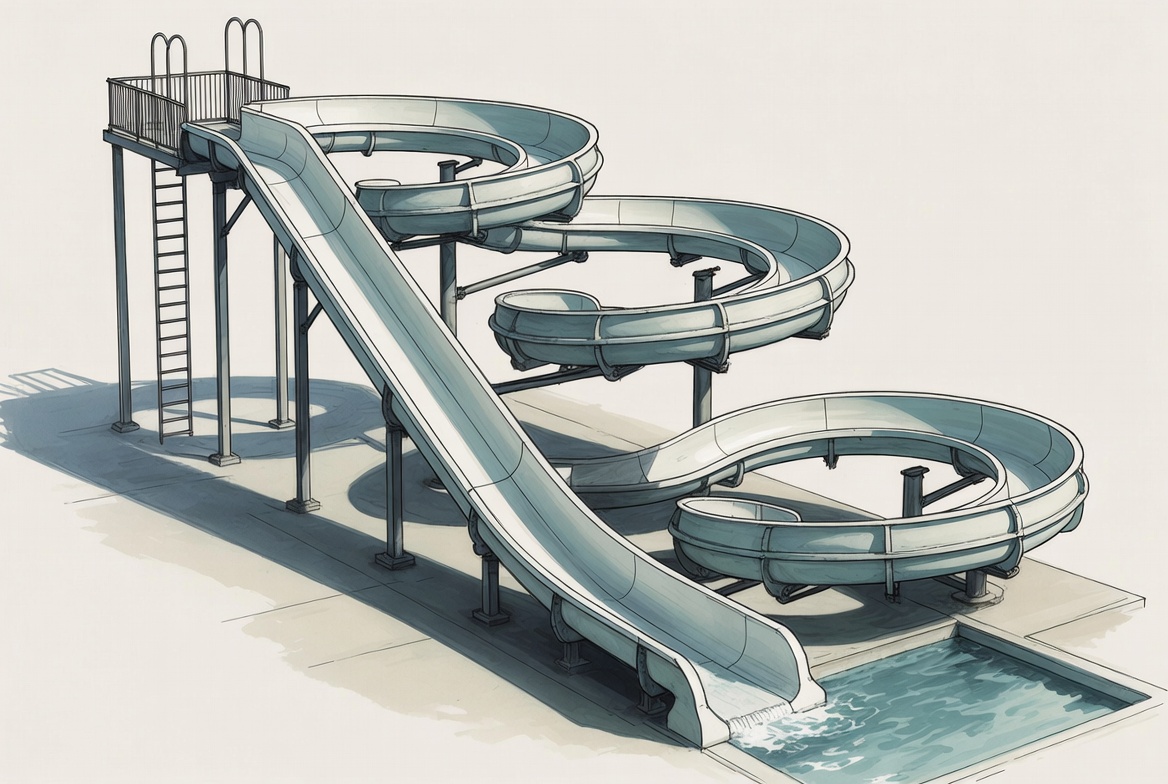
Water slides typically come in two main designs: tubular slides and flume slides. Tubular slides are enclosed tubes where the rider travels through a covered channel. Flume slides are open troughs where the rider sits in an inner tube or sits directly on the slide. When you draw, it helps to decide which type you’re depicting because it changes how you’ll render the structure.
For tubular slides, you’ll show the thickness of the tube and potentially the opening where riders enter and exit. For flume slides, you’ll show the open top and the interior walls. Both offer different visual opportunities, so choose based on what interests you.
Adding Curves and Twists
This is where your drawing becomes exciting. Real water slides aren’t boring straight lines—they’re full of curves and twists that create the thrill. When adding these elements, think about how a tube would naturally bend and curve in three-dimensional space. You might draw spiral sections, sharp turns, or even loop-de-loops if you’re feeling ambitious.
To draw curves convincingly, use light guidelines first. Sketch the path your slide will follow, then build the tubular structure around that path. Remember that curves that go away from you appear smaller, while curves coming toward you appear larger. This perspective principle will make your curves look three-dimensional and believable.
Rendering Water Movement and Flow
Now comes the part that really brings your drawing to life—adding the water. This is what transforms a drawing of a slide into a drawing of a water slide experience.
Showing Water Direction and Movement
Water follows the shape of the slide, so it won’t flow in random directions. Track the path of your slide with your eyes and imagine water flowing through it. Use flowing lines within the slide to show the water’s movement. These lines should follow the direction of the slide’s path, whether that’s downward, through a turn, or even briefly upward as the slide crests.
Don’t just draw one thin line of water. Real water takes up space and volume. Show the water filling a good portion of the slide’s interior. Add multiple flow lines that curve and bend with the slide’s shape. These lines create the illusion of water actively moving through the structure.
Creating Splashes and Spray
Water doesn’t just flow smoothly—it splashes, sprays, and creates dynamic visual effects. This is where you can really make your drawing pop. Where water exits the slide or hits turns sharply, add splashing effects. Draw irregular, energetic lines radiating outward from impact points. These splashes should look organic and chaotic, not perfectly geometric.
For spray, use softer, lighter marks that suggest mist in the air. You might use stippling (small dots) or light, wispy lines to show water particles suspended in the air. This adds atmosphere and movement to your drawing.
Adding Shadows Within the Water
Water isn’t transparent in drawings—you need to show its depth and volume through shading. Darker areas within the water suggest depth and shadows cast by the slide’s structure. Lighter areas show where light reflects off the water’s surface. Use your softer pencils to add these shades gradually, building up depth without making the water look murky.
Shading and Adding Depth
Understanding Light Sources
Before you start shading, decide where your light source is coming from. Is the sun directly overhead? Coming from the left? Behind the slide? Your choice affects every shadow you’ll draw. Consistent lighting makes your drawing look professional and believable. Choose one light source and stick with it throughout your drawing.
Shading the Slide Structure
The side of the slide facing your light source will be lighter, while the far side will be darker. Create a smooth gradient between light and dark areas using your pencils. Blend with a blending stump or even your finger for smooth transitions. The interior of tubular slides should be darker than the exterior because less light reaches inside.
Don’t make your shading uniform. Real objects have subtle variations in tone. Add slightly darker areas where sections of the slide overlap or where shadows naturally fall. This creates visual interest and makes your drawing feel more three-dimensional.
Highlighting the Water
Water reflects light, so leave some bright areas completely white. These highlights show where light bounces off the water’s surface. Typically, highlights appear where the water is moving fastest or where the surface is most exposed to light. Don’t overdo it—too many highlights make water look fake. Strategic placement of just a few bright spots creates a realistic effect.
Adding Details and Finishing Touches
Including Riders and Human Scale
Adding people to your water slide drawings gives a sense of scale and tells a story. You could draw someone entering the slide, traveling through it, or splashing down at the end. Even simple stick figures or basic human shapes work—they don’t need to be anatomically perfect. People add life to your drawing and make it more relatable and engaging.
Drawing the Surrounding Environment
Water slides don’t exist in a vacuum. They’re part of a larger water park environment. Consider adding:
- A bright, clear sky or dramatic cloud formations
- A pool or catch basin at the bottom of the slide
- Other rides or structures in the background
- Support structures, ladders, or ramps leading to the top
- Landscaping elements like palm trees or tropical plants
The environment you create helps establish mood and context. A sunny, tropical setting feels different from an overcast day. Choose your background elements to enhance your overall composition.
Fine-Tuning Your Lines
Once you’ve established all your shading and details, go back and refine your outlines. Use a slightly darker pencil or pen to strengthen the edges of your slide and important features. This makes your drawing pop off the page. Don’t outline everything equally—vary the line weight. Closer objects have darker, more defined edges, while distant objects have softer, lighter edges.
Common Mistakes to Avoid
Losing Perspective Consistency
The most common mistake beginners make is abandoning their perspective system halfway through. They start with one-point perspective, then randomly draw lines that don’t follow that perspective. Stay committed to your chosen perspective system throughout the drawing. If you need to change perspective, do so intentionally and consistently.
Ignoring Water Physics
Water flows downward due to gravity. It doesn’t defy physics to make your drawing look interesting. Even when your slide goes upward temporarily, the water still wants to flow down. Show this struggle between gravity and the slide’s direction. This realistic tension actually makes drawings more interesting, not less.
Over-Complicating the Water
Sometimes less is more with water. Too many flow lines, splashes, and effects can make your drawing look chaotic and confusing. Start simple and add details gradually. Step back frequently and ask yourself if the additions are improving the drawing or cluttering it.
Forgetting About Value Contrast
If everything in your drawing is medium gray, it’ll look flat. Create contrast by making some areas very light and others very dark. This contrast is what makes drawings “pop” and feel dimensional. Don’t be afraid to use the full range from white paper to your darkest pencil shades.
Practice Exercises to Build Your Skills
Simple Slide Exercise
Start by drawing the simplest possible water slide—a straight slide with no curves. Focus solely on getting the perspective right and shading the structure properly. This foundational exercise teaches you the basics without overwhelming you with complexity.
Curved Slide Challenge
Once you’re comfortable with simple slides, draw one with at least one curve or turn. This forces you to think about how perspective changes as the slide curves away from you. Take your time with this exercise—there’s no rush.
Full Environment Drawing
Finally, draw a complete water park scene with your water slide as the centerpiece. Include other elements, people, the sky, and ground. This comprehensive exercise ties together all the skills you’ve learned.
Using Reference Materials Effectively
I strongly recommend gathering reference photos of real water slides before you draw. Look at how water actually behaves, how slides are constructed, and how light interacts with the surfaces. You can find plenty of images online. Study them carefully, but don’t copy them directly. Instead, use them to understand the principles, then create your own unique interpretation.
References are learning tools, not shortcuts. When you understand what makes a slide look real, you can draw one from imagination that’s far more convincing than a direct copy could ever be.
Progressing to Advanced Techniques
Experimenting with Color
Once you’re comfortable with pencil, try adding color to your water slide drawings. Water is typically blue or turquoise, but it can reflect surrounding colors. The sky affects the water’s appearance. Experiment with colored pencils or markers to add vibrancy to your work. Start with a solid pencil foundation, then layer colors on top.
Creating Dynamic Compositions
Advanced artists think about composition—the overall arrangement of elements in the drawing. Experiment with different viewpoints. Draw slides from unusual angles. Show multiple slides in one drawing. Play with the rule of thirds, placing important elements off-center for more interesting compositions. These compositional choices make the difference between a good drawing and a great one.
Conclusion
Learning to draw water slides is an achievable goal that combines foundational art skills with specific knowledge about these unique structures. By understanding perspective, mastering the tubular structure, effectively rendering water movement,