

How to Install Your Vissani Portable Air Conditioner
Installing your new Vissani portable air conditioner is a straightforward process. You can get it set up in under an hour with just a few simple steps. Most units come with a window kit that makes venting easy for most standard windows.
Setting up a portable AC correctly ensures it cools your space efficiently. Proper installation also helps to prevent drafts and leaks. We found that taking a few extra minutes to ensure a good seal can make a big difference in performance.
- Gather your Vissani AC and included window kit.
- Assemble the window slider and exhaust hose.
- Connect the hose to the AC unit.
- Place the unit near your window.
- Secure the exhaust hose in the window.
Ready to beat the heat? Let’s walk through exactly how to install your Vissani portable air conditioner step by step.
Setting Up Your Vissani Portable Air Conditioner
Installing your new Vissani portable air conditioner is simpler than you might think. You’ll have it up and running to cool your room in no time. We found that most Vissani units are designed for **easy DIY installation**. Most of the work involves connecting the exhaust hose to your window.
What’s Included in Your Vissani Portable AC Kit
Before you start, let’s make sure you have everything. Your Vissani portable AC should come with the main unit, an exhaust hose, and a window vent kit. This kit typically includes an adjustable window slider and some foam sealing strips. You’ll also find a power cord and a remote control. Make sure to check your user manual for a complete list. Having all the **parts ready** will make the setup go smoothly.
Assembling the Exhaust System
The exhaust hose is what lets your portable AC push hot air out of your room. It’s pretty straightforward to assemble. You’ll usually need to connect two sections of the hose together. They often twist or snap into place. Once connected, you’ll attach one end to the back of your Vissani unit. There’s usually a specific port for this. It will likely **click or lock securely**.
Attaching the Hose to the Vissani Unit
On the back of your Vissani portable air conditioner, you’ll see a large exhaust port. Take the assembled exhaust hose and line up the connector with this port. Most Vissani models use a simple twist-and-lock mechanism. You might hear a click when it’s properly secured. Give it a gentle tug to make sure it won’t pop off. This connection needs to be firm to prevent hot air from escaping back into your room.
Connecting the Other End to the Window Kit
The other end of the exhaust hose connects to the window vent kit. This kit is designed to fit into your window opening. It has a fitting that the hose attaches to. Again, this is usually a simple push or twist connection. Ensure it’s a snug fit. We found that a loose connection here is a common reason for reduced cooling efficiency.
Preparing Your Window for Installation
Now, let’s get your window ready. You’ll need to open your window to a size that accommodates the window vent kit. Most Vissani kits are designed for sliding windows, either horizontally or vertically. You might need to adjust the length of the window slider panel. Measure the opening you’ll need. Then, adjust the panel by extending or retracting it until it fits snugly.
Installing the Window Slider Kit
Place the assembled window slider panel into the open window frame. Make sure it’s oriented correctly so the exhaust hose can connect easily. You might need to wedge it into place. Many kits come with extra foam strips. These are for sealing any gaps around the panel. Good sealing is key to preventing warm air from entering your room. We found that taking the time to apply these seals makes a noticeable difference.
Securing the Window Vent
Once the slider panel is in place, you’ll want to secure it. If you have a double-hung window, you might be able to close the top sash down onto the panel. For sliding windows, the panel might have a locking mechanism. Some people use tape or additional bracing for extra security. A secure panel ensures the hose doesn’t get dislodged. This is especially important if you have pets or kids around. You want it to be **stable and safe**.
Positioning Your Vissani AC Unit
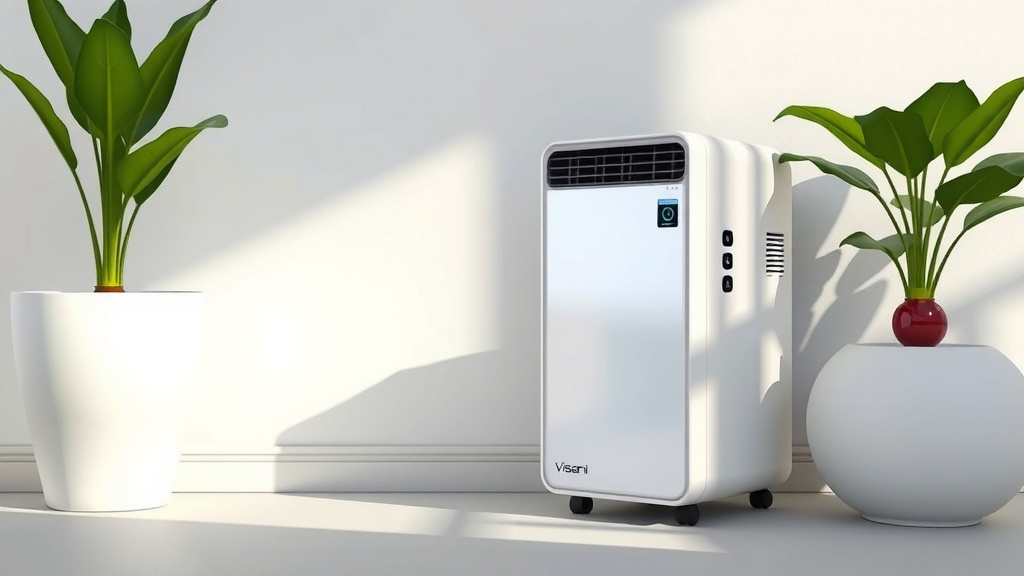
Now it’s time to put your Vissani AC in its spot. Place the unit on a level surface near the window. It needs to be close enough for the exhaust hose to reach comfortably. Avoid placing it too far away, as this can reduce airflow. Also, ensure there’s some space around the unit for ventilation. Check your manual for recommended clearance. Most units need at least a foot of space on the sides and back. This allows for **proper air circulation**.
Final Checks and Testing Your Vissani AC
With everything connected, it’s time for the final steps. Double-check all the connections. Ensure the exhaust hose is secure at both the unit and the window vent. Make sure there are no kinks in the hose, as this can restrict airflow. Plug in the power cord. Turn on your Vissani portable air conditioner using the control panel or the remote. Select a cooling mode and a low fan speed to start. You should feel cool air blowing from the unit. You might also hear the fan and compressor working. This is normal. After a few minutes, you should notice the room starting to cool. We found that running it on a low setting for a bit helps it **settle in**.
Important Installation Considerations
There are a few other things to keep in mind for optimal performance. Make sure your Vissani AC is on a level surface. This helps with drainage. Many portable ACs have a water collection tank or a drain hose. If your unit collects water, you’ll need to empty it periodically. Check the water level indicator. Some models have an auto-shutoff feature when the tank is full. Others may have a continuous drain option. Ensure your drain hose is routed correctly if you use it. A properly **drained unit** will work more efficiently.
Drainage Options for Your Vissani AC
Your Vissani portable AC likely has a couple of ways to handle condensation. Many units have an internal tank that collects water. You’ll need to empty this tank manually when it gets full. Some Vissani models also come with a drain hose. This allows you to direct the water to a floor drain or a container. If you plan to use the drain hose, ensure it’s connected securely. Also, make sure it slopes downwards to allow gravity to do its work. This **automatic drainage** can save you a lot of hassle.
Where to Place Your Portable AC for Best Results
The placement of your Vissani unit matters. For the best cooling, position it in the room where you spend the most time. Avoid placing it in direct sunlight if possible. Also, keep doors and windows closed while the AC is running. This will help keep the cool air in. We found that positioning it somewhat centrally in the room can help with **even cooling**. Just remember to keep that exhaust hose clear and unobstructed.
Safety First: Electrical and Airflow Precautions
Always use the power cord that came with your Vissani unit. Avoid using extension cords if possible. If you must use one, ensure it’s rated for the appliance’s power draw. A good guideline is to use a heavy-duty cord. The CDC recommends ensuring electrical safety with appliances in damp environments. Do not place the unit where it can get wet. Also, never block the air intake or outlet vents. Proper airflow is essential for the unit’s longevity. We found that a quick check of the manual’s electrical safety section is always wise.
Troubleshooting Common Installation Hiccups
What if it doesn’t seem to be cooling? First, re-check the exhaust hose connection at both ends. Is it firmly attached? Is the window vent sealed properly? Are there any kinks in the hose? We found that a loose connection is the most frequent culprit. If your unit is making strange noises, ensure it’s on a level surface. If you see error codes, consult your Vissani manual. It will usually explain what each code means. Many common issues can be resolved with a **few simple adjustments**.
Here’s a quick checklist to ensure your Vissani portable AC is installed correctly:
- Confirm all parts are present and accounted for.
- Attach exhaust hose securely to the AC unit.
- Connect hose firmly to the window vent kit.
- Seal all gaps around the window vent kit.
- Position the AC unit for good airflow and drainage.
- Double-check all connections before powering on.
Conclusion
You’ve successfully navigated the installation of your Vissani portable air conditioner! We’ve covered everything from unboxing to sealing your window. Remember, a good seal around the window kit is key for efficient cooling. Ensure your unit is level and has proper airflow for optimal performance and longevity. You’re now ready to enjoy a cooler, more comfortable space. For any specific issues, always consult your Vissani manual, but you’ve laid a great foundation for setup. Go ahead and **turn it on and feel the difference**!
Frequently Asked Questions
Do I need special tools to install my Vissani portable AC?
Typically, no special tools are required for Vissani portable AC installation. Your unit should come with a window kit that includes all necessary components. You might find a screwdriver helpful for tightening something, but most connections are tool-free. We found that the included parts are usually sufficient.
Can I vent my Vissani portable AC out of a small window?
Yes, most Vissani portable ACs can be vented out of smaller windows. The included window kits are usually adjustable. You can extend or retract the slider panel to fit various window sizes. Ensure the panel is sealed well to prevent air leaks. A good seal is more important than the window size itself.
How often do I need to drain the water from my Vissani portable AC?
The frequency of draining depends on your unit’s size, the humidity in your area, and how often you use it. Many Vissani models have an indicator light to show when the tank is full. Some have a continuous drain option with a hose, which can eliminate manual draining. We recommend checking the water level regularly to avoid overflow.
Can I leave the window partially open behind the Vissani AC unit?
It’s best to close the window as much as possible around the Vissani window kit. Leaving it partially open can allow warm air to re-enter your room. This reduces the unit’s efficiency. The foam sealing strips included in the kit are designed to help you achieve a tight seal. A proper seal is critical for effective cooling.
What should I do if my Vissani portable AC is not cooling effectively after installation?
First, double-check that the exhaust hose is securely connected at both the unit and the window vent. Ensure there are no kinks in the hose that restrict airflow. Verify that the window vent kit is properly sealed to prevent warm air from entering. If these connections are good, check your Vissani manual for troubleshooting tips or error codes.
![7 Best Split Unit Air Conditioner Brand [2026]](https://bathroomexplorer.com/wp-content/uploads/2026/06/7-best-split-unit-air-conditioner-brand-2026-featured-768x432.jpg)
![5 Best Air Conditioners for Van Life [In 2026]](https://bathroomexplorer.com/wp-content/uploads/2025/06/best-air-conditioner-for-van-life.jpg)