
DIY Window Air Conditioner Frame Build Guide
Building a frame for your window air conditioner is a **smart DIY project** that can **greatly improve stability** and **prevent leaks**. You can absolutely build a sturdy frame yourself with common tools and materials. This simple structure will support your AC unit, making installation safer and ensuring a tighter seal against the elements. It’s a cost-effective way to get the job done right.
A well-built frame not only secures your window AC but also contributes to **energy efficiency**. It helps to keep drafts out and your cool air in. Many homeowners find that a custom frame is a **much better solution** than relying solely on the brackets that come with the unit. It provides peace of mind knowing your air conditioner is properly supported.
- Measure your window opening carefully.
- Choose sturdy, weather-resistant lumber.
- Assemble a basic rectangular frame.
- Add support braces for extra strength.
- Ensure a snug fit for your AC unit.
Ready to get started? Let’s walk through exactly how to build this frame step by step.
“`htmlCreating a Sturdy Frame for Your Window AC Unit
Building a support frame for your window air conditioner is a fantastic DIY project. It ensures your AC unit stays put and provides a snugger fit. This frame prevents common issues like drafts and potential leaks. You’ll find it’s a more reliable solution than relying on flimsy brackets alone. Let’s get this frame built!
Measuring and Planning Your AC Frame
Accurate measurements are your best friend here. Don’t guess at this step. You need to know the exact dimensions of your window opening and your air conditioner unit. This ensures a perfect fit and prevents wasted materials. Grab your tape measure and let’s get precise.
Measuring the Window Opening
First, measure the width of your window opening. Do this at the top, middle, and bottom. Then, measure the height of the opening. Again, measure on the left, middle, and right sides. You want the smallest width and height from these measurements. This accounts for any slight variations in your window frame.
Also, measure the depth of the window sill where the AC will rest. You need to know how far the unit will protrude. Knowing these numbers helps you determine the size of lumber needed. It also tells you how much space you have for support.
Measuring Your Air Conditioner Unit
Next, get out your tape measure for the AC itself. Measure the width and height of the unit where it will sit inside the frame. Note the depth of the unit as well. You’re aiming for a frame that is just slightly larger than the AC unit. This allows for easy insertion but prevents too much wiggle room. A snug fit is key for stability and sealing.
Gathering Your Materials and Tools
You don’t need a professional workshop for this. Common household tools and readily available lumber will do the trick. Think of it like building a sturdy shelf for your cool air. You want materials that can withstand the weight and weather.
Lumber Selection
For your frame, you’ll want sturdy, weather-resistant wood. Pressure-treated lumber is a great choice. It holds up well against moisture and the elements. Common sizes like 1x4s or 2x4s work well for the main frame. If your AC unit is particularly heavy, consider 2x4s for extra strength. You’ll also need a smaller piece, like a 1×2 or a scrap piece of 1×4, for bracing.
Make sure the wood is straight and free of large knots. Knots can weaken the wood over time. You can often find suitable lumber at your local hardware store. They can even cut it to your precise measurements if you provide them. That’s a nice time-saver!
Essential Tools
Here’s a quick rundown of the tools you’ll likely need:
- Tape measure
- Pencil
- Saw (hand saw or power saw)
- Drill and drill bits
- Screws (weather-resistant exterior screws are best)
- Screwdriver or drill bit
- Level
- Safety glasses
- Work gloves
Having these on hand will make the building process smooth. Remember to always wear your safety glasses and gloves when cutting or drilling wood.
Building the Main Frame Structure
This is where your measurements come into play. You’re essentially building a strong, rectangular box that will fit snugly into your window opening. It’s like building a small, reinforced picture frame for your AC.
Cutting the Lumber
Based on your measurements, cut four pieces of lumber. You’ll have two longer pieces for the sides and two shorter pieces for the top and bottom. Remember to cut these to the inside dimensions of your window opening. If your window is 30 inches wide and 36 inches high, you’ll want two pieces that are 36 inches long and two pieces that are 30 inches long. However, if you want the frame to fit *inside* the existing window tracks, you’ll need to adjust these measurements based on the width of the AC unit itself.
It’s often best to have the frame built to the *width of your AC unit* plus a small allowance for clearance. Then, you can use foam insulation to fill any gaps. Let’s aim for a frame that’s about half an inch wider and taller than the AC unit itself. This allows for easy installation and removal. For instance, if your AC is 24 inches wide and 15 inches tall, cut two pieces 15.5 inches long and two pieces 24.5 inches long.
Assembling the Frame
Lay out your cut pieces on a flat surface. Form a rectangle. The shorter pieces should sit between the longer pieces. Pre-drill pilot holes to prevent the wood from splitting. Then, drive screws through the longer pieces into the ends of the shorter pieces. Use at least two screws per corner for a secure connection.
Use your level to ensure the frame is square. A square frame is a strong frame. Double-check all your connections. You want this to be solid. This is the main support for your air conditioner.
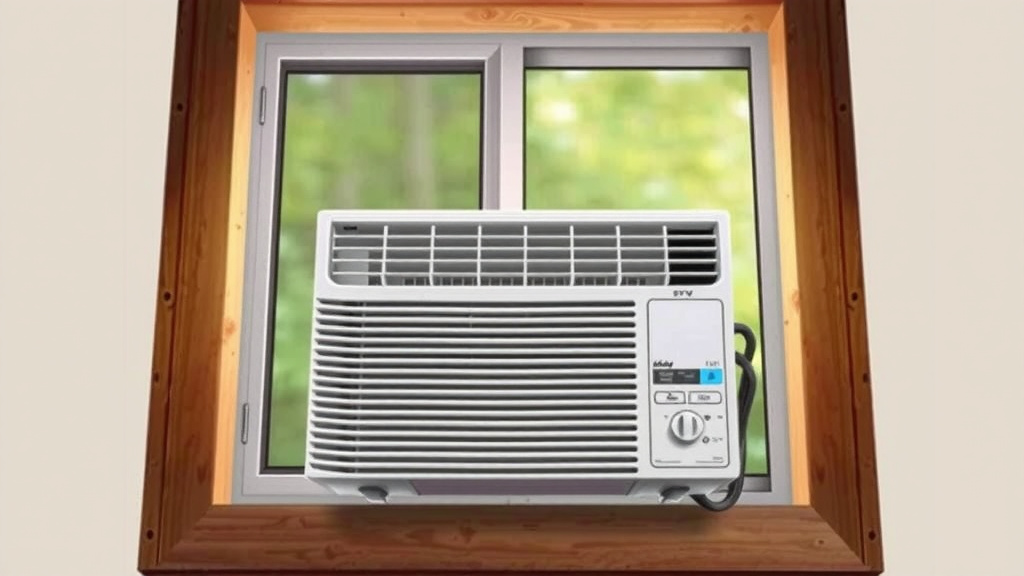
Adding Support for Stability and Sealing
A simple rectangle is good, but adding a few extra touches makes it even better. These additions help support the weight of the AC and create a better seal against the outside air.
Reinforcing the Frame
For heavier AC units, consider adding a reinforcing brace. You can cut another piece of lumber, often a 1×2 or a scrap piece, to fit diagonally across the frame. Attach it securely with screws. This adds rigidity. Some people also add a middle brace across the top or bottom for extra support, especially if the AC unit is wider than average.
Creating a Snug Fit and Seal
Once your frame is built, test its fit in the window opening. It should be snug but not so tight that you have to force it. You can use weatherstripping or foam tape to line the inside edges of the frame. This creates a much better seal against drafts. This step is super important for energy efficiency. It keeps the cool air in and the hot air out.
You can also add extra pieces of wood, sometimes called “filler strips,” to the sides of the frame if there are gaps between the frame and the window jamb. These can be made from thin plywood or even cut-up pieces of cardboard if you’re in a pinch. The goal is to fill any potential air leaks.
Installing the Support Brackets (If Needed)
Some window AC units come with external support brackets. These often attach to the outside of the window sill. If your unit has these, integrate them with your frame. You might need to drill holes in the frame to accommodate the bracket’s attachment points. Ensure these brackets are firmly secured to the wall or window frame itself. They add an extra layer of safety.
Checklist: Your AC Frame Build Success
Before you finalize everything, run through this quick checklist:
- Have you measured your window opening precisely?
- Is your lumber strong and weather-resistant?
- Did you cut your frame pieces to the correct dimensions?
- Are all frame corners securely screwed together?
- Does the frame fit snugly in the window opening?
- Have you considered adding weatherstripping for a good seal?
Completing these steps will give you a rock-solid frame. It’s ready to hold your window AC unit securely all season long!
“`Conclusion
You’ve now got a solid plan to build a sturdy frame for your window air conditioner. Remember, taking the time for precise measurements and using good materials makes all the difference. This DIY frame will provide better support and a tighter seal than relying on basic brackets alone. It’s a project that pays off in comfort and energy savings all summer long. Go ahead and build that frame – your AC unit will thank you for it!
Frequently Asked Questions
How much bigger should the frame be than the AC unit?
It’s generally recommended that your frame be about half an inch wider and taller than the air conditioner unit itself. This slight allowance makes it easier to slide the AC into place during installation and remove it later. A snug fit prevents excess movement without being too difficult to manage.
Can I use regular lumber or does it need to be pressure-treated?
While you can use regular lumber, pressure-treated wood is highly recommended for AC frames. This is because the frame will be exposed to weather and moisture. Pressure-treated lumber is designed to resist rot and decay, offering a longer lifespan and better durability for your project.
What’s the best way to ensure the frame is square?
After assembling the basic rectangular frame, use a carpenter’s square or a tape measure to check its diagonals. If the measurements of both diagonals are equal, your frame is perfectly square. You can also use a level to check that the sides are plumb and the top and bottom are level.
Do I need to add extra support if my AC unit is heavy?
Yes, for heavier air conditioner units, adding extra support is a wise idea. Consider reinforcing your frame with a diagonal brace across the back or adding a horizontal support piece across the top or bottom. Using 2×4 lumber instead of 1x4s for the main frame also provides increased strength.
How can I seal gaps between the frame and the window?
You can effectively seal gaps by using weatherstripping or foam tape along the inside edges of your frame. This creates an airtight barrier against drafts. If there are larger gaps between the frame and the window jamb, you can use filler strips or even small pieces of rigid foam insulation to fill them.

![7 Best Window Air Conditioner Under $200 [2026]](https://bathroomexplorer.com/wp-content/uploads/2026/07/7-best-window-air-conditioner-under-200-2026-featured-768x432.jpg)
