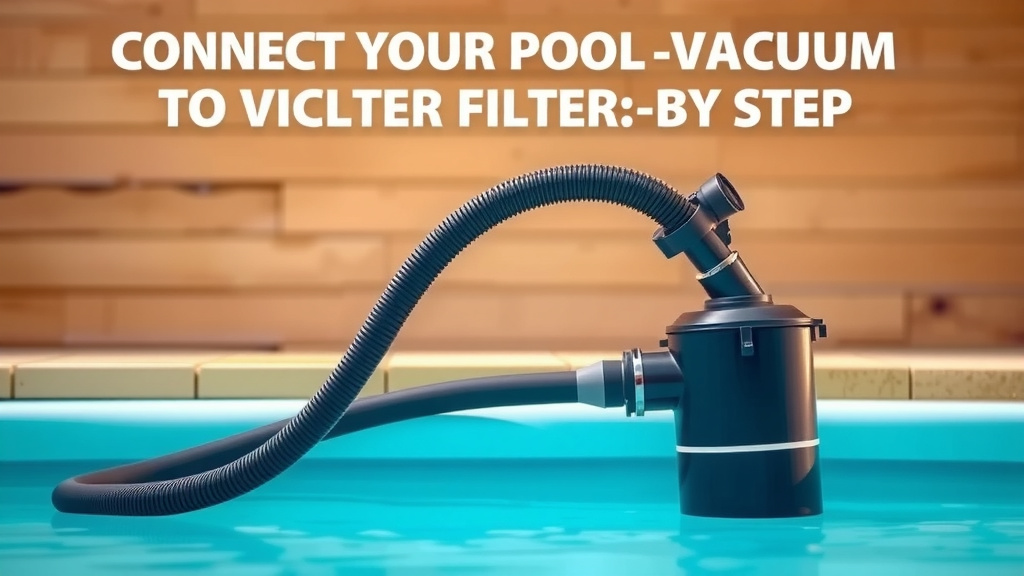
Connect Your Pool Vacuum to Your Filter: Step-by-Step
Attaching your pool vacuum to your filter is a straightforward process that keeps your pool sparkling. You’ll typically connect the vacuum hose to the skimmer or a dedicated vacuum port. This setup allows your pool’s filtration system to do the hard work of sucking up debris. Getting this connection right means less manual cleaning for you.
This connection forms the vital link between your automatic pool cleaner and your pool’s pump and filter. Understanding this setup helps ensure your cleaner operates efficiently. Many pool owners find that a proper hookup significantly reduces the time spent maintaining their pool. It’s a small step with a big impact on pool care.
- Connect vacuum hose to the skimmer.
- Ensure a secure, airtight connection.
- Prime the hose if needed.
- Turn on the pool pump.
- Check for suction.
Let’s walk through exactly how to get your pool vacuum hooked up to your filter system step by step.
Connecting Your Pool Vacuum to the Filter System
Attaching your pool vacuum to your filter is a key step for maintaining a clean pool. This connection allows your pool cleaner to use the pump’s suction power. You’re essentially creating a path for debris to travel from your pool floor to your filter. Getting this hookup right ensures your vacuum works effectively. We’ll guide you through the process so you can get back to enjoying your pool.
Understanding the Components and Your Setup
Before you begin, it’s helpful to know what parts you’re working with. Your automatic pool cleaner has a hose. This hose connects to your pool’s circulation system. The system includes your pump and filter. Most setups use the pool’s skimmer. Some pools might have a dedicated vacuum port. This port is often a separate fitting on the pool wall. Understanding your specific setup will make the connection easier. It’s like knowing which plug fits which socket.
Your Pool Skimmer: The Most Common Connection Point
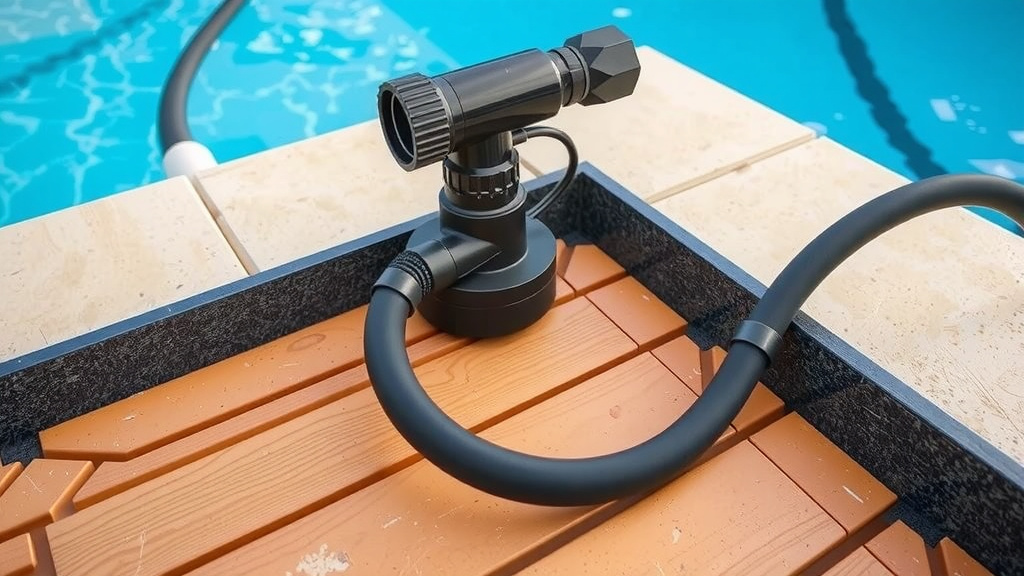
The skimmer is usually the easiest place to attach your vacuum hose. You’ll see a rectangular opening on your pool’s wall. Inside this opening, there’s a basket to catch leaves and larger debris. Most skimmers have a circular opening below this basket. This is where your vacuum hose will connect. It’s designed to allow water flow while also accommodating the hose. We’ve found this is the go-to spot for most homeowners. It’s simple and effective.
Locating the Vacuum Plate or Hole
Look inside your skimmer basket. You might see a removable plate or a specific hole. This is your vacuum connection. Some plates have a small lid that swings open. Others might just be a round opening. If you don’t see one, you might need a skimmer plate adapter. These adapters usually have a hole to insert the hose directly. They create a secure fit. Research and found that having the right adapter makes a big difference. It prevents air leaks.
Dedicated Vacuum Ports: A Less Common, but Useful Option
Some pool owners have a dedicated vacuum port. This is often a circular fitting. It’s usually located on the pool wall, near the skimmer. This port is specifically designed for vacuuming. It offers a direct connection to the plumbing. If your pool has one, you’ll likely need a specific vacuum hose adapter. These adapters screw into the port. Then, your vacuum hose connects to the adapter. This setup can sometimes offer stronger suction. It bypasses the skimmer basket entirely. This can be helpful for pools with lots of fine debris.
The Step-by-Step Connection Process
Now that you know where to connect, let’s walk through the actual steps. The goal is to create a good seal. An airtight connection is crucial for proper suction. Air getting into the system can make your pump struggle. It can also cause your vacuum to lose its cleaning power. We’ll focus on the skimmer method, as it’s the most common.
Step 1: Prepare the Vacuum Hose
Your vacuum hose is typically made of several sections. You need to connect enough sections to reach the deepest part of your pool. Make sure each section is firmly attached. Twist them together until they click or seal. A loose connection here can also let air in. You want a continuous, unbroken hose. Think of it like building a sturdy pipe.
Step 2: Connect the Hose to the Skimmer
Take the end of the vacuum hose. Gently insert it into the designated vacuum plate or opening in your skimmer. If you have a plate with a lid, position the hose end under the lid. Then, close the lid around the hose. The lid should hold the hose firmly in place. If you’re using a vacuum port, screw on the appropriate adapter first. Then, connect the hose to the adapter.
Ensuring an Airtight Seal
This is where many people run into trouble. You want to minimize air leaks. After attaching the hose, try to wiggle it. It shouldn’t move freely. If it feels loose, you might need a different adapter or a skimmer plate. Sometimes, wrapping a little Teflon tape around the hose connection can help. It creates a tighter seal. Research and found that many experts recommend checking this seal carefully. It’s worth the extra effort.
Step 3: Prime the Vacuum Hose (If Necessary)
This is a vital step for many vacuum types. Priming means removing all the air from the hose. If you don’t prime it, air can get into your pump. This can cause your pump to lose prime. It might make sputtering noises. To prime, you can either fill the hose with water manually. Or, you can let the pool’s water flow through it. Submerge the entire hose in the pool. Let the water fill it up. Make sure all the air bubbles escape. This can take a few minutes. Many sources suggest doing this underwater if possible. It’s simpler and more effective.
Step 4: Turn On the Pool Pump
Once the hose is connected and primed, it’s time to power up. Turn on your pool pump. Listen for any unusual noises. You should hear the pump running normally. The water should start flowing through the skimmer and out your return jets. The vacuum cleaner should start to move around the bottom of the pool on its own. If your pump makes loud noises or stops running, turn it off immediately. This likely means it has lost its prime. You’ll need to re-check your connections and re-prime the hose.
Step 5: Check for Proper Suction
With the pump running, check if your vacuum is working. You should feel suction at the hose connection point. If you can’t feel strong suction, or if the vacuum isn’t moving, something is wrong. Re-examine your hose connections. Make sure there are no kinks in the hose. Check the skimmer plate or vacuum port for a good seal. Ensure the vacuum head itself isn’t blocked by debris. It’s all about that suction power!
Troubleshooting Common Connection Issues
Sometimes, even with the best intentions, things don’t work perfectly the first time. Don’t get discouraged! Most problems are easily fixed. We’ve found a few common issues that pop up.
Weak or No Suction
If you have weak or no suction, the first thing to check is your hose connection. Is it airtight? Is the hose completely submerged and full of water? Kinks in the hose can also reduce suction. Look for any bends that are too sharp. Also, ensure your pump basket and skimmer basket are clean. A full basket restricts water flow. This directly impacts suction. Remember, a clean system is a happy system.
Vacuum Not Moving
If the vacuum isn’t moving but you have suction, the issue might be with the vacuum head itself. Is it clogged with leaves or debris? Try cleaning it out. Sometimes, the water flow might be too strong or too weak for the specific vacuum model. Check your pool cleaner’s manual for recommended flow rates. Adjusting your pump’s speed, if possible, can help. Or, you might need to add or remove a hose section. Too many sections can create too much friction.
Quick Checklist for a Successful Hookup
Here’s a quick rundown to ensure you’ve got it right:
- Confirm you have enough hose sections connected.
- Ensure the hose is firmly attached to the skimmer or port.
- Check for an airtight seal at the connection point.
- Prime the hose if your cleaner requires it.
- Verify the pool pump is running and water is circulating.
- Observe the vacuum for movement and suction.
Conclusion
You’ve now learned how to properly attach your pool vacuum to your filter system. A secure, airtight connection is key to efficient cleaning. Remember to prepare your hose, make the connection at the skimmer or vacuum port, prime the hose if needed, and then turn on your pump. Checking for good suction ensures your work paid off. Don’t be discouraged by minor issues; troubleshooting is part of the process. Keep your connections tight and your baskets clean for a sparkling pool all season long. Now, go enjoy your clean water!
Frequently Asked Questions
What if my skimmer doesn’t have a dedicated vacuum plate or hole?
If your skimmer lacks a specific vacuum opening, you’ll likely need a skimmer plate adapter. These adapters typically have a hole that fits your vacuum hose and can be secured within the skimmer opening. Research and found that having the correct adapter ensures a tight, airtight seal.
How do I know if my vacuum hose is properly primed?
Your vacuum hose is properly primed when all the air bubbles have escaped and it’s completely filled with water. You can test this by turning on the pump and listening for your pump to run smoothly without sputtering or shutting off. If your pump struggles, you likely still have air in the line.
Can I connect my vacuum directly to the pool pump?
Generally, no. Automatic pool vacuums are designed to connect to your pool’s circulation system via the skimmer or a dedicated vacuum port. Connecting directly to the pump could damage the pump or the vacuum hose due to high pressure.
My vacuum is moving, but not cleaning. What’s wrong?
If your vacuum is moving but not picking up debris, the issue might be with the vacuum head itself. Check if it’s clogged with leaves or other obstructions. Also, ensure there are no sharp kinks in your vacuum hose that could be restricting water flow and suction power.
How often should I check my vacuum hose connection?
It’s a good practice to check your vacuum hose connection each time you use your automatic cleaner. Ensure it’s still securely attached and the seal is airtight. This quick check can prevent air leaks and ensure your vacuum operates at peak performance.

![7 Best Miele Vacuum For Dog Hair [2026]](https://bathroomexplorer.com/wp-content/uploads/2026/06/7-best-miele-vacuum-for-dog-hair-2026-featured-768x432.jpg)