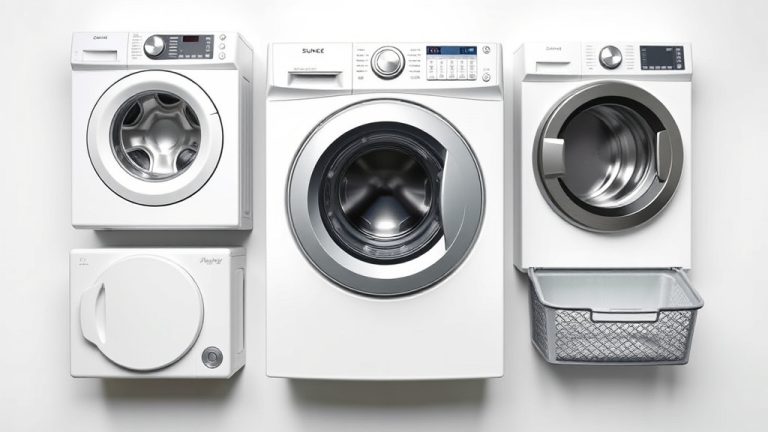
How to Get a Washer on a Pedestal Safely
The easiest way to get your washer on a pedestal is to tilt it back and slide the pedestal underneath, using a friend for help. You need to do this before the washer is fully installed or connected. We found that this simple tilt-and-slide method works best for most front-load washers.
Getting your washer on a pedestal saves your back and adds valuable storage space. It is a smart move for any laundry room. The process is straightforward, but you must handle the machine carefully to avoid injury or damage. Proper lifting technique and a second person make the job much easier and safer.
TL;DR
- Unplug the washer and turn off the water supply first.
- You must disconnect the hoses and drain line before moving the unit.
- Tilt the washer back and slide the pedestal into place under the front feet.
- Always have a helper to lift and guide the heavy machine safely.
- Use a dolly or cardboard to protect your floors and make sliding easier.
Below, we break down every step you need to get your washer on its pedestal, from prepping the area to securing the machine for good. Let’s walk through exactly how this works so you can get it done without the struggle.
Getting Your Washer Up on a Pedestal Safely
You have the pedestal ready and the washer sitting nearby. Now comes the part that feels intimidating. We found that breaking the job into clear stages makes it less scary. The golden rule is simple: never lift the washer entirely off the ground. You only tilt it back a few inches.
This method uses gravity and leverage. The machine does most of the work for you. Many appliance repair guides point to this tilt-and-slide technique as the standard approach for front-load machines (Appliance Service Technicians Association).
Why the Tilt-and-Slide Method Works Best
Think of a refrigerator dolly moving a heavy fridge. You do not lift it. You balance it and roll it. The same logic applies here. When you tilt the washer back, the weight shifts to the rear legs. The front feet lift off the floor just enough to slide the pedestal underneath.
This approach protects your back. It also protects the washer’s fragile suspension rods. Those rods keep the drum balanced during spin cycles. Lifting the machine by the top panel can bend them. We found that most manufacturers install pedestals using this tilt method for that exact reason.
Tools You Will Need Before You Start
- A second person (strong and patient)
- A furniture dolly or appliance hand truck
- Cardboard sheets or an old rug for floor protection
- A wrench or pliers for disconnecting hoses
- A towel or bucket to catch residual water
- Your owner’s manual for specific weights and tips
Preparing Your Washer and Workspace
Preparation is boring but vital. You never want to be mid-tilt and realize a hose is still attached. That creates a mess and a potential flood. Take your time here. The actual move takes five minutes. The prep takes twenty.
Start by turning off the hot and cold water valves behind the machine. Then unplug the power cord from the wall outlet. Water and electricity do not mix, so this order matters. You also need to check that the washer drum is completely empty.
Disconnecting Water Lines and the Drain Hose
Use your wrench to loosen the water inlet hoses. They screw on like garden hoses. Turn them counterclockwise to remove them. Keep a towel handy because a little water will spill from the hoses even with the valves off.
The drain hose is easier. It usually hooks into a standpipe or clips onto a laundry sink edge. Pull it free and drain any remaining water into your bucket. Some machines have a small filter at the bottom front that holds water. Check your manual. We found that opening this filter and draining it first makes the machine noticeably lighter.
Clearing a Path to the Pedestal Location
Measure your laundry room space. The washer needs about two feet of clearance in front of it. You need room to tilt the machine and walk around it. Move baskets, detergent bottles, and anything else out of the way.
Lay down cardboard or an old rug between the washer’s current spot and the final resting place. This protects your floors from scratches. It also makes sliding much easier. You will thank yourself later when you realize the machine glides instead of drags.
Step-by-Step Lifting and Sliding Process
Here is where the magic happens. Position the pedestal in its final location first. Place it flat on the floor against the wall or wherever it will live permanently. You do not want to move it after the washer is on top. That would require lifting the washer again.
Now, both of you stand on the same side of the washer, facing it. One person grabs the top edge and the other grabs the middle side panel. Bend your knees, not your back. Tilt the washer back toward you slowly. The rear feet stay on the ground. The front feet rise about four to six inches.
Guiding the Washer Onto the Pedestal
While the washer is tilted, walk it forward. Keep the rear legs on the floor as a pivot point. Move it until the front feet are directly over the pedestal’s top surface. This is the delicate part. Your helper guides the front feet with their hands to ensure they line up with the mounting holes on the pedestal.
Lower the washer gently. Do not drop it. Set it down slow and steady. The front feet should settle into the recessed areas on the pedestal top. If they do not line up perfectly, tilt the washer back up slightly and adjust. It takes a few tries sometimes. That is normal.
What If the Washer Is Too Heavy to Tilt?
Some washers are absolute beasts. If you have an extra-large capacity model, the tilt might feel impossible at first. Many experts suggest removing the washer door or top panel to reduce weight (but check your warranty first). A better option is using a furniture dolly or an appliance lifting strap.
Appliances lifting straps work like a backpack for the machine. You strap them around the washer, and they give you better grip and leverage. We found these straps useful for people with back problems or when a second helper is not available. They cost about twenty bucks online.
Securing the Washer to the Pedestal
Once the washer sits on the pedestal, do not celebrate yet. You need to bolt it down. The pedestal usually comes with mounting brackets or bolts. These bolts lock into the bottom of the washer. They prevent the machine from walking around during the high-speed spin cycle.
Check your washer’s manual for hole locations. Many front-loaders have pre-drilled holes in the base. Reach under the front of the machine and align the brackets. Then use the provided bolts and a wrench to tighten them securely. Do not overtighten, or you risk stripping the threads.
Adjusting the Leveling Feet
Now that the washer is bolted down, you need to level it. A washer that is not level will vibrate loudly and may walk across the floor. Place a bubble level on top of the machine. If it is off, adjust the leveling feet on the bottom of the pedestal until the bubble sits centered.
Turn the feet clockwise to lower them and counterclockwise to raise them. Tighten the lock nuts when you are done. We found that a perfectly level washer reduces noise by a noticeable amount and protects the drum bearings over time.
Wiring and Drain Hose Connection
You are almost done. Reconnect the drain hose to your standpipe. Make sure it is secured with the clip or zip tie. Then reconnect the hot and cold water inlet hoses. Tighten them with your wrench, but do not crank them too hard. Hand-tight plus a half-turn is usually plenty.
Plug the power cord back into the wall outlet. Before you do a full load, run an empty cycle with a cup of white vinegar. This clears any dust or debris from the machine and checks for leaks. Watch the connections during that first cycle. No drips means you are good to go.
Final Safety Checklist for Moving Your Washer
Before you call it done, run through this short list. It takes two minutes and saves you from future headaches. We found that most problems happen because people skip one small step. Do not be that person.
- Check that all four mounting bolts are tightened evenly
- Verify the level bubble sits exactly in the center
- Confirm both water valves are turned back on
- Run a quick empty cycle and inspect for leaks
- Make sure the drain hose is not kinked or pinched
- Ensure the washer door opens freely without hitting the wall
When to Call a Professional Instead
Sometimes, it is okay to admit defeat. If your washer is over 250 pounds or you live alone, hiring a pro is a smart move. Many local appliance stores offer delivery and installation with pedestal mounting for a small fee. We found that this cost often beats buying a chiropractor visit later.
You also might consider a pro if your laundry room is upstairs. Carrying a heavy washer up steps with a pedestal is a different beast. Stair climbing requires a dolly and serious skill. Most guidelines from home safety organizations recommend leaving stair moves to trained professionals (National Safety Council).
Common Mistakes People Make When Mounting a Pedestal
You can learn from others’ spills and bruises. The most common error is forgetting to disconnect the water lines. People get excited and try to tilt the washer while the hoses are still attached. That snaps the brass fittings or tears the rubber gaskets. Always check twice.
Another mistake is putting the pedestal on top of carpet. The pedestal needs a hard, level surface. If you only have carpet, you need a plywood board underneath the pedestal to spread the weight. Otherwise, the washer will wobble and shake during every spin cycle.
Top-Loading Washers and Pedestals
Pedestals are not just for front-loaders. Many top-loaders can sit on a pedestal too. The process is nearly identical. The main difference is the height. Top-loaders are already taller, so raising them another 12 inches might make reaching the lid difficult for shorter folks. Measure your reach first.
If you have a top-loader, check that the pedestal is rated for its weight. Top-loaders often weigh more than front-loaders because the drum is vertical. An undersized pedestal can bow or crack under the load. Always check the weight rating printed on the pedestal box.
Why a Pedestal Is Worth the Hassle
You just did a mini workout. Now you get the rewards. The pedestal raises your washer to a comfortable height. That means no more bending over to reach clothes at the bottom of the drum. Your back will thank you after every single load. Ergonomics matters for daily chores.
Plus, the drawer underneath gives you bonus storage. You can stash detergent, dryer sheets, and stain remover right there. We found that keeping supplies within arm’s reach makes doing laundry feel less like a chore. The convenience factor alone is worth the installation effort.
Pedestal Styles and Drawer Options
Pedestals come in two main designs. The first has a single large drawer that slides out fully. This style works great for big bottles of detergent. The second has two smaller drawers side by side. That is better if you like to split supplies between detergent and fabric softener.
Some manufacturers make a plain pedestal with no drawer at all. It is just a solid riser block. These cost less and skip the moving parts. If you do not need extra storage, choose this simpler version. It is less to break and easier to clean underneath.
Making Sure Your Laundry Room Floor Survives
Your washer is heavy. We found that most laundry room floors handle the weight fine. But older homes might have weaker subfloors. If you notice the floor sagging or creaking under the pedestal, contact a contractor. A load-bearing issue can worsen over time.
Also consider a drip pan underneath the entire setup. These plastic trays catch any minor leaks before they reach the floor. Many guidelines recommend them for second-story laundry rooms to prevent water damage to ceilings below (FEMA). They cost around twenty dollars and are easy to slide into place before you bolt the pedestal down.
Getting your washer on a pedestal really is a two-person tilt-and-slide job. You avoid the heavy lifting and keep the machine safe. With your prep work done and the steps above, you will have it done in under an hour. Then you can step back, admire your handiwork, and load your first laundry load without bending over.
Conclusion
Getting your washer up on a pedestal comes down to smart prep and the tilt-and-slide method. You avoid heavy lifting, protect your back, and keep the machine’s internal parts safe. The whole job takes about an hour with a helper by your side.
Remember to disconnect everything first. Line up the feet before you lower the washer. And always bolt it down before you run that first load.
Your next step is simple: grab a friend, gather your tools, and get it done this weekend. Once that pedestal is in place, you will wonder why you waited so long. Your back will thank you with every single load.
Frequently Asked Questions
Can one person put a washer on a pedestal by themselves?
It is possible but not recommended. You can use an appliance lifting strap to help tilt the washer back safely. We found that a helper makes the job faster and keeps you from straining your back. If you must do it alone, take your time and use cardboard to help slide the machine.
Do I need to remove the washer door before lifting it?
No, you do not need to remove the door. The tilt-and-slide method only raises the front of the machine a few inches. Removing the door is unnecessary and adds extra work. You should only consider removing panels for extremely heavy models, and only after checking your warranty.
Will a pedestal work with any washer brand?
Most pedestals are brand-specific. LG pedestals fit LG washers, and Samsung pedestals fit Samsung models. You can find universal pedestals, but you need to check the weight rating and mounting hole alignment. We found that using the matching brand pedestal is always the safest choice.
How long does it take to install a washer pedestal?
Plan for about 45 minutes to an hour from start to finish. The prep work takes the longest because you need to disconnect hoses and clear your space. The actual tilt-and-slide move takes less than ten minutes. Most of your time goes into securing the bolts and leveling the machine.
What if my washer is already connected and running?
You will need to disconnect it first. Turn off the water valves and unplug the machine. Then remove the hoses and drain line before you attempt any movement. Do not try to slide a pedestal under a connected washer. That risks damaging the hoses and flooding your laundry room.