How to Elevate Washer and Dryer: Pro Tips
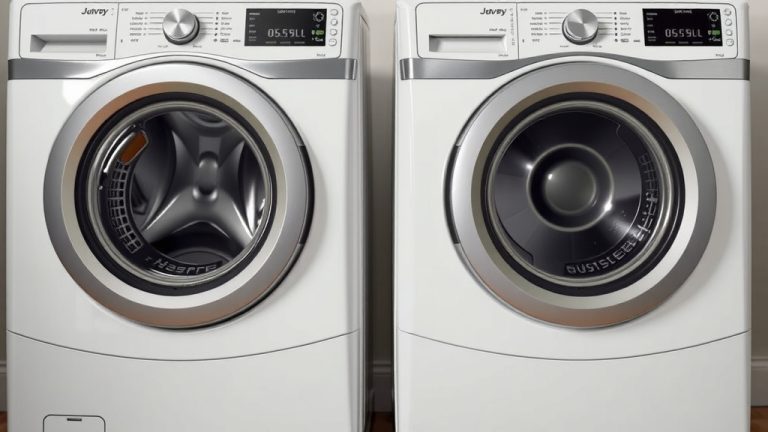
The simplest way to elevate your washer and dryer is to place them on a sturdy riser, pedestal, or platform that lifts them 12 to 16 inches off the floor. You can buy ready-made pedestals or build a DIY platform with wood for much less money. This reduces back strain and makes loading and unloading laundry much easier.
Elevating your machines also opens up valuable storage space underneath for baskets, detergent, or a pet bed. Many experts say that proper airflow around your units is another big benefit, which helps prevent moisture and mold buildup. Finding the right height depends on your own comfort and your specific laundry room setup.
- The best option: Installing official manufacturer pedestals for a perfect fit and built-in storage drawers.
- The budget option: Building a simple, sturdy 2×4 wood platform that costs under $50.
- The quick fix: Using heavy-duty anti-vibration pads or rubber mats if you just need a few inches of lift.
- The key rule: Always ensure the surface is completely level and the machines are secured to prevent walking or falling.
- The safety check: Leave enough clearance for hoses and vents to avoid kinks or airflow blockages.
Below, we break down every method step by step, including the tools you’ll need, the exact measurements to use, and the safety tips that matter most. Let’s walk through how to get your machines up off the floor the right way.
Raising Your Laundry Machines the Smart Way
You spend hours each week hunched over your washer and dryer. That constant bending takes a toll on your lower back and knees. Raising your machines brings the drums closer to waist height, which makes laundry feel far less like a workout.
We found that most people prefer a lift of about 12 to 16 inches. That range keeps the machines stable while making the top of the dryer easy to reach. The best height for you depends on your own height and how the space feels when you load clothes.
Why You Should Consider Lifting Your Machines
Beyond saving your back, there are real practical benefits. Research and found that a raised platform creates a natural storage zone. You can slide bins, baskets, or a small step stool underneath without losing any floor space.
Elevation also improves airflow. Many experts say this reduces the risk of moisture building up under the machines. That moisture is a common cause of mold and mildew smells in laundry rooms (Environmental Protection Agency).
Choosing the Right Height for Your Needs
Stand in front of your washer and mimic loading clothes. Your elbows should bend at a comfortable angle, roughly 90 degrees. If you have to lean way down, your platform is too low. If you stretch up, it is too high.
For front-loading machines, the door should sit just below your hip. That way, you can pull clothes out without squatting. For top-loaders, you want the lid at about waist level for the best reach.
Manufacturer Pedestals vs. DIY Platforms
The big choice comes down to store-bought versus homemade. Both work well, but they serve different budgets and needs. Let us break down the main differences so you can pick with confidence.
Official Pedestals from Your Brand
Brand-name pedestals are designed to match your exact washer and dryer models. They bolt directly to the machine base, which keeps everything rock-solid. Many come with integrated storage drawers that are perfect for detergent and dryer sheets.
We found that these are the most reliable option because they are engineered for your specific machines. They cost more, usually between $200 and $400 per unit. But they look clean and require zero guesswork when it comes to fit.
Installation Tips for Brand Pedestals
Place the pedestal on a flat floor first. Then, carefully lift the washer onto the pedestal with a partner. Most models come with a mounting bracket kit that locks the machine in place.
Check the manual for specific torque specs on the bolts. Going too tight can crack the machine frame. Too loose, and you risk wobble during the spin cycle.
Building a Sturdy DIY Wood Platform
A wood frame is the budget-friendly champion. You can build a solid platform for under $50 using common lumber. We found that 2x4s are the go-to material because they are strong and easy to work with.
Build a rectangular frame that matches the footprint of your washer. Add a top sheet of 3/4-inch plywood for a smooth, even surface. Then, screw everything together with deck screws for maximum strength.
The Right Dimensions for a DIY Riser
Measure the width and depth of your machines first. Add about 2 inches of overhang on each side so the feet rest comfortably. The legs of your platform should be 12 to 16 inches tall, depending on your comfort.
Use at least four vertical support legs, not just a flat box. A hollow box can crush over time under the weight of a heavy washer. Solid legs distribute the weight straight down to the floor.
Simple Quick Fixes for a Few Inches of Lift
Not everyone needs a massive platform. Sometimes, you just need a little nudge to reach the buttons already on top of the machine. Rubber pads or anti-vibration mats are a fast, easy answer.
These thick rubber squares sit under each machine foot. They raise your washer by about an inch or two. They also absorb vibration, which keeps your laundry room quieter during the spin cycle.
Using Anti-Vibration Pads the Right Way
Clean the floor area before placing the pads. Any dust or grit can cause the machine to sit unevenly. Then, place one pad under each foot and press down firmly.
Lift the machine one corner at a time using a pry bar or your own strength. Slide the pad into position and lower the foot back down. Check with a level afterward to make sure your washer is not tilting.
Safety Rules for Any Lifting Method
Your washer shakes hard during a spin cycle, especially with a heavy load. An unsecured machine can literally walk across the floor. That is why proper anchoring is non-negotiable.
Always ensure the platform is level before installing the machines. Use a carpenter’s level and shim under the legs if needed. A slight tilt can cause the drum to hit the sides and make loud banging noises.
Securing Your Washer and Dryer
Most manufacturers provide L-brackets or anti-tip kits with their pedestals. Use them. If you build a DIY platform, add your own metal brackets to lock the machine feet in place.
Check that the rubber feet on your washer are intact. Worn grips can slide on the plywood surface. Add a rubber mat or grip tape between the machine feet and your platform to keep things steady.
Checking Hose and Vent Clearance
Raising your machines changes how the hoses bend behind them. A kinked hose can restrict water flow or trap lint. That can lead to leaks or even a fire hazard with your dryer vent (Consumer Product Safety Commission).
Measure the distance from the back of the washer to the wall. Your new platform should not crush the hoses. If the hoses are too short, you may need to buy longer, braided stainless steel ones for safety.
Storage Solutions for the Space Underneath
The empty space below your lifted machines is pure bonus. Many people turn it into a functional laundry station. You can slide in a rolling cart to keep supplies at your fingertips.
Use clear bins so you can spot items without pulling everything out. Stack them two high if your platform gives you 15 inches or more of clearance. Just keep heavy bottles low to avoid tip-overs.
Creative Ideas for the Under-Platform Zone
If you have pets, that dark spot under the washer is prime real estate for a dog bed. Many experts say that pets love the enclosed feeling. Just make sure the machine stays quiet enough for them to relax.
You can also install a pull-out drying rack or a small ironing board on slides. That turns wasted space into a working surface. The key is keeping the area clear so air can still circulate around the machines.
Comparing All Your Lifting Options
Different households need different solutions. Here is a quick comparison to help you decide based on budget, effort, and value.
| Option | Cost | Effort | Best For |
|---|---|---|---|
| Brand Pedestal | $200 – $400 | Easy | Perfect fit, storage drawers |
| DIY Wood Platform | $50 – $100 | Moderate | Budget builders, custom height |
| Rubber Pads | $10 – $30 | Very easy | Quick tiny lift, noise reduction |
Measuring and Planning Your Project
Grab a tape measure and your machine’s manual before you buy anything. Measure the height, width, and depth of your washer and dryer. Most front-loaders have a standard depth of about 30 inches, but always check.
Factor in the door swing too. Your new platform should not block the washer door from opening fully. Leave at least 1 inch of space around all sides of each machine for airflow and access.
The Tools You Will Need for a DIY Build
- Circular saw or handsaw for cutting lumber
- Power drill with a screwdriver bit
- Tape measure and a carpenter’s level
- 2×4 lumber and 3/4-inch plywood
- 3-inch deck screws and wood construction adhesive
A Quick Pre-Install Checklist
Go through this list before you lift anything heavy. A few minutes of checks can save you hours of headaches later.
- Clear the work area of rugs, cords, and clutter
- Unplug both machines and shut off the water supply
- Confirm your floor is level and will support the extra weight
- Enlist a friend or partner to help with the heavy lifting
- Have a pry bar, level, and shims ready for adjustments
- Measure again before you cut or install anything
When to Call a Professional
Some situations are too tricky for a weekend DIY project. If your laundry room floor is uneven or sloped, you might need a pro to level it first. A platform sitting on an unstable floor can shift and make things worse.
Similarly, if you have a gas dryer, do not mess with the vent connector yourself. Gas connections are dangerous. A licensed technician can move the vent or adjust the pipe safely so your setup stays compliant.
Raising your washer and dryer is one of those simple upgrades that pays off every single week. Start with a clear plan, measure twice, and take your time. Your back will thank you on laundry day. And that new storage space under the machines? That is just a satisfying bonus you will wonder how you ever lived without.
Conclusion
You do not need to live with a backache every laundry day. Raising your washer and dryer by 12 to 16 inches makes a real difference in how you feel after each load. We covered the three main paths: brand pedestals for a perfect fit, DIY wood platforms for budget builders, and rubber pads for a quick lift.
Start by measuring your space and your machines. Then pick the option that fits your skill level and budget. The key is a level, secure surface with proper clearance for hoses and vents. Grab a friend, gather your tools, and take on this weekend project. Your back will thank you for years to come.
Frequently Asked Questions
Will elevating my washer and dryer cause more vibration or noise?
Not if you do it the right way. A sturdy, level platform actually helps reduce vibration by giving the machines a solid, flat base. You need to make sure the platform is completely level and the machine feet are properly gripping the surface.
If you notice extra shaking, check the level again and add anti-vibration pads under the feet. For a DIY wood platform, use solid legs rather than a hollow box. That keeps everything stable during the spin cycle.
Is it safe to put a washer and dryer on a wooden platform?
Yes, a well-built wood platform is completely safe for both machines. Use 2×4 lumber for the frame and 3/4-inch plywood for the top surface. Make sure you add vertical support legs that transfer the weight straight down to the floor.
The total weight of a loaded washer can exceed 300 pounds. So, you need solid construction and at least four support points. Check the platform regularly for any signs of wear or cracking over time.
How much does it cost to have a professional elevate my washer and dryer?
Professional installation costs usually range from $150 to $300 depending on your area. That price typically covers the labor to install brand pedestals or build a custom platform. You will still need to buy the pedestals or materials separately.
If you choose a DIY approach, you can save that labor cost entirely. A wood platform costs $50 to $100 in materials. The tradeoff is your time and effort over a weekend afternoon.
Can I stack my washer and dryer instead of elevating them?
Stacking is a great option if you have a front-loading washer and a matching dryer. You need a stacking kit from the manufacturer to secure the dryer on top of the washer safely. This frees up floor space completely, but adds height up to about 70 inches.
Keep in mind that stacking makes the controls higher to reach. You may need a step stool if you are shorter. Also, you lose the under-machine storage that a pedestal provides.
What is the best height for a washer and dryer pedestal?
The sweet spot for most people is 12 to 16 inches. That height puts the washer door at hip level for most adults. It also leaves enough clearance underneath for storage bins or baskets.
Stand in front of your machine and mimic loading clothes. Your elbows should bend at about a 90-degree angle. If you are taller than average, go toward the 16-inch mark. If you are shorter, stick with 12 inches.