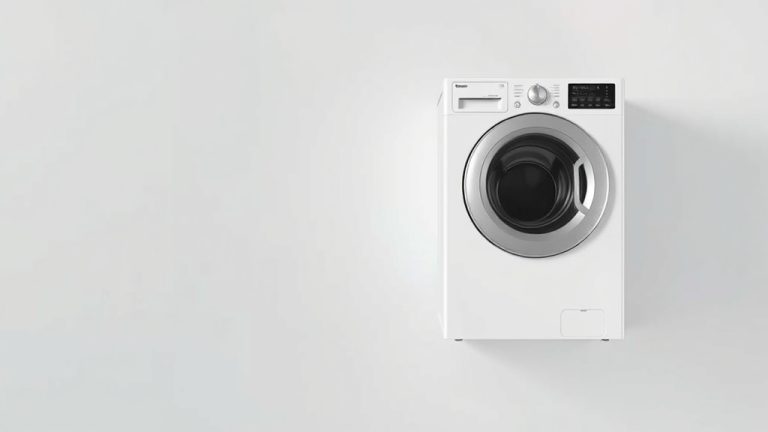
Mastering Your Portable Clothes Dryer: A How-To Guide
To use a portable clothes dryer, plug it in, load it, select a cycle, and empty the water tank — most models work right out of the box. The key is placing it on a flat, stable surface and giving it enough space for airflow. Keep the lint filter clean, and you’re set for quick, wrinkle-free drying.
Portable dryers are great for apartments, dorms, RVs, or anyone who wants to skip the laundromat. We found that ventless condenser models are the easiest for indoor use because they don’t need an outside vent. Just remember, drying smaller loads means faster cycles and less wear on your clothes.
- Place it on a flat surface with at least 6 inches of clearance on all sides.
- Sort your clothes by fabric weight — don’t mix towels with delicates.
- Load it about 3/4 full — overloading causes longer dry times and wrinkles.
- Empty the water tank after every use to prevent leaks and mold.
- Clean the lint filter after each cycle for safety and efficiency.
Below, we walk you through every step — from setup and loading to choosing the right cycle and maintaining your dryer. Let’s get your laundry done without the hassle.
Getting Your Portable Dryer Set Up the Right Way
Before you toss a single sock inside, you need to find the perfect spot. We found that a stable, level surface is non-negotiable. Think of your dryer like a washing machine — if it wobbles, it will make noise and wear out faster.
Most portable dryers are compact, but they still need breathing room. Keep at least 6 inches of clearance on all sides. This includes the back panel where the hot air exhausts. Blocking that airflow is the number one reason dryers overheat or take forever to finish a load.
Hardware and Water Tank Checks
Look at the back of your unit. If it has a water tank, make sure it clicks firmly into place. Many models have a small drainage hose you can route to a sink, but the tank is the easier option for most people.
Some condenser dryers have a secondary filter or a heat exchanger. Pop those out and check them before your first load. Many experts say that a clean start prevents musty smells later on (Consumer Reports).
Power Cord and Outlet Safety
Plug your dryer directly into a wall outlet. We strongly advise against using an extension cord for the first run. Portable dryers draw a lot of wattage. A power strip can overheat or trip your breaker.
Check that the plug fits snugly. If you live in an older apartment with two-prong outlets, you might need an adapter, but a grounded three-prong outlet is the safest bet.
Sorting and Prepping Your Laundry Load
You can’t just dump everything in like a standard dryer. Portable dryers are smaller and gentler. Start by sorting your clothes just like you would for the washing machine. This step saves you time and prevents damage.
Heavy items like towels and jeans should stay together. Delicates like lace or silk need a separate, cooler cycle. We found that mixing heavy and light fabrics makes the heavy items hog all the heat, leaving your t-shirts damp and wrinkled.
Shake It Out Before Loading
Take each item out of the washer and give it a good shake. This separates the fabric fibers. It also removes tangles that trap moisture. If you load a soggy ball of clothes, the inside layers will stay wet for hours.
Shaking also helps reduce wrinkles. It’s a tiny step, but it makes a big difference in how your shirts come out. Think of it like fluffing a pillow before you sleep on it.
Check the Weight Limits
Your machine has a specific weight limit, usually around 10 to 13 pounds. That’s roughly the size of a medium load of t-shirts. Don’t pack it to the brim like a suitcase.
Overloading forces the dryer to work harder. It takes longer, uses more energy, and often leaves clothes damp in the center. When in doubt, leave a little extra room.
Loading the Drum for Maximum Airflow
This is the part most people get wrong. You want the clothes to tumble freely. Load the drum only about three-quarters full. This leaves enough space for hot air to circulate around every item.
If you stuff the drum full, the clothes just clump together. The tumble action stops, and the dryer basically becomes a steamer. You’ll end up with damp, wrinkled laundry and a longer cycle time.
How to Distribute Items Evenly
Place larger items like sheets or jeans in the drum first. Then, add smaller items like socks and underwear around them. This balances the load and stops the machine from thumping.
An unbalanced load can cause the dryer to shut off mid-cycle. If your machine starts vibrating, pause it and redistribute the clothes. You’ll hear the difference — a smooth hum means the load is balanced.
Selecting the Right Cycle Settings
Portable dryers usually have a few basic settings: delicate, normal, and heavy. Don’t just hit the default button every time. Take a second to match the cycle to your fabric type.
We found that using a lower heat setting for synthetics is safer. High heat can melt polyester or shrink cotton blends. For most everyday loads, a medium heat and low spin speed works perfectly.
Time Settings and Automatic Sensors
Some models have a timer dial, while others have moisture sensors. If you have a sensor, use it. It stops the dryer once the clothes are dry, saving energy and preventing over-drying.
For timer-based models, start with a 40-minute cycle. Check the clothes at the halfway point. You can always add more time, but you can’t undo shrinkage from too much heat.
Using the Cool-Down Cycle
If your dryer has a cool-down or air-fluff setting, use it for the last five minutes. This brings the fabric temperature down slowly. It helps prevent wrinkles and makes clothes easier to fold immediately.
We like to run a cool breeze cycle after the main drying. It sets the fibers and reduces static cling. It’s a simple trick that makes your laundry look professionally finished.
Emptying the Water Tank: The Golden Rule
Ventless portable dryers collect moisture in a tank. If you forget to empty it, the dryer will stop working mid-cycle. Many models have a full-tank indicator light, but don’t rely on it completely.
Get into the habit of emptying the tank after every single use. This prevents water from sitting and growing mold or bacteria. A clean tank also keeps your dryer smelling fresh.
- Pull the tank straight out from the front or top of the unit.
- Pour the water into a sink or drain — it’s just distilled water from your clothes.
- Rinse the tank with warm soapy water once a week.
- Dry the tank thoroughly before sliding it back into place.
- If your model has a drain hose, secure it to the sink edge so it doesn’t slip.
Cleaning the Lint Filter and Traps
Lint buildup is a fire hazard. It’s not just about efficiency — it’s about safety. The National Fire Protection Association reports that failing to clean dryers causes thousands of home fires each year. Don’t be a statistic.
Clean the lint filter after every cycle. The filter is usually located near the door or inside the drum. Pull out the mesh screen, wipe off the lint, and reinsert it before the next load.
| Maintenance Task | How Often | Why It Matters |
|---|---|---|
| Empty water tank | After every use | Prevents leaks and mold build-up |
| Clean lint filter | After every use | Prevents fire risks and speeds up drying |
| Wipe drum interior | Weekly | Removes residue and keeps clothes fresh |
| Check exhaust vents | Monthly | Ensures proper airflow and cooling |
Tips for Faster Drying and Fewer Wrinkles
Want your portable dryer to work like a champ? Try tossing in a dry towel for the first ten minutes. The towel absorbs moisture from the wet clothes and speeds up the evaporation process. We found this cuts drying time by up to 15 percent.
Another trick is to use dryer balls. They bounce around and lift the fabric, letting hot air reach every layer. They also reduce static cling, so you don’t need fabric softener sheets.
Don’t Overload with Water
Spin your clothes in the washer on the highest spin speed possible. The more water removed in the washer, the less work your portable dryer has to do. If your spin cycle leaves clothes dripping, wring them out by hand first.
Stagger Heavy Loads
Dry towels and jeans in separate batches. Mixing them with delicates forces you to use a low heat, which leaves the heavy items damp. Keep heavier items together for a high-heat cycle, and keep delicates in their own cooler load.
Unloading and Folding Right Away
Set a timer on your phone for the end of the cycle. Don’t leave clothes sitting in the drum after it stops. They will wrinkle and trap moisture, making them smell musty.
Pull everything out and give it a good shake. Fold or hang items immediately. This saves you from breaking out the iron or steamer later. It takes two extra minutes but feels amazing.
Dealing with Damp Spots
If you find a damp spot, don’t run the whole cycle again. Just toss that item back in alone for a quick 10-minute refresh. You’ll save energy and keep the rest of your clothes from over-drying.
A damp collar or cuff happens. It’s normal, especially with thicker fabrics. A quick targeted toss fixes it without guilt.
Portable Dryer Placement for Seasonal Changes
During summer, place your dryer near an open window. This helps ventilate excess heat and humidity. During winter, you can move it to a warmer room to help it work more efficiently.
Just remember to always keep it on a hard, flat floor. Never place it on carpet, which can block airflow and trap heat. If you have to use a table, make sure it’s weight-rated and sturdy.
Storing Your Portable Dryer
If you only use it seasonally, store it in a dry place. Cover it with a cloth or keep it in its original box. Before storing, run a 10-minute air-only cycle to clear out any damp condensation left in the drum.
Check the power cord for cracks or frays before you plug it in again. A little care keeps your dryer safe and functional for years.
When to Use a Portable Dryer vs. Air Drying
A portable dryer isn’t always the best choice. For heavy fabrics like thick denim or bulky sweatshirts, air drying might be quicker. Hang these items on a rack or shower rod overnight.
Portable dryers shine for smaller loads — gym clothes, office shirts, and everyday essentials. They’re perfect when it’s raining outside or you live in a humid climate where line drying takes forever.
Energy Efficiency Check
Many users wonder if these dryers are worth the energy. We found that portable dryers use less energy per load compared to standard vented dryers because they handle smaller loads. But they cost more per pound of laundry dried. If you’re weighing a portable dryer against a full-size washer, our breakdown of washing machine costs can help you budget.
If you’re drying multiple loads back-to-back, consider air drying the heavy items. Save the dryer for quick-turnaround pieces. This balance keeps your electric bill low and your closet full.
Quick Guide to Troubleshooting
- Dryer stops mid-cycle: Check the water tank and empty it immediately.
- Clothes take too long: Clean the lint filter and reduce your load size.
- Strange noises: Check for loose coins or buttons in the drum and ensure the unit is level.
- Burning smell: Unplug right away, clean the filter, and check vents for blockages.
- Error code flashing: Consult your manual — it’s often just a full tank or an unbalanced load.
Checklist for a successful portable dryer run:
- ✅ Place dryer on a flat, level surface with clearance.
- ✅ Shake out clothes and sort by fabric weight.
- ✅ Load drum only three-quarters full.
- ✅ Select the correct heat and time settings.
- ✅ Empty the water tank and clean the lint filter afterward.
- ✅ Fold clothes immediately to prevent wrinkles.
Conclusion
Using a portable clothes dryer comes down to three simple habits: load it loosely, empty the tank, and clean the lint filter. Get those right, and you will enjoy fast, wrinkle-free drying without the fire risks or musty smells that plague careless users.
Start small. Pick one load this week and follow our checklist from start to finish. Shake out your clothes, keep the drum three-quarters full, set the right cycle, and fold everything the moment the buzzer sounds. You will notice the difference in drying time, energy use, and how good your shirts look straight out of the drum.
Your portable dryer is a tool, not a toy. Treat it with a little respect, and it will serve you for years. Now go dry something.
Frequently Asked Questions
Can you plug a portable dryer into a regular wall outlet?
Yes, most portable dryers run on a standard 120-volt household outlet. Just plug the dryer directly into the wall. Avoid extension cords and power strips because the dryer draws heavy wattage and can trip your breaker.
How long does a portable clothes dryer take to dry a full load?
A typical load takes between 40 and 90 minutes depending on fabric type and load size. Lightweight synthetics dry faster while towels and jeans take longer. Check your clothes at the halfway point to avoid over-drying.
Do portable dryers need a vent or water hookup?
Ventless condenser models need only a power outlet and a water tank you empty after each use. Some units come with a drain hose you can route to a sink. You do not need any permanent installation or outside venting for most models.
Can you dry sneakers in a portable clothes dryer?
You can, but you need to use a low-heat or air-only cycle. Remove the insoles and laces first. Place the shoes in a mesh laundry bag to protect the drum and your footwear from bouncing around.
What is the best way to reduce static cling in a portable dryer?
Use wool dryer balls instead of fabric softener sheets. They bounce around, lift the fabric, and reduce static naturally. You can also run a cool-down cycle at the end to minimize static buildup.