Adhesive for Shower Caddy [How to Use]
To use adhesive for a shower caddy, follow these steps: clean the surface thoroughly, apply adhesive to the back of the caddy, press firmly against the wall or tile, and let it dry for the recommended time. Adhesive for shower caddies is a convenient and efficient way to organize your bathroom essentials without drilling holes or causing damage to your walls.
It provides a strong and secure hold, allowing you to easily access your items while showering. In this article, we will explore the benefits of using adhesive for shower caddies, as well as provide a step-by-step guide on how to properly use it.
So, let’s dive in and find out more about this practical solution for organizing your shower space.
Table of Contents
Why Choose Adhesive For Shower Caddy
When it comes to choosing the right adhesive for your shower caddy installation, there are a few compelling reasons to consider it as your go-to option. The benefits of using adhesive for shower caddies are many, and it’s important to understand why this method is a popular choice among homeowners.
So let’s dive in and explore the advantages of using adhesive for shower caddy installation.
Benefits Of Using Adhesive For Shower Caddy
- No drilling or damage to tiles: One of the biggest advantages of using adhesive for shower caddy installation is that it eliminates the need for drilling into your bathroom tiles. This means no unsightly holes or potential damage to your walls, making it a great option for rented properties or homeowners who want to avoid any permanent alterations.
- Easy installation: Using adhesive for your shower caddy is incredibly simple. You don’t need any special tools or equipment, and the process can be completed in just a few minutes. This ease of installation is perfect for those who want a hassle-free solution that doesn’t require professional help.
- High load-bearing capacity: Adhesive products designed for shower caddy installation are specifically formulated to provide strong and reliable support. They can easily withstand the weight of your toiletries and shower essentials, ensuring that your caddy remains securely in place.
- Flexibility: With adhesive, you have the freedom to position your shower caddy wherever you desire. Unlike other installation methods that limit your options, adhesive gives you the flexibility to place your caddy at the most convenient and accessible spot in your shower.
Comparison With Other Installation Methods
- Adhesive vs. suction cups: Adhesive outperforms suction cups when it comes to stability and longevity. Suction cups can lose their grip over time, causing your shower caddy to fall off. On the other hand, adhesive provides a strong bond that lasts, giving you peace of mind that your shower essentials are securely stored.
- Adhesive vs. drilling: While drilling may be a common installation method, it comes with its drawbacks. Drilling can be time-consuming, messy, and irreversible. Adhesive offers a simpler alternative that saves you time and effort, while also preserving the aesthetic appeal of your bathroom.
- Adhesive vs. Tension rods: Tension rods may seem like a convenient choice, but they can be finicky and require constant adjustments. Adhesive provides a more reliable solution that ensures your shower caddy stays firmly in place, even under the weight of heavy items.
In addition to the benefits it offers and its comparison with other installation methods, adhesive for shower caddy installation stands out for its easy installation and removal. With adhesive, you can quickly set up your shower caddy without the need for extensive tools or professional help, and if you ever need to make changes or remove the caddy, it can easily be done without leaving any damage behind.
So why struggle with complicated installation methods when adhesive provides a simple, effective, and reliable solution? Give it a try and enjoy a hassle-free shower caddy experience.
Types Of Adhesive For Shower Caddy
Shower caddies are essential additions to any bathroom, providing convenient storage for all your shower essentials. However, finding the right adhesive to secure your shower caddy in place can be a bit daunting. That’s why we’ve put together this informative guide to help you understand the different types of adhesive options available.
From suction cup adhesives to waterproof adhesive strips and epoxy adhesives, we’ve got you covered. So, without further ado, let’s dive in!
Suction Cup Adhesives:
- Suction cup adhesives offer a quick and easy solution for attaching your shower caddy to smooth, non-porous surfaces like glass or tile.
- These adhesives come with a suction cup that creates a vacuum seal when pressed against the surface, providing a strong hold.
- They are easily removable and can be repositioned with ease, making them a great choice for those who like to change the layout of their shower caddy.
Waterproof Adhesive Strips:
- Waterproof adhesive strips are an excellent option for attaching your shower caddy to surfaces like fiberglass or acrylic.
- These adhesive strips are designed to withstand moisture and humidity, ensuring your shower caddy stays securely in place even in wet conditions.
- They provide a reliable bond without damaging the surface, making them a popular choice for rental properties or temporary installations.
Epoxy Adhesives:
- Epoxy adhesives offer an incredibly strong and durable bond, making them ideal for heavy-duty shower caddies or for securing caddies to uneven surfaces.
- These adhesives consist of two components – a resin and a hardener – that need to be mixed before application.
- Once applied, epoxy adhesives create a chemical reaction that results in a powerful bond capable of withstanding water, heat, and pressure.
Whether you opt for suction cup adhesives, waterproof adhesive strips, or epoxy adhesives, choosing the right adhesive for your shower caddy is crucial to ensure it stays securely in place. Consider the surface you’ll be attaching the caddy to, the weight of the caddy, and your specific needs before making your decision.
With the right adhesive, you can enjoy a clutter-free shower experience.
Preparing The Surface For Adhesive Application
Cleaning The Shower Wall:
Before applying adhesive for your shower caddy, it’s crucial to ensure that the surface is clean and free from any dirt or grime. Here are some key points to consider when cleaning the shower wall:
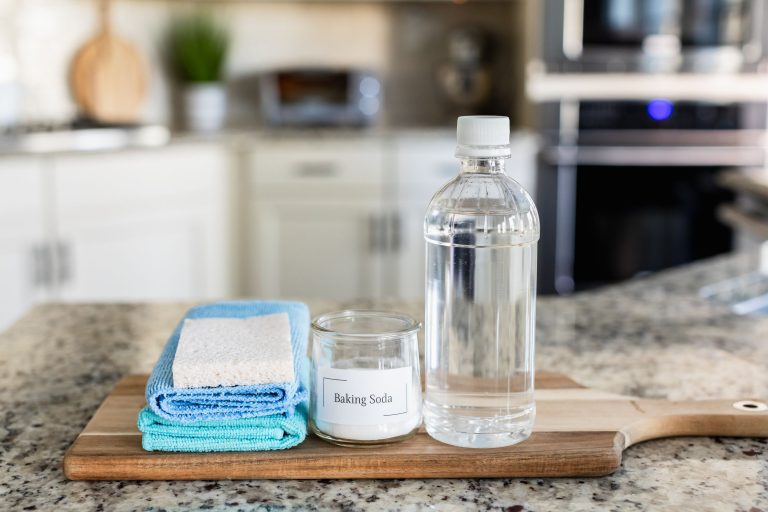
- Use a mild cleaner or a mixture of water and vinegar to effectively clean the wall.
- Scrub the surface gently with a sponge or brush to remove any soap scum or residue.
- Pay extra attention to the corners and edges of the wall.
- Rinse the wall thoroughly with water to remove any cleaning product residue.
- Double-check for any remaining dirt or grime and clean it again if necessary.
Drying The Surface:
Once the shower wall is clean, the next step is to ensure that it is completely dry before applying the adhesive. Here are some important points to keep in mind while drying the surface:
- Use a clean, dry towel or cloth to wipe off any excess moisture from the wall.
- Allow sufficient time for the wall to air dry naturally. Avoid using a hairdryer as it may not uniformly dry the surface.
- Check that there are no wet spots or damp areas on the wall.
- Ensure the room is well-ventilated to aid in the drying process.
Removing Any Residue Or Debris:
To ensure proper adhesion of the shower caddy, it’s essential to remove any residue or debris from the shower wall. Here are some key points to consider during this step:
- Use a scraper or putty knife to gently scrape off any stubborn residue or adhesive from previous installations.
- Wipe down the wall with a clean, dry cloth to remove any loose debris.
- Inspect the surface carefully for any remaining residue or debris, and remove it using an appropriate cleaning solution or gentle scrubbing.
- Ensure that the wall is smooth and free from any bumps or rough patches.
Remember, preparing the surface properly is vital for the adhesive to work effectively and ensure a secure attachment for your shower caddy. By following these steps, you’ll be well on your way to a successful installation.
Applying Adhesive For Shower Caddy Properly
When it comes to installing a shower caddy in your bathroom, using the right adhesive is crucial for ensuring a secure bond. Improper application can lead to the caddy falling off the wall, causing damage and inconvenience. In this section, we’ll guide you through the correct placement of the adhesive, ensuring a secure bond, and allowing the adhesive to cure properly for a long-lasting hold.
Correct Placement Of The Adhesive:
- Identify the ideal location for your shower caddy, considering convenience and accessibility.
- Ensure the surface is clean, dry, and free from any dust or debris that could interfere with the adhesive bond.
- Measure and mark the placement of the shower caddy, ensuring it is level and at a suitable height for your needs.
- Begin applying the adhesive in small, even lines, using a caulking gun or squeeze tube.
- Pay attention to the corners and edges, ensuring the adhesive covers the entire surface area where the caddy will be attached.
- Avoid excessive application, as it can result in the adhesive squeezing out when the caddy is pressed against the wall.
Ensuring A Secure Bond:
- Immediately after applying the adhesive, firmly press the shower caddy against the wall, making sure it aligns with the marked placement.
- Apply pressure evenly across the entire surface of the caddy to maximize contact with the adhesive.
- Hold the caddy in place for at least 30 seconds to allow the adhesive to bond effectively.
- Avoid applying any weight or strain on the caddy for the recommended curing time specified by the adhesive manufacturer.
Allowing Adhesive To Cure Properly:
- After installing the shower caddy, avoid using it or placing any items on it until the adhesive has fully cured.
- Curing time can vary depending on the type of adhesive used, so refer to the manufacturer’s instructions for the recommended duration.
- Maintain a dry and temperature-controlled environment during the curing process to optimize the adhesive’s bonding properties.
- Once the adhesive has cured, test the strength of the bond by gently tugging on the caddy. If it holds firmly in place, you can rest assured that it has cured properly.
Following these steps will ensure that your shower caddy is securely attached to the wall, providing a convenient storage solution for your bathroom essentials. With proper placement, a secure bond, and allowing the adhesive to cure properly, your shower caddy will withstand the test of time, keeping your shower organized and clutter-free.
Frequently Asked Questions On Adhesive For Shower Caddy [How To Use]
Can I Use Adhesive For My Shower Caddy?
Yes, adhesive is a great option for securing your shower caddy without drilling any holes.
What Type Of Adhesive Is Best For A Shower Caddy?
An adhesive with strong bonding properties, specially designed for bathroom environments, is ideal for a shower caddy.
How Do I Prepare The Surface Before Applying The Adhesive?
Clean the surface thoroughly to remove any dirt or residue, ensuring a clean and dry surface for the adhesive to adhere to.
How Do I Apply Adhesive To The Shower Caddy?
Apply the adhesive according to the manufacturer’s instructions, ensuring to evenly distribute it on the connection points of the shower caddy.
Can I Remove The Adhesive Without Damaging The Wall?
Yes, most adhesives can be removed without damaging the wall. Follow the removal instructions provided by the adhesive manufacturer.
How Much Weight Can Adhesive Support For A Shower Caddy?
The weight capacity of adhesive varies depending on the brand, so it’s important to choose an adhesive that can support the weight of your shower caddy.
Conclusion
To effectively use adhesive for your shower caddy, it’s crucial to follow the correct steps. Start by preparing the surface and cleaning it thoroughly. Make sure it’s dry before applying the adhesive. Use a high-quality adhesive that is specifically designed for bathroom environments, ensuring it is waterproof and resistant to humidity.
Apply a small amount of adhesive onto the back of the shower caddy and firmly press it against the desired spot on the wall. Hold the caddy in place for a few minutes to allow the adhesive to bond. It’s important to give the adhesive enough time to fully cure before adding any weight to the caddy.
Following these steps will ensure a secure and long-lasting bond between your shower caddy and the wall. Enjoy a clutter-free and organized shower experience with your securely mounted caddy!


![Best Magnetic Shower Curtains Reviews [Ultimate Guides]](https://bathroomexplorer.com/wp-content/uploads/2024/01/best-magnetic-shower-curtain.jpg)
![5 Best Extendable Shower Squeegees [A Comprehensive Guide for 2025]](https://bathroomexplorer.com/wp-content/uploads/2025/01/Best-Extendable-Shower-Squeegees.jpg)
