How to Change Well Water Filter: A Complete Step-by-Step Guide
When was the last time you thought about your well water filter? If you’re like most homeowners with a private well, the answer is probably “not recently enough.” But here’s the thing—changing your well water filter isn’t some mysterious task that requires calling in a professional every single time. With the right knowledge and a little bit of elbow grease, you can handle this maintenance job yourself and save some serious money in the process.
Let me be honest with you: I used to dread this chore. The first time I attempted it, I felt completely lost, fumbling around with unfamiliar equipment and wondering if I was doing everything correctly. But after learning the proper technique, I realized it’s actually straightforward. Today, I’m going to walk you through exactly how to change your well water filter so you can do it confidently.
Understanding Your Well Water Filtration System
Before we jump into the actual process of changing your filter, let’s talk about what you’re dealing with. Your well water filter is like the bouncer at a club—it’s standing at the entry point, checking everything that tries to pass through and saying “no” to the stuff you don’t want in your water.
What Does Your Well Water Filter Do?
Your well water filter serves several critical purposes. It removes sediment, which includes sand, silt, and other particles that make your water look cloudy or taste gritty. It also traps bacteria, chlorine, and various chemicals that might have found their way into your well. Think of it as your water’s first line of defense against contaminants.
Most well water systems use one of three main filter types:
- Sediment filters that catch larger particles
- Activated carbon filters that remove chemicals and improve taste
- Combination filters that do both jobs at once
Why Regular Filter Changes Matter
Here’s something many people don’t realize: a dirty filter is almost as bad as no filter at all. When your filter gets clogged with sediment and contaminants, the water pressure drops, and the filter becomes less effective. It’s like trying to breathe through a cloth that’s been used too many times—eventually, you’re not getting much air through anymore.
Depending on your water quality and filter type, you should change your filter every three to six months. If you have particularly poor water quality, you might need to change it more frequently. The good news? You’ll know when it’s time because you’ll notice reduced water pressure or a change in water quality.
What You’ll Need Before Starting
Gathering Your Tools and Materials
Don’t start this project empty-handed. Having everything ready before you begin makes the whole process smoother and faster. Here’s what you should gather:
- A replacement filter cartridge that matches your system exactly
- An adjustable wrench or filter wrench
- Towels or rags to catch spillage
- A bucket to collect water that drains from the housing
- Work gloves to protect your hands
- A step stool if your filter housing is mounted high
- Optional: a filter wrench designed specifically for your filter type
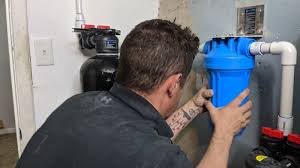
Identifying Your Filter Housing
Where’s your filter located? Most well water systems have the filter housing installed near your pressure tank, often in a basement, garage, or utility room. It typically looks like a large canister standing upright or lying horizontally, connected to your water lines with metal or plastic pipes.
Before you do anything, locate the shut-off valve for your well system. This is essential because you’ll need to turn off your water supply before opening the filter housing. The shut-off valve is usually located near your pressure tank or at the main entry point where water comes into your house.
Step-by-Step Instructions for Changing Your Filter
Step One: Turn Off Your Water Supply
This is the non-negotiable first step. Seriously, don’t skip this. Locate your main shut-off valve and turn it clockwise until it stops. You want to cut off the water supply completely so you’re not dealing with water spraying everywhere when you open the housing.
If you can’t find the shut-off valve or it doesn’t seem to be working properly, this is a good time to call a plumber to help you locate it. It’s much better to spend a few minutes now figuring this out than to create a water emergency later.
Step Two: Release Pressure from the System
After shutting off the water, you need to release the pressure that’s built up in your filter housing. Look for a small relief valve on top of the filter housing—it usually looks like a small button or screw. Turn it counterclockwise slowly to let the pressure escape. You might hear a slight hissing sound, which is exactly what should happen.
Don’t fully remove this valve yet; just open it enough to release the pressure. You’ll know the pressure is released when you no longer hear or feel air coming out.
Step Three: Position Your Bucket and Gather Your Rags
Now place your bucket under the filter housing. There’s going to be water inside that housing, and it needs to go somewhere. Spread out your towels around the area to catch any drips or spills. This step might seem overly cautious, but trust me, water has a way of going exactly where you don’t want it.
Step Four: Loosen and Remove the Filter Housing
Using your adjustable wrench or filter wrench, gently loosen the large bolt or band that holds the filter housing together. Turn it counterclockwise slowly. If you’re using a regular wrench, grip it firmly and apply steady pressure—you don’t want it slipping and damaging your hands or the equipment.
Once it’s loose enough, you can usually finish loosening it by hand. Turn it carefully and completely remove it. Set it aside on a clean surface where you won’t lose it or damage it.
Step Five: Remove the Old Filter Cartridge
Now you can lift off the top of the filter housing and remove the old, dirty cartridge. This is where you’ll see just how much stuff your filter has been catching. The cartridge will probably look pretty grimy, and that’s completely normal. Don’t be surprised or worried—that dirt and sediment would otherwise be in your drinking water.
As you remove the cartridge, some water will drain out. That’s why we positioned the bucket earlier. Let that water drain completely into the bucket.
Step Six: Clean the Filter Housing
Before inserting the new filter, take a moment to clean the inside of the housing. Use a clean rag to wipe out any sediment or debris that might still be clinging to the walls. You’re essentially giving the housing a quick bath to make sure the new filter has a clean environment to work in.
Pay special attention to the seals and rubber gaskets. These are crucial for preventing leaks, so make sure they’re clean and undamaged. If you notice any cracks or deterioration in the gaskets, this is a good time to replace them.
Step Seven: Install the New Filter Cartridge
Carefully insert your new filter cartridge into the housing. It should fit snugly, and you might need to give it a gentle twist or push to get it seated properly. Make sure the cartridge is oriented correctly—most cartridges have specific top and bottom ends, and installing them backward defeats their purpose.
Check that the cartridge is fully seated. You shouldn’t be able to wiggle it around once it’s properly installed.
Step Eight: Replace the Housing and Tighten the Bolt
Place the top of the housing back on and align the bolt or band. Begin tightening it by hand first to make sure you’re threading it correctly. Once you’ve hand-tightened it, use your wrench to finish the job. Tighten it firmly, but don’t go overboard—you want it snug, not stripped.
Step Nine: Close the Relief Valve
Turn the relief valve back to its closed position by rotating it clockwise. Don’t over-tighten it, but make sure it’s secure.
Step Ten: Turn the Water Supply Back On
Slowly turn the main shut-off valve counterclockwise to restore water to your system. Open it gradually rather than all at once. This gives the air in the pipes a chance to escape and prevents sudden pressure surges.
Step Eleven: Check for Leaks
Watch the filter housing carefully for the next few minutes. Check around the base of the housing, around the bolt you just tightened, and anywhere the housing connects to the pipes. You should not see any water dripping or spraying.
If you do see a leak, turn the water back off and check your work. Sometimes a small leak means the housing bolt just needs to be tightened a bit more. If the leak persists after re-tightening, there might be an issue with the gasket or the cartridge installation.
Step Twelve: Flush Your System
Let your water run for several minutes to flush out any loose carbon particles or sediment from the new filter. You might notice the water looks a bit discolored or has a slight odor—don’t panic. This is normal with a brand new activated carbon filter. Run the water until it runs clear.
Common Mistakes People Make When Changing Filters
Not Turning Off the Water Supply
I mentioned this already, but it bears repeating because it’s such a common mistake. Some people think they can handle the mess if water sprays out. They’re usually wrong, and they end up with water damage and a frustrating experience. Just turn off the water.
Installing the Wrong Filter Size
Before you buy a replacement filter, check your current filter housing to confirm the exact size and type you need. Many people make assumptions and buy filters that don’t fit, leading to wasted money and a trip back to the store.
Forgetting to Release Pressure
Skipping the pressure release step can cause the housing to spray water in your face when you loosen it. Not fun. Always release the pressure.
Over-Tightening the Housing Bolt
While you want it tight, over-tightening can strip the threads or damage the gasket, creating leaks later. Tighten firmly, then stop.
Troubleshooting Common Issues
Water Pressure Hasn’t Improved After Filter Change
If you’ve changed the filter and still don’t have good water pressure, the issue might be elsewhere in your system. Check your pressure tank to make sure it’s properly charged. You might also have sediment buildup in other parts of your system that needs attention.
The Housing Is Leaking
If you’re seeing water drip from the housing, turn off the water and examine the situation. First, try tightening the bolt a bit more. If that doesn’t work, you might need to replace the rubber gasket. This is a relatively inexpensive part that prevents leaks.
Water Quality Hasn’t Changed
Remember that even a new filter takes a few minutes to become fully effective. If you wait several hours and the water still doesn’t seem improved, you might have a bigger problem with your well water. Consider having your water tested professionally to identify what contaminants you’re actually dealing with.
Maintaining Your Well Water System Between Filter Changes
Changing your filter is important, but it’s only one part of maintaining a healthy well water system. Keep an eye on your water pressure—a gradual decline usually means your current filter is getting clogged. Pay attention to changes in water color, taste, or smell, as these can indicate it’s time for a filter change before the regular schedule.
Have your well water tested annually by a professional lab. This will tell you exactly what’s in your water and whether your current filtration system is adequate for your needs. Sometimes, you might discover you need additional filtration beyond what a standard filter provides.
When to Call a Professional
While changing a filter is a straightforward task, some situations warrant professional help. If you can’t locate your shut-off valve, if you notice persistent leaks no matter what you do, or if you suspect there’s damage to your well system, call a professional. It’s not worth causing major damage trying to save a few dollars.
Similarly, if your water quality issues persist even after filter changes, a professional water treatment specialist can identify and solve the underlying problem.
Conclusion
Changing your well water filter is a task that any homeowner can master with the right approach and a little patience. It doesn’t require special skills or expensive tools—just basic preparation, careful attention to the steps, and respect for your water system. By taking control of this maintenance task yourself, you’ll save money, ensure your water stays clean and healthy, and develop confidence in maintaining your home’s essential systems.
Remember to mark your calendar for your next filter change, stay alert to signs that your filter needs replacing, and don’t hesitate to call a professional if you encounter problems beyond the scope of a simple filter change. Your well water system will reward your attention with clean, healthy water for years to come.
Frequently Asked Questions
How often should I change my well water filter?
Most well water filters should be changed every three to six months, depending on your water quality and the filter type. If you have high sediment levels or use your water heavily, you might need to change it more frequently. Monitor your water pressure and quality to determine the best schedule for your situation. Some homeowners find they need quarterly changes, while others can go longer between changes.
Can I change my well water filter if I don’t have a shut-off valve?
Technically, you could attempt it, but you’d have water everywhere. Before you change your filter, locate or install a shut-off valve if you don’t have one. If you absolutely cannot find a shut-off valve and you’re renting or otherwise unable to install one, contact your landlord or a professional plumber. This is a safety issue that’s worth addressing before you proceed.
What do I do if water is leaking from the filter housing after I’ve installed a new filter?
First, turn off the water supply. Then, check that the housing bolt is tight—sometimes it just needs an extra quarter turn. If tightening doesn’t stop the leak, the rubber gasket might be damaged and need replacement. You can purchase gasket kits relatively inexpensively. If neither of these solutions works, you might need professional help to assess whether the housing itself is damaged.
Is it normal for water to look discolored after installing a new activated carbon filter?
Yes, this is completely normal with new activated carbon filters. The discoloration is typically tiny carbon particles from the new filter material. Run your water for several minutes until it runs clear. This usually takes less than five minutes but can occasionally take longer. There’s no danger in the water during this time—you’re just flushing out loose particles.
How do I know which replacement filter to buy?
Check your current filter housing for specifications. The size, type, and model information should be printed or engraved somewhere on the housing. You can also contact your well system’s manufacturer or take a photo of your current filter to the hardware or plumbing store. Don’t guess about filter size—getting the wrong one wastes money and means another trip to the store. When in doubt, bring your old filter with you to match it exactly.
“`