How to Check If the Water Heater Is Working: A Complete Guide to Ensuring Hot Water Comfort
There’s nothing quite like stepping into a hot shower on a cold morning, right? But what happens when that warm water doesn’t come through? Your water heater might be giving you silent signals that something’s wrong, and you might not even realize it. In this guide, I’m going to walk you through everything you need to know about checking whether your water heater is functioning properly.
Understanding Your Water Heater: The Basics First
Before we dive into the troubleshooting steps, let’s talk about what your water heater actually does. Think of it as the unsung hero of your home—it sits quietly in your basement or utility closet, warming up water so you can use it for showers, dishes, and laundry. Most homes have either a traditional tank-based water heater or a tankless (on-demand) model. Regardless of which type you have, they both need regular check-ups to ensure they’re working at peak performance.
Why Regular Water Heater Checks Matter
You wouldn’t ignore warning lights in your car, so why ignore your water heater? Regular inspections can help you catch problems early, extend the lifespan of your unit, and save you money on emergency repairs. A water heater that’s running inefficiently is also costing you more on energy bills—sometimes significantly more than you realize.
The Real Cost of Neglect
When you ignore your water heater’s health, you’re essentially inviting bigger problems. A small leak today becomes a flooded basement tomorrow. A declining water temperature might indicate sediment buildup that reduces efficiency. The sooner you identify these issues, the better your wallet will thank you.
Signs Your Water Heater Needs Attention
Your water heater communicates through various signs and symptoms. Are you getting less hot water than usual? Is the water coming out lukewarm instead of hot? These are messages worth paying attention to. Let me break down the most common warning signs you should watch for.
Temperature Issues and What They Mean
One of the most obvious indicators that something’s wrong is when your water temperature starts fluctuating or drops entirely. If you’re adjusting your shower knob further and further toward the hot side just to get comfortable water, that’s your first clue. Sometimes the issue is simple—maybe the thermostat setting got bumped down. Other times, it indicates a more serious problem like a faulty heating element or sediment accumulation.
- Water takes longer to heat up than it used to
- Hot water runs out quickly during showers
- Temperature varies inconsistently throughout the day
- Water is lukewarm instead of hot
- Cold water suddenly enters your hot water stream
Strange Noises Coming From Your Water Heater
Have you heard popping, crackling, or rumbling sounds coming from your water heater? That’s not normal, and it deserves investigation. These noises typically indicate sediment buildup at the bottom of your tank. As the heating element warms this sediment, it creates those uncomfortable sounds. It’s like listening to your water heater struggle under the weight of accumulated debris.
Visible Leaks and Moisture
Any water pooling around your water heater is a red flag. Even small drips shouldn’t be ignored because they can escalate into major flooding situations. Check around the base, the connections, and the pressure relief valve. Sometimes the condensation from a cold unit can be misleading, but actual leaks require immediate attention.
How to Perform a Basic Water Temperature Test
Let’s start with the simplest check you can do right now. This requires nothing more than a thermometer and a few minutes of your time.
Step-by-Step Temperature Testing
First, locate the nearest hot water tap to your water heater—typically the bathroom sink closest to where your unit is located. Turn on the tap and let it run for about 30 seconds to ensure you’re getting water that’s actually been heated by your heater, not just water sitting in the pipes. Then, place a reliable thermometer under the stream. Most water heaters are set to maintain around 120 degrees Fahrenheit, though some homeowners prefer it slightly hotter at 130 degrees.
If your water is significantly cooler than this range, you’ve got a problem. If it’s much hotter, your thermostat might need adjustment. Write down the temperature and compare it to your heater’s settings. This simple test reveals a lot about your system’s current performance.
Testing Multiple Faucets
Don’t just test one faucet and call it a day. Check the kitchen sink, bathroom sink, and shower to see if the temperature is consistent throughout your home. If one faucet works great but others run cool, you might have a pipe insulation issue rather than a heater problem. If all faucets struggle with temperature, your water heater is definitely the culprit.
Checking the Thermostat Setting
Here’s where many people have an “aha” moment. Your water heater’s thermostat might be the issue, and it’s often the easiest fix. Look for the temperature dial on your unit—on most traditional tank heaters, you’ll find it near the bottom, underneath some insulation. The factory setting is usually 120 degrees Fahrenheit.
If someone in your household has adjusted it (kids are notorious for this), simply turn it back to the recommended setting. Wait about two hours for the tank to reheat and test again. Problem solved? Great! If not, we need to dig deeper.
Safety Considerations When Adjusting Thermostat
Never set your water heater above 140 degrees Fahrenheit unless you have a specific reason to do so. Extremely hot water increases scalding risks and can damage your plumbing fixtures. Some experts even recommend keeping it at 120 degrees for safety, especially if you have young children or elderly family members in your home.
Inspecting Your Water Heater Visually
A thorough visual inspection can reveal many issues without requiring professional help. Grab a flashlight and spend a few minutes examining your unit carefully.
What to Look For During Visual Inspection
First, check for any visible rust or corrosion on the tank itself. Some surface rust is normal, but extensive corrosion suggests your heater is aging and might need replacement soon. Look at all connections and valves—these should be dry. Check the pressure relief valve at the top of the tank; it should have a drain pipe attached and should not be leaking.
Examine the area around and underneath your water heater. Any standing water, mineral deposits, or staining indicates a leak, even if you don’t currently see active dripping. These deposits are like evidence of a crime scene—they tell the story of what’s been happening when you weren’t looking.
Checking Connection Points
Water heaters have several connection points where leaks commonly develop. The cold water inlet line, hot water outlet line, and drain valve all deserve careful attention. Tighten any connections that feel slightly loose, but don’t over-tighten. Sometimes a simple wrench adjustment stops a leak immediately.
Testing the Pressure Relief Valve
The pressure relief valve is like a safety guardian for your water heater. It’s designed to release excess pressure if it builds up to dangerous levels. Testing this valve is important but requires caution.
How to Safely Test the PRV
Look for the valve near the top of your tank with a lever handle. Place a bucket underneath, then lift the lever slightly. You should hear or see a brief discharge of hot water. If nothing happens, the valve might be stuck or non-functional. Allow the valve to snap back into place—don’t hold it open.
If the valve continually leaks after this test, it likely needs replacement. If the valve never discharges any water, have a professional inspect it. A non-functioning pressure relief valve is a safety hazard you shouldn’t ignore.
Assessing Sediment Buildup Issues
Over time, minerals in your water settle at the bottom of your tank, creating sediment buildup. This is one of the most common reasons for declining water heater performance.
Signs of Sediment Accumulation
Remember those strange noises we discussed earlier? That popping and crackling often indicates sediment. You might also notice reduced water pressure, rusty discolored water coming from your tap, or simply less hot water available before the tank empties. In areas with hard water, sediment buildup happens faster than in soft water regions.
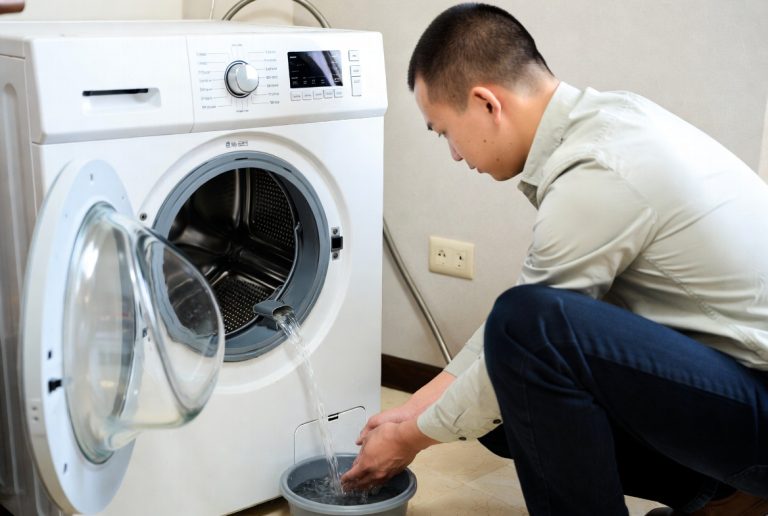
Flushing Your Water Heater
The good news is you can address sediment buildup with a flush. Turn off your water heater (switch off power at the breaker or turn the gas valve to pilot). Connect a garden hose to the drain valve at the bottom of the tank and direct it to a drain or outdoors. Open the valve and let the tank drain completely. This process flushes out accumulated sediment and can dramatically improve performance.
After draining, close the valve and refill the tank. Turn the power back on and allow it to heat. Your heater should run quieter and produce hotter water. Many experts recommend doing this annually to maintain peak efficiency.
Energy Efficiency Performance Check
Your water heater’s efficiency directly impacts your utility bills. An aging, inefficient unit might be costing you hundreds of dollars annually.
How to Evaluate Efficiency
Check how long it takes for your water heater to recover after a full tank is used. A good unit should refill and reheat within 30-45 minutes. If it takes much longer, your heating element or burner might be failing. Also, monitor your water heating costs month to month. If they’re consistently rising, your heater is becoming less efficient.
Look for the EnergyGuide label on your unit, which shows its estimated yearly energy cost. Compare this to your actual bills. A significant discrepancy suggests declining efficiency.
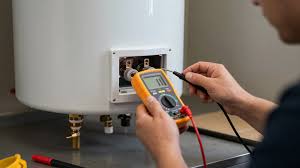
When to Call a Professional
There are definitely times when you need expert help. Don’t attempt repairs beyond your comfort level, especially with gas-powered units or electrical components.
Red Flags Requiring Professional Service
- Gas smell around your water heater
- Persistent leaks that don’t stop after simple fixes
- No hot water despite proper thermostat settings
- Pressure relief valve continuously discharging water
- Visible cracks or severe corrosion on the tank
- Discolored or foul-smelling hot water
- Electrical issues or tripped breakers
Professional technicians have the tools and expertise to diagnose complex issues and perform repairs safely. The cost of a service call is well worth it compared to potential damage from DIY mistakes.
Maintenance Tips for Optimal Performance
Prevention is always better than cure. Regular maintenance extends your water heater’s lifespan and keeps it running efficiently.
Monthly Checks You Should Do
Every month, spend five minutes doing a basic inspection. Check for new leaks, listen for unusual sounds, and test your temperature quickly. These quick checks help you catch issues early before they escalate.
Annual Professional Maintenance
Once yearly, have a professional inspect your unit. They’ll check components you can’t easily access, replace the anode rod if needed, and perform a thorough flush. This investment typically costs between $100 to $200 but can extend your heater’s life by several years.
Tankless Water Heater Checks
If you have a tankless water heater, the troubleshooting process differs slightly. These units don’t store hot water, so problems manifest differently.
Common Tankless Heater Issues
Tankless heaters often have flow rate issues where they can’t heat water fast enough if multiple faucets run simultaneously. You might also experience temperature fluctuations or slow startup times. Mineral buildup is even more critical in tankless units, so descaling should happen more frequently than with tank models. If your tankless heater isn’t working properly, the issue is often mineral buildup inside the heat exchanger, which requires professional descaling.
Conclusion
Checking whether your water heater is working properly doesn’t require expensive tools or professional training—at least not for the initial assessment. Start with simple temperature tests, visual inspections, and thermostat checks. Most issues you can identify yourself will either have straightforward fixes or will clearly indicate when professional help is needed.
Remember, your water heater is an investment in your home’s comfort and functionality. By staying proactive with regular checks and maintenance, you’ll ensure reliable hot water for years to come. Don’t wait for a complete breakdown to address problems. Those early warning signs—temperature changes, strange noises, visible leaks—are your heater’s way of asking for help. Listen to those signals, act promptly, and you’ll enjoy the comfort of a well-functioning water heater without unexpected emergencies or expensive repairs.
Frequently Asked Questions
How often should I flush my water heater?
Most experts recommend flushing your water heater annually, or more frequently if you live in an area with hard water. Annual flushing removes sediment buildup that reduces efficiency and causes noise. If you haven’t flushed your heater in several years, start with a flush immediately and then continue annually. The process is straightforward enough for a homeowner to do independently and takes only a couple of hours.
What’s the normal lifespan of a water heater?
Traditional tank-based water heaters typically last between 8 to 12 years, with an average of around 10 years. Tankless units often last longer, sometimes reaching 15 to 20 years. The actual lifespan depends heavily on water quality, maintenance frequency, and how much the unit is used. Regular maintenance can extend these timelines significantly, while neglect will shorten them.
Why is my hot water sometimes brown or rusty?
Discolored hot water usually indicates rust or sediment inside your tank. This happens when the anode rod (which protects the tank from rust) deteriorates and no longer provides protection. The corroding tank interior releases rust particles into the water. This is a serious issue requiring professional attention because it suggests your tank is deteriorating and might fail soon. Have a professional inspect and likely replace your anode rod.
Can I adjust my water heater temperature myself?
Yes, you can adjust the thermostat dial on most water heaters yourself. It’s one of the safest DIY tasks you can perform. However, always wait at least two hours after adjusting before testing the temperature change, as the tank needs time to reheat. Be careful not to set it above 140 degrees Fahrenheit, and remember that higher temperatures increase scalding risk without providing significant benefits.
How much does water heater replacement typically cost?
A new traditional tank water heater costs between $400 to $900 for the unit itself, with installation adding another $300 to $800 depending on your location and setup complexity. Tankless units are more expensive, ranging from $1,000 to $3,000 installed. While replacement is a significant expense, investing in a new efficient unit often pays for itself through reduced energy bills over the following years, especially if your current heater is over 10 years old.
“`