

Clean Your AC Evaporator Coil: A Step-by-Step Guide
The easiest way to clean your air conditioner’s evaporator coil is to first turn off your AC unit at the breaker box. Then, you can safely spray it with a no-rinse coil cleaner or a DIY vinegar solution. Cleaning your evaporator coil regularly helps your AC run more efficiently and prevents costly repairs by addressing mold and mildew buildup.
Your evaporator coil is a key part of your AC system. It absorbs heat from your home. When it gets dirty, it can’t do its job well. This means your system works harder and uses more energy. Keeping it clean is an important part of AC maintenance and ensures you breathe cleaner air. Many homeowners overlook this step, leading to reduced cooling power.
- Turn off your AC unit at the breaker.
- Use a coil cleaner or vinegar solution.
- Rinse if your cleaner requires it.
- Ensure proper ventilation during cleaning.
- Check your owner’s manual for specific instructions.
Ready to get your AC cooling like new? Let’s walk through exactly how to clean that evaporator coil step by step.
Your Guide to Cleaning Your Air Conditioner’s Evaporator Coil
Keeping your evaporator coil clean is like giving your air conditioner a fresh breath. A dirty coil works harder and cools less effectively. This leads to higher energy bills and can even shorten your AC’s lifespan. Thankfully, cleaning it yourself is a manageable DIY task. You can restore its efficiency and improve your home’s air quality.
Understanding the Evaporator Coil’s Role
Your evaporator coil is a critical component of your cooling system. It’s usually located inside your indoor air handler unit. Think of it as the place where the magic happens to cool your home. It absorbs heat from the air inside your house. This heat is then transferred to the refrigerant flowing through the coils. This process is fundamental to how your AC cools your living space. Without it, your system wouldn’t be able to provide that welcome chill on a hot day.
How a Dirty Coil Impacts Performance
When dust, dirt, and grime build up on the evaporator coil, they act like a blanket. This blanket insulates the coil, preventing it from absorbing heat efficiently. Your AC unit then has to run much longer to achieve the desired temperature. This means it consumes more electricity. Studies have shown that dirty coils can reduce an AC system’s efficiency by as much as 30% (U.S. Department of Energy). This inefficiency translates directly into higher energy costs for you.
Potential Problems from Neglect
Beyond just poor cooling and increased energy bills, a neglected evaporator coil can lead to bigger issues. Mold and mildew can thrive in the moist environment of a dirty coil. This can negatively affect your indoor air quality. Inhaling mold spores can be detrimental to your health, especially for those with allergies or respiratory conditions. Furthermore, the extra strain on the system can lead to premature wear and tear on components like the compressor. This could result in costly repairs down the line.
Gathering Your Cleaning Supplies
Before you begin, make sure you have everything you need. Having your supplies ready will make the cleaning process much smoother. You don’t want to be halfway through and realize you’re missing something important. This list covers the essentials for a thorough coil cleaning.
Essential Cleaning Tools and Materials
You’ll need a few key items to get the job done right. A soft brush or a vacuum with a brush attachment is helpful for removing loose debris. A spray bottle is essential for applying your cleaning solution. You’ll also need a coil cleaner. This can be a commercially available, no-rinse cleaner designed for AC coils. Alternatively, a simple DIY solution works well. You’ll need a gallon of distilled white vinegar for this. Gloves and eye protection are a good idea for safety. You might also want some old towels or rags to catch any drips.
Choosing Your Cleaning Solution
There are two main options for cleaning your evaporator coil. The first is a commercial no-rinse coil cleaner. These are specifically formulated to break down dirt and grime. They also often contain enzymes that help prevent future buildup. They are very effective and convenient. The second option is a DIY solution of distilled white vinegar. Vinegar is a natural acid that can dissolve mineral deposits and break down grease. For most situations, either option will work well.
Safety First: Turning Off Power
This step is non-negotiable and extremely important for your safety. Always turn off the power to your air conditioning unit before you start cleaning. Locate the electrical breaker box for your home. Find the breaker that controls your AC unit. Flip it to the “off” position. Many homeowners also recommend turning off the power switch located on or near the indoor air handler unit itself. Double-check that the unit will not turn on to ensure it’s completely de-energized. Your safety is the top priority.
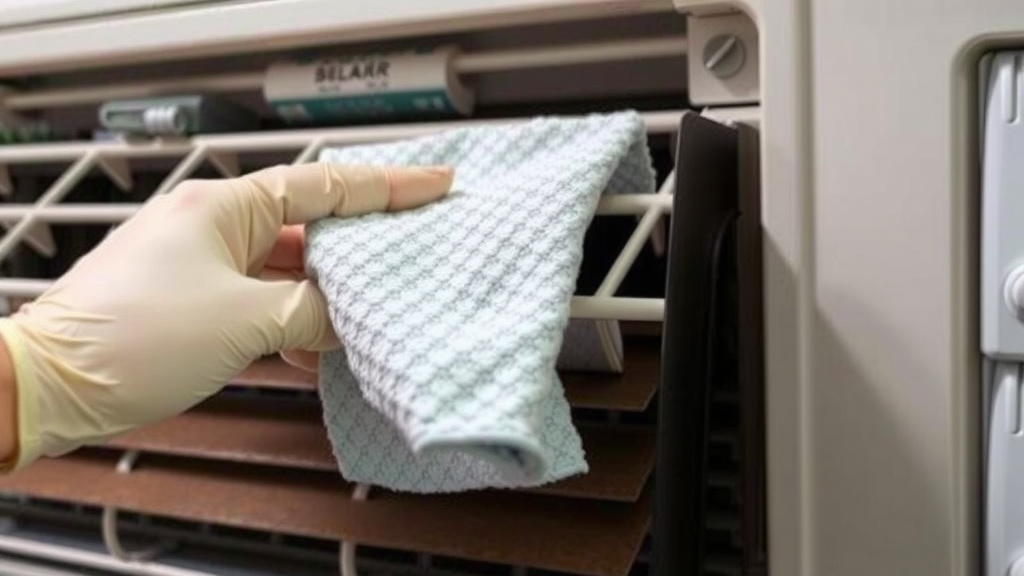
Step-by-Step Coil Cleaning Process
Now that you have your supplies and safety precautions in place, let’s get to the actual cleaning. Follow these steps carefully to ensure you clean the coil effectively without causing damage.
Accessing the Evaporator Coil
The evaporator coil is typically housed within the indoor air handler unit. You’ll need to open up the unit to get to it. This usually involves removing an access panel. Consult your AC unit’s owner’s manual if you’re unsure how to access the coil. Some panels are held in place by screws, while others might have latches. Take your time and be gentle to avoid damaging any parts. Once the panel is off, you should be able to see the coil.
Initial Debris Removal
Before applying any liquid cleaner, it’s best to remove any loose debris. Use a soft brush or a vacuum cleaner with a brush attachment. Gently brush or vacuum away dust, lint, and other buildup from the coil fins. Be careful not to bend or damage the delicate fins. Many experts suggest brushing or vacuuming in the direction of the fins to avoid this. This initial step can remove a surprising amount of gunk.
Applying the Cleaning Solution
Now it’s time to apply your chosen cleaner. If you’re using a commercial no-rinse cleaner, follow the product’s instructions carefully. Typically, you’ll spray it directly onto the coil. Ensure you coat the entire surface of the coil. If you’re using the vinegar solution, pour it into your spray bottle. Spray the vinegar generously over the evaporator coil. Make sure to get good coverage. The vinegar will begin to work on breaking down dirt and grime.
Rinsing (If Necessary)
Some commercial coil cleaners are no-rinse formulas. This means you don’t need to wash them off. However, if your cleaner’s instructions specify rinsing, or if you used a stronger cleaning agent, you’ll need to do this. Use a gentle stream of water from a hose or a spray bottle. Rinse the coil thoroughly from top to bottom. Make sure all cleaning solution residue is removed. If you used vinegar, rinsing is a good idea to remove any lingering smell.
Allowing for Drainage and Drying
After cleaning and rinsing, allow the coil to air dry. Gravity will help water drain away. Most AC systems have a drain pan underneath the evaporator coil. This pan collects condensation and any excess water. Make sure the drain pan is clear and functioning properly. If it’s clogged, water can back up, which is a problem. Some moisture will evaporate over time. Proper airflow through the unit will aid in drying.
Reassembly and Power Restoration
Once the coil appears dry, you can replace the access panel. Ensure it’s secured properly. Now, you can turn the power back on to your air conditioning unit. Go back to your breaker box and flip the AC breaker to the “on” position. You can also turn on any local power switches you turned off earlier. Your AC should now be ready to run with a clean, efficient evaporator coil.
Checklist for a Sparkling Evaporator Coil
Here’s a quick checklist to help you remember the key steps for a successful coil cleaning:
- Turn off power at the breaker box.
- Gather all necessary cleaning supplies.
- Remove loose debris from the coil.
- Apply your chosen cleaning solution evenly.
- Rinse if your cleaner requires it.
- Allow the coil to air dry completely.
- Restore power to the AC unit.
Conclusion
You’ve learned how cleaning your AC’s evaporator coil is a manageable DIY task that boosts efficiency. It helps your system run better and can prevent costly repairs down the road. Remember to always prioritize safety by turning off the power before you start. By regularly cleaning your evaporator coil, you’ll ensure cooler air, lower energy bills, and a healthier home environment. Your next step is to grab your supplies and schedule this important maintenance task for your AC unit.
Frequently Asked Questions
How often should I clean my AC’s evaporator coil?
For most homes, cleaning your evaporator coil once a year is recommended, typically in the spring before the cooling season begins. If you live in a dusty environment or have pets, you might need to clean it more frequently, perhaps twice a year.
Can I use a regular household cleaner on my evaporator coil?
It’s best to avoid regular household cleaners, as they may not be formulated for delicate AC components. Stick to commercial no-rinse coil cleaners or a simple vinegar solution as discussed. These are designed to be effective without damaging the coil.
What if my evaporator coil is frozen?
If your evaporator coil is frozen, turn off your AC unit immediately and turn on the fan to help it thaw. A frozen coil usually indicates an airflow problem or a low refrigerant charge, which might require professional attention after it thaws.
Will cleaning the evaporator coil improve my AC’s cooling power?
Yes, a clean evaporator coil can significantly improve your AC’s cooling power. When the coil is free of dirt and grime, it can absorb heat more efficiently, allowing your system to cool your home more effectively and quickly.
Is it okay to spray water directly onto the AC unit components after cleaning?
Only rinse the coil if your cleaning product specifically instructs you to do so. If rinsing is required, use a gentle stream of water and ensure the coil is allowed to dry thoroughly afterward. Avoid saturating electrical components.
![7 Best Indoor Wall Mounted Air Conditioner [2026]](https://bathroomexplorer.com/wp-content/uploads/2026/06/7-best-indoor-wall-mounted-air-conditioner-2026-featured-768x432.jpg)
![7 Best Generator To Run Rv Air Conditioner [2026]](https://bathroomexplorer.com/wp-content/uploads/2026/06/7-best-generator-to-run-rv-air-conditioner-2026-featured-768x432.jpg)