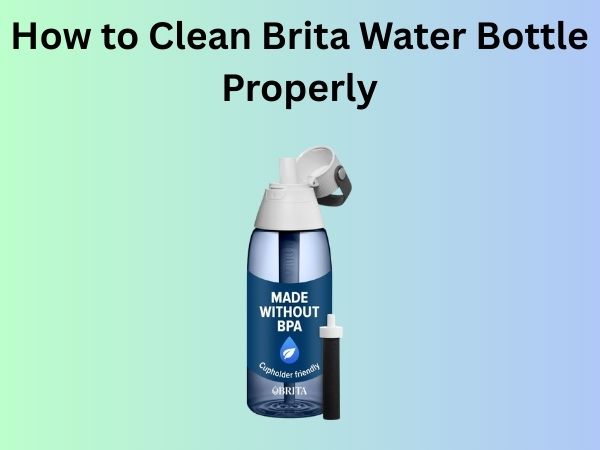
How to Clean Brita Water Bottle Properly: A Complete Guide
Let me be honest with you—if you’re anything like me, you probably grab your Brita water bottle every morning without giving it much thought. You fill it up, take a sip, and go about your day. But here’s the thing: that trusty bottle of yours needs some serious TLC if you want it to keep your water fresh and safe to drink.
I’ve been using Brita bottles for years, and I’ve learned the hard way that proper cleaning isn’t just about making your bottle look nice. It’s about maintaining the integrity of your filter, preventing bacterial growth, and ensuring that every sip you take is actually as pure as you think it is. In this guide, I’m going to walk you through everything you need to know about cleaning your Brita water bottle the right way.
Understanding Why Brita Water Bottles Need Regular Cleaning
Before we dive into the how, let’s talk about the why. Your Brita water bottle isn’t just sitting empty between uses, right? There’s moisture, residue, and yes, potentially some unwanted bacteria that can build up inside if you’re not careful.
Think of your water bottle like a small ecosystem. When you use it daily without proper cleaning, you’re creating the perfect environment for mold and bacteria to thrive. The filter inside does an amazing job of removing contaminants from your water, but the bottle itself? That’s your responsibility.
What Happens When You Don’t Clean Your Bottle Regularly
I learned this lesson the hard way. Once, I left my Brita bottle sitting in a dark cabinet for a week without cleaning it properly, and when I came back to it, there was visible mold growing inside. It was disgusting, and honestly, kind of terrifying knowing I had been drinking from that.
Here’s what actually happens when you neglect your cleaning routine:
- Mold and mildew develop in hard-to-reach corners and the filter area
- Bacteria colonies start to form on the wet surfaces
- Mineral deposits and scale buildup create a sticky residue
- Odors develop that make your water taste off
- The filter’s effectiveness diminishes faster than it should
None of this is good news for your health or your water quality. So let’s make sure you’re doing this right.
What You’ll Need to Clean Your Brita Water Bottle
Essential Cleaning Supplies
You don’t need anything fancy or expensive to clean your Brita bottle properly. In fact, you probably have most of these items in your kitchen right now:
- Warm water (hot is better, but warm works fine)
- Dish soap or liquid detergent
- A soft bottle brush or long-handled sponge
- White vinegar (optional but highly recommended)
- Baking soda (for stubborn stains)
- Clean, lint-free towels
- A small cup or container for soaking
That’s honestly it. You’re not going to need any special commercial cleaners or anything overly complicated. The beauty of this process is its simplicity.
Why These Specific Items Work Best
I chose these items specifically because they’re gentle on your bottle’s material while being tough on grime. Dish soap breaks down oils and residue without being too harsh. Vinegar is a natural disinfectant that kills bacteria and helps dissolve mineral deposits. Baking soda works wonders on stubborn stains through a gentle abrasive action. And a soft brush? That’s your best friend for reaching those corners where nasties like to hide.
Step-by-Step Guide to Cleaning Your Brita Water Bottle
Step 1: Empty and Initial Rinse
Start by completely emptying your bottle. Don’t just shake out what’s obviously there—pour it all out and make sure there’s no water sitting at the bottom. This is crucial because you want to work with a bottle that’s as empty as possible.
Give it a quick rinse with warm water while you’re at it. This initial rinse helps loosen any obvious debris and prepares the bottle for the deeper cleaning process ahead.
Step 2: Fill with Warm Soapy Water
Now here’s where the real cleaning begins. Fill your bottle about three-quarters of the way with warm water. Add a generous squirt of dish soap—we’re talking about enough to create some decent suds. Don’t be shy with it; you want the water to have that slippery, soapy feel throughout.
If your bottle has a removable cap and any detachable parts, separate those now and add them to the soapy water as well. Everything needs to get cleaned, not just the main bottle body.
Step 3: Brush the Interior Thoroughly
This is the step where your bottle brush really earns its keep. Take your soft brush and really work it throughout the entire interior of the bottle. Pay special attention to:
- The bottom corners where water tends to stagnate
- Around the filter area and any hard-to-reach crevices
- The neck and opening where your lips touch
- The threads where the cap screws on
Don’t just do a quick once-over. Spend at least two to three minutes really scrubbing every surface. Move the brush in circular motions, up-and-down strokes, and make sure you’re hitting every angle. The soapy water will help loosen debris while your brush physically removes it.
Step 4: Tackle the Exterior
While that interior is soaking in soapy water, let’s not forget about the outside of your bottle. The exterior collects just as much dirt and grime from being in your bag, on your desk, or in your hands throughout the day.
Use your brush or a cloth with some of that soapy water and clean the entire exterior surface. Don’t skip the bottom—that’s where a lot of grime accumulates.
Step 5: The Vinegar Soak for Deep Cleaning
Here’s where things get interesting. Empty out the soapy water and now fill your bottle halfway with white vinegar. If you’re really dealing with stubborn mineral deposits or signs of mold, you can use full-strength vinegar. Otherwise, a one-to-one ratio of vinegar to water works great.
Let this sit for about 30 minutes. This is the time I usually check my phone or do some light chores because the vinegar is doing the heavy lifting. It’s breaking down mineral deposits, killing bacteria, and generally working its magic on all those hard-to-reach spots.
If you have time and really want to be thorough, let it sit for longer. I’ve gone as far as leaving it overnight for particularly grimy bottles, and the results were impressive.
Step 6: Scrub Again After Vinegar Soak
After the vinegar has done its work, grab your brush again and scrub the interior one more time. The vinegar will have loosened things up, so this second scrubbing session should be easier and more effective. You’ll likely see visible improvements in the cleanliness of your bottle.
Step 7: Baking Soda for Stubborn Stains
If you’re still seeing stubborn stains or discoloration, baking soda is your secret weapon. Add a tablespoon of baking soda to the bottle along with just enough water to create a thick paste. The gentle abrasive nature of baking soda will help scrub away stains without damaging your bottle’s interior.
Use your brush to scrub with the baking soda paste, focusing on any remaining problem areas. This combination of baking soda and physical scrubbing works wonders on things like tea stains or stubborn mineral buildup.
Step 8: Thorough Rinsing
Now comes a step that people often rush through, but shouldn’t: rinsing. You want to make absolutely sure that all the soap, vinegar, and baking soda residue is completely gone from your bottle. Any leftover cleaning agents will affect the taste of your water and could potentially cause issues if ingested regularly.
Rinse multiple times with clean water. I typically do at least three to four thorough rinses, holding the bottle under running water and rotating it so the water reaches all surfaces. If you used vinegar, you might notice a slight vinegar smell initially—that’s normal and will dissipate once the bottle dries.
Cleaning the Brita Filter Itself
How to Clean Without Damaging the Filter
Your filter is delicate, so you need to approach this carefully. Most Brita filters shouldn’t be cleaned in the traditional sense, but they do need maintenance.
If your filter is removable, you can rinse it gently under cool running water. Hold it under the tap and let water run over it, but don’t scrub it or apply pressure. You’re not trying to deep clean the filter material itself—you’re just rinsing off any loose particles or dust that might be on the surface.
Never use hot water on the filter, as this can damage it. Never use soap or any cleaning agents on it either. The filter is designed to trap particles, and you only want to remove surface debris.
When to Replace Versus Clean
Here’s the thing about filters: they have a lifespan. Brita filters typically last about two to three months with regular use, depending on your water quality. Cleaning won’t extend this lifespan significantly, and at a certain point, you really do need to just replace it.
If you notice that water is flowing slower than usual or your water is starting to taste off even after cleaning, that’s probably your signal to replace the filter. Don’t keep using an old, ineffective filter hoping that cleaning will fix it—it won’t.
Drying Your Brita Water Bottle Properly
Air Drying Versus Towel Drying
After all that cleaning, you want your bottle to dry completely before using it again. I recommend air drying whenever possible. Here’s why: when you air dry, there’s no risk of lint from towels ending up inside your bottle, and there’s better air circulation that prevents moisture from being trapped.
Stand your bottle upside down in a dish rack or on a clean towel, allowing it to air dry naturally. Make sure the cap is off and any removable parts are also drying separately. This usually takes a couple of hours, depending on your kitchen’s humidity.
If you’re in a rush and need to use your bottle sooner, you can use a lint-free cloth or paper towels to dry the exterior and the opening. Just avoid reaching deep inside with towels, as lint can get trapped.
How Often Should You Clean Your Brita Bottle
Daily Maintenance Cleaning
I clean my bottle daily, even if it’s just a quick rinse. Every evening, I rinse it out with warm water and let it air dry overnight. This simple habit prevents buildup and keeps things fresh.
Deep Cleaning Schedule
For the thorough cleaning process I described above? I do that about once a week. Some people might be able to get away with less frequently, but weekly feels right to me, especially since I use my bottle almost every single day.
If you use your bottle less frequently, you might be able to stretch this to every two weeks. But if you notice any discoloration, odor, or cloudiness, do an immediate deep clean regardless of your schedule.
Special Situations and Problem Areas
Dealing with Mold Growth
If you do find mold, don’t panic. It happens to the best of us. For visible mold, soak your bottle in a solution that’s one part vinegar to one part water for several hours. Then scrub vigorously with your brush. For really stubborn cases, you can use a diluted bleach solution (one part bleach to ten parts water), but only as a last resort and make sure to rinse extremely thoroughly afterward.
Removing Hard Water Stains
If you have hard water, mineral deposits can be frustrating. Your best friends here are vinegar and baking soda. The vinegar tackles the minerals, and the baking soda provides gentle scrubbing action. You might need to repeat this process a couple of times for really stubborn deposits, but it’s effective.
Eliminating Odors
Sometimes your bottle might develop an unpleasant smell even when it’s clean. This usually happens when the bottle hasn’t fully dried before being used again or stored closed. For odor removal, I fill the bottle with a baking soda and water solution (one tablespoon of baking soda per bottle) and let it sit overnight. The baking soda absorbs odors naturally. Rinse thoroughly before using.
Pro Tips for Maintaining Your Brita Water Bottle
Let me share some things I’ve learned through experience that can make your life easier:
- Never leave your bottle sitting with stagnant water in it for more than a day
- Always dry your bottle completely before sealing the cap to prevent moisture buildup
- Store your bottle in a cool, dry place, not in a dark cabinet where mold loves to grow
- If you’re traveling and can’t clean it properly, at least rinse it daily
- Keep your bottle brush clean too—wash it regularly and let it air dry
- Consider keeping a spare bottle so you always have one clean and ready to use
- Don’t use your dishwasher unless Brita specifically states it’s safe for your model
Common Mistakes People Make When Cleaning Brita Bottles
Using Water That’s Too Hot
I see people making this mistake all the time. Really hot water can damage the plastic material of your bottle and potentially affect the filter. Warm water is plenty effective for cleaning—it doesn’t need to be scalding.
Neglecting the Cap and Threads
The cap and the threading where it screws on is often overlooked, but it’s a hotbed for bacterial growth. Make sure you’re cleaning these areas thoroughly. Unscrew the cap completely and clean the threads on both the bottle and the cap itself.
Using Harsh Chemicals
I’ve seen recommendations for all sorts of harsh cleaners, but honestly, they’re overkill and potentially dangerous. Simple soap, water, vinegar, and baking soda are all you need. These natural solutions are safer, cheaper, and actually more effective for your purposes.
When to Replace Your Brita Water Bottle
Eventually, even with the best care, your bottle will reach the end of its lifespan. Signs that it’s time for a replacement include:
- Cracks or leaks that develop in the plastic
- Persistent discoloration that won’t come clean
- The cap no longer seals properly
- Cloudy plastic that’s become brittle
- Persistent odors that even deep cleaning can’t eliminate
When this happens, don’t feel bad about getting a new one. Your bottle has served you well, and it’s better to start fresh than to keep using something that’s compromised


![What Is The Best Home Distiller for Water [In 2026]](https://bathroomexplorer.com/wp-content/uploads/2026/03/Best-Home-Distiller-for-Water.jpg)