How to Connect a Fridge Water Line: A Complete DIY Guide for Homeowners
Installing a water line to your refrigerator might sound like a job reserved for professional plumbers, but honestly? It’s something most homeowners can tackle themselves with a bit of patience and the right information. I’m going to walk you through the entire process, breaking it down into manageable steps so you’ll feel confident doing this yourself.
Whether you’ve just bought a new fridge with an ice maker and water dispenser, or you’re upgrading your current refrigerator, connecting the water line doesn’t have to be intimidating. Let’s explore everything you need to know to get that crisp, cold water flowing from your fridge door.
Understanding Your Refrigerator’s Water System: The Basics
Before you grab your tools and get started, it’s important to understand what you’re actually working with. Your refrigerator’s water system is relatively simple in design, even though it might seem complicated at first glance.
What Components Make Up the Water Line System?
Think of your fridge’s water system like the circulatory system in your body. You’ve got a source (like the main water supply), the pathway (the water line), and the destination (your ice maker and water dispenser). The main components you’ll encounter include:
- The water line itself, typically made of plastic or copper tubing
- Connection fittings that link everything together
- A shutoff valve to control water flow
- Filter housings that clean the water before it reaches you
- Check valves that prevent backflow
Each of these parts plays an important role, and understanding their function helps you appreciate why installation matters. A leak in any of these components could lead to water damage in your kitchen, so precision is key.
Gathering Your Tools and Materials: What You’ll Actually Need
I’ve learned through experience that having everything ready before you start saves you from those frustrating trips back and forth to the hardware store. Here’s what you should gather:
Essential Tools for Installation
- An adjustable wrench or two
- Teflon tape for sealing connections
- A screwdriver set (both Phillips and flathead)
- A bucket or towels for catching water drips
- A measuring tape
- A level, in case your fridge needs adjustment
- A flashlight or headlamp for working in tight spaces
- Compression fittings or quick-connect adapters
Materials You Might Need
Depending on your specific situation, you might need:
- Plastic or copper water line tubing
- Shutoff valve for your water supply
- Water filter cartridges
- Adapter fittings to match your plumbing
If your refrigerator came with an installation kit, you’re in luck—it likely includes most of what you need. However, it’s smart to check the measurements on your existing plumbing before you start.
Locating Your Water Supply: Finding the Right Connection Point
Where Should You Tap Into Your Water Line?
This is arguably the most important decision you’ll make. You need to find a spot where you can safely connect to your home’s water supply without causing problems elsewhere. The most common options are:
The Cold Water Line Under Your Sink
Most people choose this location because it’s accessible and usually straightforward. Look under your kitchen sink, and you’ll see pipes coming up from the wall or floor. The cold water line is typically the one on the right side (if you’re looking at the supply lines from the front). This is my go-to recommendation because you can easily access it and install a shutoff valve.
The Ice Maker Supply Line
If your refrigerator already has an ice maker line, you might think you could just use that. However, I’d suggest creating a separate line instead. This gives you more control and reduces the risk of pressure issues with your ice maker.
The Main Water Supply Line
For some homes, tapping into the main supply in the basement or crawl space makes sense. This requires more work but can be cleaner if you have limited space under your sink.
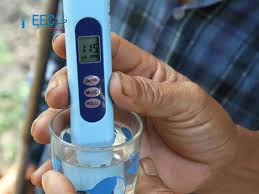
Checking Your Water Pressure
Here’s something many people overlook: your water pressure needs to be within the right range. Most refrigerators require between 20 and 100 pounds per square inch (PSI). If your pressure is too low, your water dispenser will be painfully slow. If it’s too high, you risk damaging the refrigerator’s internal components. You can buy an inexpensive pressure gauge to check this—it’s money well spent.
Turning Off Your Water Supply: Safety First
Before you do anything else, locate and turn off the water supply to your home or at least to the area where you’re working. This is non-negotiable. Water damage from a mistake can cost thousands of dollars, so take this step seriously.
Finding Your Shutoff Valve
Most homes have a main shutoff valve near the water meter. If you’re working under the sink, look for individual shutoff valves on the supply lines themselves. Turn the valve clockwise until it stops—don’t force it. Then, turn on your sink to confirm the water is actually off.
If you can’t find a shutoff valve under your sink, now’s the perfect time to install one as part of this project. It’ll make future plumbing work much easier.
Step-by-Step Installation: The Main Event
Step 1: Prepare Your Work Area
Even with the water off, there’s usually some water in the pipes. Place towels or a bucket under your work area to catch any spillage. I always place a bucket there anyway—it’s just good practice.
Step 2: Disconnect or Tap Into the Cold Water Line
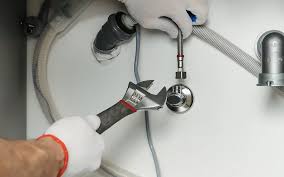
Using your adjustable wrench, gently loosen the connection you’re tapping into. Turn counterclockwise, but go slowly. Once you’ve loosened it, you can unscrew it by hand. Water will likely drip out, which is why that bucket is essential.
Now, you’ll either insert a tee fitting (if you want to keep the original line functional) or install a shutoff valve with a connector for your new water line. Most people use a tee fitting because it allows the original line to continue working while you branch off to the refrigerator.
Step 3: Apply Teflon Tape to Threaded Connections
This is a crucial step that prevents leaks. Wrap Teflon tape around the threads of your fitting (the male threads—the ones that screw in) about three to four times, going clockwise. The tape creates a watertight seal and makes connections easier to tighten and loosen later.
Step 4: Install Your Shutoff Valve
Between your tee fitting and the water line running to your refrigerator, install a shutoff valve. This gives you the ability to turn off water to the fridge without affecting the rest of your home’s water supply. Wrap the threads with Teflon tape and screw it in firmly but not with excessive force.
Step 5: Run the Water Line to Your Refrigerator
Now comes the physical work of getting that line from under your sink to your fridge. The line needs to follow a path that’s safe and doesn’t create a tripping hazard. Options include:
- Running it along the wall and through a hole drilled in your cabinet
- Feeding it behind your refrigerator and down from the top
- Using wall channels or clips to keep it neat and secure
I prefer running the line along the back wall because it’s hidden and protected. Drill a hole if necessary, but be careful not to hit any existing pipes or wires.
Step 6: Connect to Your Refrigerator
At the back of your fridge, you’ll find the water inlet. This is typically a push-connect fitting that accepts tubing of a specific diameter (usually 1/4 inch). Check your manual for the exact specifications. Push the tubing in firmly until you feel it click or seat properly. Some connections have a metal ferrule that you’ll need to install first.
Step 7: Install a Water Filter (If Required)
Many refrigerators have built-in water filters that need to be installed. These filters sit either in a housing in the refrigerator itself or in a separate unit you install under the sink. If your model has one, install it according to the manufacturer’s instructions. This step keeps your water clean and your ice maker happy.
Testing Your Connection: Does It Actually Work?
The Initial Pressure Test
Before you celebrate, you need to make sure everything is actually working. Turn your shutoff valve back on slowly. Watch for leaks around all your connections. Even small drips should be addressed immediately.
Check under the sink, around the fridge connection, and any other joints you’ve made. Tighten any connections that are leaking, turning clockwise with your wrench.
Testing the Water and Ice Dispenser
Once you’re confident there are no leaks, turn on your refrigerator’s water dispenser. Water might come out slowly at first or appear cloudy—that’s normal. The system is just getting primed. Run water for about a minute.
Next, test the ice maker if your fridge has one. It might take a few hours to produce ice, so don’t panic if nothing happens immediately. Check back after a few hours to make sure the ice maker is actually making ice.
Troubleshooting Common Issues: What to Do When Things Go Wrong
Water Leaks at Connection Points
Leaks are the most common problem. First, try tightening the connection with your wrench. If that doesn’t work, turn off the water, disconnect, add more Teflon tape, and reconnect. Most leaks come from insufficient sealing.
Slow or No Water Flow
If water comes out very slowly, check your water pressure first. Low pressure is often the culprit. Also, check if your water filter is clogged and needs replacing. A new filter can dramatically improve flow.
Cloudy Water or Ice
Run water through the dispenser for several minutes. This removes air from the line and usually clears up cloudiness. If it persists, your filter might need changing.
Ice Maker Not Producing Ice
Make sure water is reaching the ice maker by checking the water dispenser first. If water comes out of the dispenser but not the ice maker, there might be a separate line inside the fridge that’s disconnected. Check your manual for the ice maker’s internal water line.
Maintenance Tips: Keeping Your System Running Smoothly
Regular Filter Changes
Your water filter is doing heavy lifting, trapping sediment and chemicals. Change it according to your manufacturer’s recommendations—usually every 6 to 12 months. A clogged filter will slow water flow and reduce water quality.
Periodic Pressure Checks
Every couple of years, check your water pressure again using that inexpensive gauge. Pressure can change, and you want to ensure it’s still in the safe range for your refrigerator.
Visual Inspections
Once a month, take a moment to check under your sink and behind your fridge for any signs of leaks. Catching a small leak early is much better than discovering a water-damaged cabinet later.
When to Call a Professional: Knowing Your Limits
Look, I’m all for DIY projects, but there are situations where calling a professional makes sense. If your home’s plumbing is particularly complex, or if you’re not comfortable working with your home’s water supply, don’t hesitate to hire a plumber. The cost is worth the peace of mind and the guarantee of proper installation.
Also, if you encounter any issues during installation that you can’t diagnose, stop and call for help. Water damage isn’t worth saving a few hundred dollars on professional labor.
Conclusion
Connecting a water line to your refrigerator is absolutely something you can do yourself. I’ve walked through the entire process from start to finish, and if you follow these steps carefully, you’ll end up with a properly functioning water and ice dispenser. The key is taking your time, using the right materials, and not rushing through any step.
Remember that the most important elements are finding the right water source, installing a shutoff valve for safety, using Teflon tape to prevent leaks, and testing everything thoroughly before you consider the job done. Start small, stay organized, and don’t be afraid to ask questions or call for professional help if you get stuck.
With a little patience and the right approach, you’ll have refreshing ice-cold water and fresh ice cubes dispensed right from your fridge door. That’s the kind of upgrade that makes daily life just a little bit better.
Frequently Asked Questions
Can I Connect My Refrigerator’s Water Line to the Hot Water Supply Instead of Cold Water?
I wouldn’t recommend it. Refrigerators are designed to work with cold water, and connecting to hot water can damage internal components, create safety issues, and produce water that’s warmer than you’d want to drink. Stick with the cold water supply—that’s what the system is engineered for.
Do I Need to Call a Plumber to Install a Water Line to My Fridge?
Not necessarily. If you’re comfortable with basic plumbing work and follow the proper steps, this is a manageable DIY project for most homeowners. However, if you’re uncertain at any point or have complex plumbing, calling a professional is a smart choice. The cost is usually between one hundred and three hundred dollars, which is reasonable insurance against potential water damage.
How Often Should I Replace My Refrigerator’s Water Filter?
Most manufacturers recommend replacing the water filter every six months to one year, depending on your water usage and quality. Some filters come with indicators that show when replacement is needed. Check your manual for specific recommendations for your model, and replace it when you notice slower water flow or cloudiness.
What Type of Water Line Tubing Should I Use: Plastic or Copper?
Both options work, but plastic tubing (typically polyethylene) is easier to install and less expensive. Copper is more durable and can last longer, but it requires more specialized tools and skills to install. For a DIY project, plastic tubing with compression fittings is usually the better choice. Make sure it’s food-grade plastic suitable for drinking water.
What Should I Do If I Discover a Leak After Installation?
Turn off your water immediately at the shutoff valve you installed. Then, identify where the leak is coming from. If it’s at a connection point, try tightening the fitting. If that doesn’t work, disconnect it, add more Teflon tape, and reconnect. If the leak is in the tubing itself, you’ll need to replace that section. Always address leaks quickly to prevent water damage to your kitchen