Install a Wall Mounted Air Conditioner: Step-by-Step Guide
Installing a wall-mounted air conditioner yourself is definitely achievable. With the right tools and a bit of patience, you can cool your space effectively. This guide will walk you through the step-by-step process.
Many homeowners decide to tackle this DIY project to save money on professional installation. While it requires careful planning, especially regarding electrical connections and structural support, it’s a rewarding task. We found that understanding the basics before you start makes a big difference.
- Ensure you have the right tools.
- Properly measure and mark your installation spot.
- Securely mount the indoor and outdoor units.
- Connect the refrigerant lines and electrical wiring safely.
- Seal and insulate for efficiency.
Ready to get started? Let’s walk through exactly how to install your wall-mounted air conditioner step by step.
Mounting Your Air Conditioner on the Wall: A Step-by-Step Breakdown
So, you’re ready to install your new wall-mounted air conditioner! That’s fantastic. Taking on this project yourself can save you a pretty penny. We found that understanding the process makes it much less daunting. This guide will help you every step of the way. Let’s get your space cool and comfortable.
Preparing for Installation: What You Need to Know
Gathering Your Tools and Materials
Before you even think about touching your new AC unit, make sure you have all your tools. You’ll need a level, a stud finder, a drill with various bits, a screwdriver set, a tape measure, a pencil, and safety glasses. Don’t forget work gloves and possibly a helper. Having everything ready will prevent frustrating interruptions later on. We also recommend having some caulk and weather stripping on hand for a tight seal.
Choosing the Right Location
Selecting the perfect spot is key. You want to ensure there’s a clear path for the air to circulate freely. Avoid placing the indoor unit where it might be directly hit by sunlight, as this can reduce its efficiency. For the outdoor unit, make sure it has good ventilation and is accessible for maintenance. Check your owner’s manual for specific placement recommendations.
Consider the condensate drain. Water will drip from the unit as it cools the air. You need a place for this water to go. Often, a small drain hose is included. You’ll need to route this hose so it drains away from your home’s foundation, perhaps into a garden bed or a dedicated drain. We found that planning this drainage route early saves a lot of hassle.
Understanding Wall Structure and Support
Your wall unit needs a solid foundation. Most wall-mounted ACs come with a mounting bracket. This bracket needs to be securely attached to wall studs. Using a stud finder is essential here. Attaching it only to drywall isn’t safe and could lead to a disaster. Research and found that wall studs provide the necessary structural integrity for the weight of the unit. If your desired location doesn’t have studs in the right place, you might need to install blocking between studs for extra support.
Installing the Indoor Unit: Creating Your Cool Zone
Marking and Cutting the Wall Opening
Once you’ve chosen the spot and confirmed it’s structurally sound, it’s time to mark where your AC will go. Your unit likely came with a template. Use this template to mark the outline of the opening on your wall. Double-check that it’s level before you make any marks. Now, carefully cut along your marked lines. A drywall saw or a reciprocating saw works well for this. Go slow and steady to make a clean cut. We found that cutting slightly inside the line and widening if needed is a safer approach.
Mounting the Wall Bracket
The mounting bracket is your indoor unit’s best friend. Hold the bracket against the wall, aligning it with the opening you just cut. Use your level to ensure it’s perfectly horizontal. Mark the screw holes on the wall studs. Drill pilot holes, then secure the bracket firmly with the provided screws. Make sure it doesn’t budge. This bracket supports the weight of the entire indoor unit, so it needs to be rock solid. Many experts say this is the most critical step for safety.
Installing the Indoor Unit and Drainage
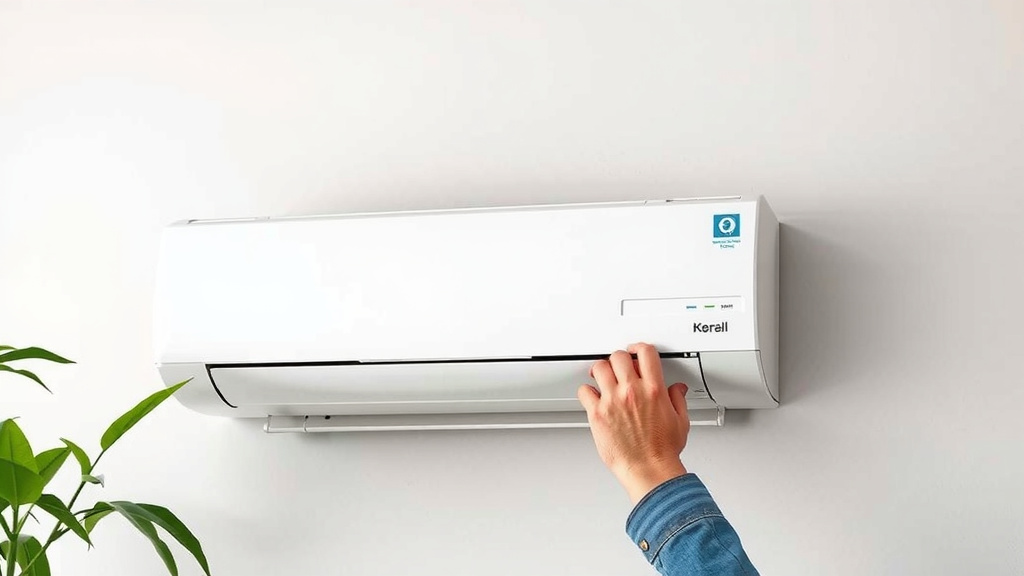
With the bracket in place, carefully lift the indoor unit and slide it onto the bracket. Most units click or lock into place. Ensure it’s seated securely. Now, connect the condensate drain hose. Route it through the wall opening towards the outside. You might need to drill a small hole in the wall specifically for the drain hose if it doesn’t align with the main opening. Ensure the hose has a slight downward slope to encourage drainage.
Setting Up the Outdoor Unit: The Unsung Hero
Positioning the Outdoor Unit and Base Pan
Find a suitable spot outside for your outdoor unit. It should be on a level surface, away from direct drafts and obstructions. Many people opt for a concrete pad or a sturdy plastic base pan to keep it elevated and stable. Ensure there’s enough space around it for airflow. We found that leaving at least two feet of clearance on all sides is a good rule of thumb for optimal performance.
Connecting the Refrigerant Lines and Electrical Wiring
This is where things get a bit technical, and safety is absolutely paramount. The refrigerant lines connect the indoor and outdoor units. They usually have flare fittings that need to be tightened securely. If you’re uncomfortable with refrigerant lines or electrical work, now is the time to call a professional. Improper handling can be dangerous and can damage the unit. Many guidelines point to consulting a licensed electrician for the final electrical hookup (CDC). Your unit will likely require a dedicated circuit.
| Tool | Purpose |
|---|---|
| Stud Finder | Locate wall studs for secure mounting. |
| Level | Ensure brackets and units are perfectly horizontal. |
| Drill & Bits | Create pilot holes and secure screws. |
| Tape Measure | Accurate measurements for placement and cuts. |
| Screwdriver Set | Fasten screws on brackets and panels. |
| Caulk Gun | Seal gaps for efficiency and weatherproofing. |
Final Touches: Sealing and Testing
Sealing the Wall Opening
Once the indoor unit is in place and the lines are run, it’s time to seal the opening in your wall. Use caulk around the edges of the unit where it meets the wall. This prevents air leaks, keeping conditioned air inside and outdoor air out. It also helps keep insects and drafts from entering. Weather stripping can also be applied to the exterior trim for an extra layer of protection.
Testing the System
Now for the exciting part: turning it on! Double-check all connections. Turn on the power to the unit. Follow the startup instructions in your manual. Set your desired temperature and mode. Listen for any unusual noises and check that cool air is blowing from the indoor unit. Make sure the outdoor unit is running smoothly as well. We found that testing thoroughly at this stage helps catch any minor issues before they become major problems.
Here’s a quick checklist to ensure you’ve covered the bases:- Verified your electrical setup is adequate and safe.
- Confirmed all mounting brackets are securely attached to studs.
- Ensured the indoor unit is level and properly seated.
- Checked the outdoor unit has clear ventilation.
- Sealed all wall openings to prevent air leaks.
- Tested the unit to confirm it’s cooling effectively.
Conclusion
You’ve successfully navigated the process of installing your wall-mounted air conditioner! Remember, careful preparation, accurate measurements, and secure mounting are your best friends here. By following these steps, you’ve not only saved money but also gained the satisfaction of a DIY success. Ensure all seals are tight and double-check your electrical connections for safety. Your next step is simple: enjoy your newly cooled and comfortable space!
Frequently Asked Questions
How do I know if my wall can support the AC unit?
Your wall must be strong enough to hold the weight of the AC unit. Always locate wall studs using a stud finder. You’ll need to securely screw the mounting bracket directly into these studs. If studs aren’t perfectly positioned, you may need to add extra support blocking between them.
Can I install the AC if I’m not comfortable with electrical wiring?
Electrical connections are critical and can be dangerous if not done correctly. If you’re unsure about wiring, it’s best to hire a licensed electrician for that part of the job. Ensure the unit is on a dedicated circuit as recommended by the manufacturer.
What’s the best way to handle the condensate drain hose?
The drain hose removes water from the AC unit. You need to route it so water flows away from your home’s foundation. Make sure there’s a slight downward slope to the hose. Consider running it to a garden bed or a proper drainage system to avoid water pooling.
Do I need a helper for this installation?
While some steps can be done alone, having a second person is highly recommended, especially for lifting and positioning the indoor and outdoor units. A helper ensures safety and stability during these heavier tasks, making the installation much smoother.
What if I cut the wall opening too large?
If your wall opening is slightly too large, don’t worry. You can usually compensate with caulk and weather stripping. Apply these materials generously around the unit’s edges where it meets the wall and exterior trim. This will help seal any gaps and prevent air leaks.
![7 Best Split Air Conditioner For Home [2026]](https://bathroomexplorer.com/wp-content/uploads/2026/06/7-best-split-air-conditioner-for-home-2026-featured-768x432.jpg)
![7 Best Inverter Split Air Conditioner [2026]](https://bathroomexplorer.com/wp-content/uploads/2026/06/7-best-inverter-split-air-conditioner-2026-featured-768x432.jpg)