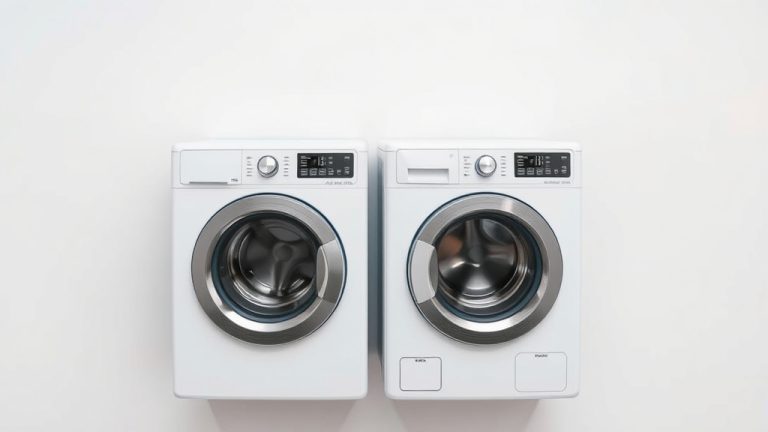
How to Lift a Washer and Dryer onto a Pedestal
The safest way to lift a washer and dryer onto a pedestal is to use a dryer or appliance lifting strap kit with a second person. You should never try to lift either machine alone, and many experts say using a two-person lift with proper straps is the most reliable method. This protects your back, your floors, and your appliances from damage.
Washers and dryers are heavy and awkward, often weighing 150 to 200 pounds. Lifting them without the right tools can easily cause serious injury or damage to the machines. We found that the best approach combines the right equipment, a clear plan, and a smart lifting technique.
- Use lifting straps to grip the machine securely and reduce back strain.
- Always work with a partner — never attempt this solo.
- Tilt and slide the machine onto the pedestal instead of trying to deadlift it straight up.
- Unplug and disconnect hoses before you start.
- Slide, don’t lift — use cardboard or sliders to move the machine into place first.
Below, we break down the full process step by step, including prep work and the exact lifting technique that works best.
Preparing to Lift Your Washer and Dryer Onto a Pedestal
Before you grab the machine, you need a clean, safe workspace. Clear the area around the machines. Move rugs or cords that could trip you or your helper. We found that spending 10 minutes on prep saves you from a 200-pound mistake later.
You will also need to gather your tools first. Do not start lifting until you have everything within arm’s reach. This keeps you from bending over awkwardly while holding a heavy load.
Gather the Right Lifting Equipment
Do not rely on your grip alone. Many experts say that using an appliance lifting strap kit is the smartest route. These straps wrap around the machine and give you handles near the bottom. This lets you lift with your legs, not your back.
You can also use furniture sliders to move the machine across the floor. While these do not help with vertical lifting, they make the final positioning far easier. We found that combining straps with sliders is the most efficient setup.
Disconnect Power and Water Lines
Safety comes first. Unplug the washer and dryer from the wall outlet. For the washer, turn off the hot and cold water supply valves. Then, disconnect the water hoses from the back of the machine.
Do not forget the dryer vent hose. Detach it from the dryer and push it out of the way. Leave the vent duct attached to the wall for now. You will reconnect everything once the machines are on their pedestals.
Measure Your Space and Pedestal Height
Pedestals add about 12 to 15 inches of height. Check the ceiling clearance in your laundry room. Many machines need around 39 inches just to tilt upright. If your ceiling is low, you might need to adjust your approach.
Also, check the pedestal itself. Ensure it is level and placed where you want the machine to sit. If the floor is uneven, use shims under the pedestal before you lift the appliance onto it.
Lifting a Washer and Dryer with a Partner
Grab a helper. This is not a solo task. You need one person on each side of the machine. Both of you should wear sturdy, non-slip shoes and lifting gloves for a better grip.
We found that communication is everything. Decide on a simple lifting phrase before you start. For example, “Ready, lift” and “Set down.” Use these phrases every single time you move the machine.
Position Your Bodies Correctly
Stand facing the side of the machine. Your feet should be shoulder-width apart. Bend at your knees, not at your waist. Keep your back straight and your core tight. Your chest should stay up and your shoulders back.
Place the lifting straps around the bottom edge of the appliance. Pull the handles upward so the straps are snug. Do not let the straps dig into the front panels, as this can dent the metal.
Use the Power of the Leg Lift
When you are ready, squat down and grab the strap handles. On the count of three, straighten your legs. Let your thigh muscles do the heavy work, not your lower back. Many guidelines point to this leg-driven method as the safest way to lift heavy items (Mayo Clinic).
Lift the machine only a few inches off the floor. You do not need to raise it high. The goal is to clear the pedestal top, which is usually only 13 to 15 inches off the ground.
Technique: Sliding the Machine onto the Pedestal
Do not try to hold the washer high and drop it into place. That is a recipe for a pinched finger or a damaged machine. Instead, use a slide-and-tilt method. This is the technique most appliance movers use in the field.
Position the pedestal right next to the machine. You want the short end of the pedestal facing the side of the washer. This reduces the distance you need to slide the appliance inward.
Step-by-Step Tilt and Slide Process
First, tilt the machine back slightly. Have your partner hold it there while you place a piece of cardboard or a furniture slider on the pedestal top. This smooth surface lets the machine glide instead of grip.
Next, lower the front of the machine onto the edge of the pedestal. The bottom lip of the washer should rest on the pedestal. From here, you simply push the machine forward. Slide it across the cardboard until it is fully seated.
Use Cardboard for a Smoother Glide
Cardboard is your best friend here. It reduces friction and protects the pedestal from scratches. We found that a large piece of a moving box works perfectly. Just fold it over the top of the pedestal before you slide the machine.
Once the machine is in place, carefully pull the cardboard out from underneath. Do this slowly so the machine does not shift. Check that all four feet are sitting flat on the pedestal surface.
When to Use a Step Stool or Platform
Sometimes, the floor is too slippery, or the machine is simply too heavy to slide. In these cases, place the pedestal on a low platform first. A sturdy wooden crate or a stack of plywood works well. Then, follow the same tilt-and-slide method.
Many experts say that raising the pedestal to knee height actually makes the lift easier. It reduces the angle of your bend. This is especially helpful for taller people who struggle with low lifts.
Securing the Machine and Reconnecting Everything
Once the washer is on the pedestal, do not just walk away. You need to secure it. Most pedestals come with metal brackets and screws. These attach the machine to the pedestal frame to prevent vibration and walking.
For the dryer, make sure the vent hose reconnects firmly. A loose vent is a fire hazard. For the washer, reconnect the water lines and check for leaks. Run a quick empty cycle to make sure everything works.
Use the Anti-Vibration Pads
Swapping to a pedestal can make the machine bounce more during the spin cycle. This is because the center of gravity rises. Many pedestal kits include adhesive anti-vibration pads. Use them on the feet of the machine.
If your kit does not include them, you can buy generic rubber pads at most hardware stores. We found that this small addition drastically reduces noise and movement. It also stops the machine from “walking” across the floor over time.
Level the Machine for Smooth Operation
An unlevel washer is loud and wears out faster. After the machine is on the pedestal, check the level. Place a bubble level on top of the machine. Adjust the feet by turning them clockwise or counterclockwise.
Do the same for the dryer. While the dryer does not slosh water around, it does spin. A level dryer prevents unnecessary strain on the drum bearings and the pedestal brackets.
Essential Checklist for a Safe Lift
Before you lift, run through this quick mental checklist. It takes 30 seconds and prevents most accidents. We recommend printing it or reading it aloud to your helper.
- Clear the path — remove rugs, cords, and clutter from the route.
- Disconnect everything — unplug power, water hoses, and dryer vent.
- Gather tools — lifting straps, cardboard, gloves, and a bubble level.
- Set up the pedestal — place it level and near the machine.
- Warm up your back — do a few gentle stretches to loosen your muscles.
- Agree on commands — decide on “lift” and “set down” with your partner.
Remember, the pedestal makes the machine easier to use. It reduces bending when loading clothes and raises the dryer to a more natural height. But the installation requires care. Use the straps, bend with your legs, and keep the machine low until you can slide it into place.
Conclusion
Lifting your washer and dryer onto a pedestal doesn’t have to be a back-breaking ordeal. The trick is to use lifting straps, a partner, and a smart slide-and-tilt method instead of trying to muscle the machines straight up. Take your time with the prep work. Disconnect everything, clear your path, and get your pedestal level before you touch the appliance.
You’ve got this. Grab your helper, run through the checklist one time, and lift with your legs. In about thirty minutes, you will have both machines sitting higher, which makes laundry day a whole lot easier on your back. Start by measuring your space and ordering a good strap kit today.
Frequently Asked Questions
Can you install a washer pedestal by yourself?
We strongly recommend against it. A washing machine can weigh up to 200 pounds, and the risk of injury or dropping the unit is too high for a single person. Even with lifting straps, you need a second set of hands to guide the machine and keep it steady. Wait for a helper or hire a local mover if you have no one available.
Do I need to remove the dryer vent hose before lifting?
Yes, you absolutely should. The metal vent duct is rigid and can easily kink or tear if the dryer shifts weight against it. Disconnect the hose from the dryer and push it out of the way so it does not snag during the lift. Reattach it securely once the machine is seated on the pedestal.
How heavy is a washer and dryer combo on a pedestal?
The total weight stays the same as before; the pedestal just adds about 10 to 15 pounds of frame and drawer hardware. You are still lifting the full weight of the washer or dryer during installation. Do not assume the pedestal makes the appliance lighter to carry.
What can I use instead of an appliance lifting strap?
If you do not have a strap kit, you can use two sturdy ratchet straps wrapped around the appliance. Just be careful they do not dig into the side panels. A thick piece of rope can work in a pinch, but it is harder to grip and offers less control than proper lifting straps.
Should I place a washer on a 15-inch or 27-inch pedestal?
That depends on your height and your laundry room ceiling. A 15-inch pedestal suits most people and keeps the machine around waist height. Taller users often prefer a 27-inch model to avoid bending, but you must confirm you have enough ceiling clearance to tilt the washer upright during installation.