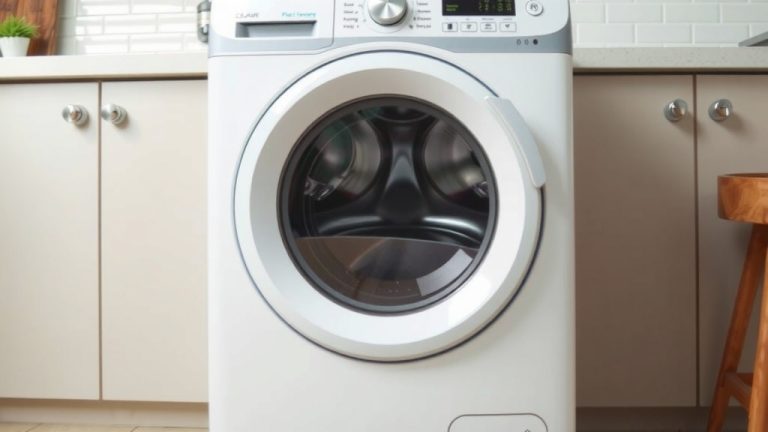
How to Raise Washer and Dryer: Step-by-Step Guide
The quickest way to raise your washer and dryer is to use a sturdy riser or pedestal, which lifts them 10 to 15 inches off the ground to reduce back strain. You can buy ready-made pedestals from the manufacturer or build your own platform with plywood and lumber. This simple change makes loading and unloading laundry far more comfortable for most people.
Raising your laundry machines is a smart home upgrade that also helps with drainage and airflow. We found that matching the exact model of your washer is important if you buy a pedestal, while DIY platforms need careful weight support. Many experts say a raised setup can also help your machines last longer by keeping them off a cold, damp floor.
- Measure your machines first to find the right riser height and width.
- Check if your washer is front-load or top-load to choose the right pedestal.
- Use anti-vibration pads to keep things quiet after raising.
- Always level the washer and dryer to prevent excessive shaking.
- Consider hiring a pro if you need to extend the vent or water lines.
Below, we walk you through the exact steps for both store-bought pedestals and simple DIY platforms. Let’s get your laundry room set up so you can say goodbye to that awkward bending for good.
Raising Your Laundry Machines Without the Headache
Let’s face it—bending over to grab a wet towel from a low washer is no fun. You feel it in your back, your knees, and your patience. The good news? You can fix this in an afternoon with a few tools or a simple purchase. We found that most people choose one of two paths: a store-bought pedestal or a custom DIY platform. Both work well, but your choice depends on your budget and your comfort with basic carpentry.
Why Raise Your Washer and Dryer in the First Place?
Ergonomics is the big reason. The National Institutes of Health (NIH) highlights that repeated bending and twisting can lead to lower back strain over time. Raising your machines by even 10 inches can make a huge difference in how your body feels on laundry day. You’ll also find that loading and unloading becomes faster because you can see inside the drum without squatting.
There’s a practical side, too. A raised dryer often means a shorter vent run, which helps your machine dry clothes more efficiently. And if your laundry room sits on a concrete slab, lifting the machines off the cold floor can reduce moisture buildup and keep your equipment in better shape for years.
Choosing Between Pedestals and DIY Platforms
You have two solid options here. We broke down the pros and cons so you can pick the right one for your space and skill level. Both approaches raise the machines to a comfortable height, but they differ in cost, effort, and stability.
| Feature | Store-Bought Pedestal | DIY Wooden Platform |
|---|---|---|
| Cost | $150–$400 per machine | $40–$80 for materials |
| Installation time | 30–60 minutes | 2–3 hours |
| Weight capacity | Made for your exact model | Depends on your build quality |
| Looks | Factory finish, matches machines | Custom look, can be painted |
| Storage | Often includes a drawer | No extra features unless you add them |
What to Consider Before You Start
Before you buy anything, grab a tape measure. You need the width, depth, and height of both machines. Front-load washers and dryers are usually the same size, but they don’t have to be. Measure each one separately to avoid a wobbly setup. Also, check the clearance in your laundry room. If your ceiling is low or your space is tight, a tall pedestal might not fit.
We found that many people forget to check the vent hose on the dryer. When you raise the dryer, the vent might kink or pull loose. Look at how much slack you have before committing to a height. The same goes for the water hoses on the washer. You may need longer hoses if you’re lifting the machine significantly.
Weight and Vibration Concerns
A washer full of wet clothes can weigh over 300 pounds. Your platform must support that weight without flexing. Plywood that is ¾-inch thick is the minimum we recommend for a DIY build. Anything thinner risks cracking under the load. Many experts say to use pressure-treated wood if the platform sits directly on concrete, because it resists moisture damage.
Vibration is another thing to watch. Washers spin at high speeds, and they can walk or shake if not level. After you raise your machines, use a bubble level to check both side-to-side and front-to-back. Anti-vibration pads placed under the feet will absorb some of the movement and keep the noise down.
Installing a Store-Bought Pedestal the Right Way
This is the easiest route, especially if your washer brand offers matching pedestals. Most manufacturers design these to fit their specific models perfectly. That means no guesswork. You just align the pedestal with the base of your machine and secure it with the included brackets.
Step-by-Step Guide for Pedestal Installation
First, unplug both machines and turn off the water supply valves. You don’t want any surprises while you work. Next, tilt the machine backward and slide the pedestal under the front edge. Then, carefully lower the machine onto the pedestal base. Most models use a bracket system that snaps or bolts into place.
Once the machine sits on the pedestal, check that all four feet are secure in their slots. Tighten any screws or bolts that came with the kit. Plug everything back in and run a quick empty cycle to make sure nothing rattles loose. If you have a drawer-style pedestal, test the drawer slides before loading it up.
Finding the Right Pedestal for Your Model
You might wonder if a universal pedestal works. In our experience, brand-specific pedestals are safer. They’re engineered to match the mounting points and weight distribution of your exact washer or dryer. You can usually find the model number on a sticker inside the door or on the back panel. Search that number online or check with the manufacturer’s website to find the compatible pedestal.
Building a Sturdy DIY Platform From Scratch
If you’re handy with tools, building your own riser saves money and gives you total control over the height. You can make it as tall or as low as you want. Many people aim for a final height of 12 to 15 inches from the floor to the top of the drum opening. That puts the door right at waist level for most adults.
Materials You’ll Need for the Build
- One sheet of ¾-inch plywood (cut to your machine’s footprint)
- Four pieces of 2×4 lumber for the frame
- Wood screws (2.5 inches or longer)
- Wood glue for extra strength
- A drill with a screwdriver bit
- A bubble level and a measuring tape
Cut the plywood to match the base dimensions of your washer or dryer. Then, build a simple box frame using the 2x4s. The frame should sit inside the plywood edges so the platform looks clean. Screw everything together, and you have a solid base.
Finishing Touches for a Professional Look
Sand the edges so there are no splinters. Paint the platform with a waterproof enamel or seal it with polyurethane. This protects the wood from spills and humidity. You can also add small rubber feet to the bottom to keep the platform from sliding on a smooth floor.
One tip we found helpful: cut a piece of rubber mat or an old yoga mat to place on top of the platform. This gives the machines a grippy surface and reduces vibration. It also prevents metal-to-wood squeaking noises.
Handling the Hoses and Vents After Raising
Raising your machines can stretch your existing connections. You might need longer water hoses or a new dryer vent hose. This is normal, and it’s a simple fix at any hardware store. Measure the distance from your machine connections to the wall hookups, then add a few inches for slack.
Safety Checks Before You Run a Full Load
After everything is set up, do a slow inspection. Check for any kinks in the water lines or the vent. Make sure the drain hose still reaches the standpipe without bending sharply. A kinked drain hose can cause water to back up, which leads to leaks or slow drainage.
Run a small load first. Watch the machines through a full cycle. Listen for unusual noises and watch for any shifting. If the washer vibrates excessively, adjust the leveling feet again. Sometimes you need to tweak the height of one corner to get things perfectly stable.
Common Mistakes to Avoid When Raising Machines
- Using thin plywood that bends under the washer’s weight
- Forgetting to level the machines after installation
- Not accounting for the dryer vent hose length
- Blocking the water shutoff valves with the new platform
- Raising a top-load washer too high, which makes reaching inside difficult
We found that many people also forget about the utility connections behind the machines. If your new height blocks access to the shutoff valves, you’ll have a problem in an emergency. Leave at least a few inches of clearance so you can reach them easily.
When to Call a Professional
If you’re not comfortable working with electrical connections or gas lines, call a pro. Dryers that use gas need special care when moving. A small mistake can cause a gas leak, which is dangerous. Many local appliance repair technicians can install pedestals or build platforms for a reasonable fee.
Final Checklist Before You Enjoy Your New Setup
- Measure the height of the drum opening—it should be near your waist
- Verify all four feet are snug and level
- Check water hoses for kinks or leaks at the connections
- Confirm the dryer vent is straight and firmly attached
- Run a full empty cycle to test stability
- Keep the area around the machines clear for airflow
Take your time with the setup. A solid, level base makes your machines quieter, safer, and easier on your body. You’ll wonder why you didn’t do this sooner. And when laundry day comes around, you’ll thank yourself every time you reach into the drum without bending an inch.
Conclusion
Raising your washer and dryer is one of those home upgrades you will appreciate every single laundry day. Whether you choose a brand-specific pedestal or a custom DIY platform, the goal is the same: get the drum opening to a comfortable height and keep your machines stable. We covered the key steps—measuring your space, picking the right materials, leveling everything, and double-checking your hoses and vents.
Your next move is simple. Grab a tape measure, check your machine’s model number, and decide which route fits your budget and skill level. If you take your time with the setup, you will protect your back and extend the life of your appliances. Start with a small test load and adjust as needed. You have got this.
Frequently Asked Questions
Can you put a washer and dryer on any type of platform?
You can use a platform as long as it is sturdy and completely level. The surface needs to support the combined weight of the machine plus a full load of wet laundry. Solid wood or a manufacturer-made pedestal are your safest bets. Avoid flimsy plastic storage bins or anything that can flex.
How much height should you add to a washer and dryer?
Most people find that raising the machines by 10 to 15 inches feels right. You want the top of the drum opening to sit near your waist level. Measure from the floor to your wrist while standing relaxed—that is a good target height for the machine’s opening.
Will raising a washing machine cause more vibration?
It can if the platform is not perfectly level or sturdy. A wobbly base makes the spin cycle worse. Use a bubble level to check both directions and add anti-vibration pads under the feet. A solid, heavy platform actually absorbs more movement than a lightweight one.
Do you need longer hoses when you raise a washer and dryer?
Sometimes you do. Raising the machines adds vertical distance, which can pull the hoses tight. Check for any tension or kinks after setup. Standard hoses are usually 4 to 5 feet long, but you can buy longer ones if needed. The same rule applies to the dryer vent hose.
Is it safe to raise a gas dryer on a wooden platform?
Yes, it is safe if you do it correctly. The key concern is the gas line connection. Never stretch or bend the gas line sharply. Call a professional if you have any doubts about the gas hookup. A licensed technician can disconnect, move, and reconnect the dryer safely.