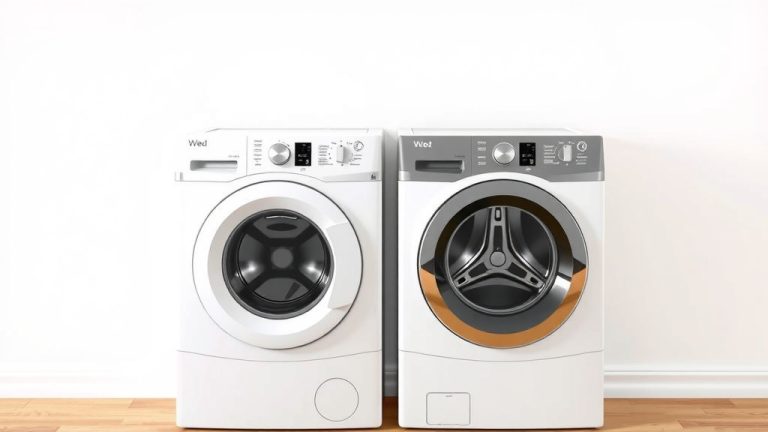
How to Put Washer and Dryer on Pedestals
The easiest way to put a washer and dryer on pedestals is to **tip the appliance back**, slide the pedestal underneath, and then carefully lower it into place. You’ll need a helper for this, and you should always **unplug the machines first** for safety. The entire process usually takes about 30 minutes per machine.
Pedestals are a smart upgrade because they **raise your machines to a comfortable height**, so you won’t have to bend over to load laundry. They also give you a handy storage drawer for detergent and supplies. We found that most people can handle this as a DIY project, but it does require some muscle and a few basic tools to get it done right.
- Get a helper: Lifting a washer or dryer alone is dangerous and can damage the machine.
- Unplug everything: Always disconnect power and water before moving your appliances.
- Use a cardboard slide: Tilt the machine back and use a piece of cardboard to slide the pedestal into position.
- Secure the brackets: Bolt the pedestal to the machine using the included hardware to prevent shifting.
- Level it out: Adjust the feet on the pedestal so the machine doesn’t wobble during the spin cycle.
Below, we walk you through the step-by-step process, including how to prep the area and what to do if your machines are extra heavy. Let’s get your laundry room set up so you can say goodbye to back pain for good.
Preparing Your Laundry Area for Pedestal Installation
Before you lift a single machine, take a few minutes to get the area ready. This step makes the whole job easier and keeps your machines safe. You will need about two feet of clearance in front of the washer and dryer. Clear out any boxes, baskets, or stray socks that might be in the way.
Check the floor where the pedestals will sit. The surface should be level and solid. If you have a concrete floor in the garage or basement, you are good to go. For wood floors, make sure there is no water damage or soft spots. Many experts suggest sweeping the area completely clean so no debris gets trapped under the pedestal feet.
Gathering the Right Tools and Safety Gear
Most pedestal kits come with the pedestal, a drawer, and mounting brackets. You will likely need a few common household tools to finish the job. Grab a socket wrench or an adjustable wrench, a Phillips-head screwdriver, and a level. You might also want a piece of thick cardboard or a moving blanket to protect the floor.
Wear work gloves to protect your hands from sharp metal edges on the pedestal frame. You should also wear closed-toe shoes. Dropping a 150-pound washer on your foot is not a fun way to spend an afternoon. Trust us on that one.
Measuring Your Machines for the Right Fit
Not all pedestals fit all machines. Check the model number on your washer and dryer to confirm you have the correct pedestal kit. Most major brands like Samsung, LG, and Whirlpool make matching pedestals for their units. A mismatched pedestal might not align with the mounting holes on the bottom of your machine.
Measure the width and depth of your machines and compare them to the pedestal dimensions. The pedestal should be roughly the same footprint as the appliance. If the pedestal is too small, the machine will be unstable. If it is too large, it will stick out and look odd in your laundry room.
Step-by-Step Guide to Lifting and Mounting
Here is the core process for getting your machines up on pedestals. We found that taking your time with each step prevents damage and frustration. This is a two-person job, so do not try to be a hero.
Step 1: Unplug and Disconnect Everything
Safety comes first. Unplug the washer and dryer from the wall outlet. For the washer, turn off the hot and cold water supply valves and disconnect the hoses from the back of the machine. For the dryer, disconnect the vent hose if it is attached to the back. You do not want any cords or hoses pulling on the machine while you move it.
Pull the machines a few inches away from the wall so you have room to work behind them. This also gives you space to tilt them back without hitting the wall. Have a towel handy to catch any water that might drip from the hoses.
Step 2: Tilt the Machine Back at an Angle
Position the pedestal right next to the machine where it will sit. Now, with your helper, tilt the washer back about 30 degrees. One person holds the machine steady while the other slides the pedestal underneath. Keep your back straight and lift with your legs, not your back. Many guidelines point to proper lifting form as the best way to avoid injury (OSHA).
Once the pedestal is in position, slowly lower the machine onto the top of the pedestal. Make sure the machine’s feet line up with the recessed areas or mounting holes on the pedestal top. A little wiggling is normal to get everything aligned.
Step 3: Secure the Mounting Brackets
Most pedestal kits include metal brackets that bolt the machine to the pedestal. These brackets prevent the machine from sliding off during the spin cycle. Locate the mounting holes on the bottom front of the machine. Attach the brackets using the included screws and a socket wrench.
Check the back of the machine as well. Some models have rear mounting points too. Secure all of them, even if it takes an extra few minutes. A loose machine is a loud machine, and nobody wants a washer that vibrates across the laundry room floor.
Step 4: Level the Machine and Test Stability
Use your level to check both side-to-side and front-to-back. The pedestal has adjustable feet on the bottom. Twist them to raise or lower each corner until the bubble sits in the center of the level. Take your time here. A properly leveled machine runs quieter and lasts longer.
Give the machine a gentle push from each side. It should not rock or wobble at all. If it moves, readjust the feet until it feels solid. We found that spending an extra five minutes on leveling saves you from listening to a thumping washer for years.
Step 5: Reconnect and Run a Test Cycle
Plug the machines back in and reconnect the water hoses and vent. Turn the water valves back on and check for leaks at the connection points. For the dryer, make sure the vent hose is securely clamped to prevent lint from escaping into your laundry room.
Run an empty cycle on the washer to test for vibration. Listen for any unusual noises. If the machine shakes, double-check the leveling. The dryer should also run a quick cycle to ensure the exhaust is working properly.
Installing Pedestals on Front-Load vs. Top-Load Machines
Your machine type changes the process slightly. Front-loaders are the most common candidates for pedestals because they have flat bottoms. Top-loaders are trickier and often require special pedestals. Here is what you need to know about each.
| Machine Type | Pedestal Compatibility | Installation Notes |
|---|---|---|
| Front-load washer | High — most brands offer matching pedestals | Straightforward tilt-and-slide method works perfectly |
| Front-load dryer | High — matches washer pedestal height | Lighter than washer, easier to lift and align |
| Top-load washer | Limited — some models have stacking kits only | Pedestals add height that makes loading harder |
| Compact or portable units | Check manufacturer specs | May need universal pedestals with adjustable brackets |
Research shows that front-loaders are the best candidates for pedestal installation. The flat base distributes weight evenly across the pedestal frame. Top-loaders, on the other hand, already have a comfortable loading height, so adding a pedestal often does more harm than good.
Dealing with Extra Heavy Machines or Tight Spaces
Sometimes the standard method just does not work. Maybe you have an older machine that weighs 200 pounds. Or your laundry closet is too narrow to tilt the machine back. Do not panic. There are other approaches that get the job done safely.
Using a Furniture Dolly or Appliance Slide
An appliance dolly can help you position heavy machines with less strain. Strap the washer securely to the dolly and tilt it back. Roll it into position over the pedestal, then lower it down. This gives you more control and reduces the risk of dropping the machine.
Appliance slides are flat plastic discs that go under the machine feet. They let you slide the machine across the floor without lifting it. This works well for moving the machine onto the pedestal once you have it tilted just slightly.
When to Call a Professional Installer
If you are uncomfortable lifting heavy appliances, hire a pro. Many appliance stores offer installation services when you buy pedestals. The cost is usually reasonable, and it saves you the risk of injury or damaging your equipment.
We found that professional installers complete the job in about 15 minutes per machine. They bring their own tools and handle all the lifting. If you have back problems or a narrow stairway, this is the safest route.
Final Checklist Before You Start Using Your Pedestals
You are almost done. Run through this quick checklist to make sure everything is set up correctly. This takes less than two minutes and prevents headaches down the road.
- Check that both machines are unplugged before you start any work.
- Confirm all mounting brackets are tightened with a socket wrench.
- Verify the level bubble is centered on both axes.
- Test the pedestal drawers slide open and shut smoothly.
- Run an empty cycle to check for vibration or movement.
- Keep the warranty card and model numbers in case you need parts later.
Pedestal installation is one of those projects that looks intimidating but is actually quite doable. The key is patience and having a second set of hands. Once you are done, you will wonder why you did not do this years ago. No more bending over to fish wet clothes out of the drum. That alone is worth the effort.
Take a step back and admire your work. Your machines are elevated, your storage is organized, and your back is grateful. Now go toss in that load of laundry and enjoy the new height.
Conclusion
You just tackled a project that will change how you do laundry forever. Lifting your machines onto pedestals saves your back and gives you extra storage. The whole job takes about an hour when you have a helper and the right tools. Remember to unplug everything, tilt with your legs, and secure those mounting brackets tight.
Take a few extra minutes to level the machines perfectly. A wobbly washer will make noise for years if you skip this step. You also learned when to call a pro if the machines are too heavy or your space is too tight. That is a smart call, not a failure.
Now grab your socket wrench and get to work. Your laundry room is about to feel a whole lot better. And once you finish, throw a load in and enjoy not bending over for the first time.
Frequently Asked Questions
Do pedestals work with any brand of washer and dryer?
Not always. Most major brands like Samsung, LG, and Whirlpool sell matching pedestals for their machines. Check your model number and compare it to the pedestal specs before buying. Universal pedestals exist, but the fit is less secure. You are better off getting the brand-matched set if you can.
Will adding a pedestal make my washer vibrate more?
Only if you skip the leveling step. A properly leveled pedestal with secured brackets should actually reduce vibration. The pedestal adds mass and stability to the machine. If you notice shaking after install, adjust the feet until the bubble is centered. That usually fixes it right away.
Can I install a pedestal by myself?
We really do not recommend it. Washers can weigh 150 pounds or more, and tilting one alone is risky. You could drop the machine, damage your floor, or hurt your back. A helper makes the job safer and faster. If nobody is around, call a professional installer instead.
How much weight can a washer and dryer pedestal hold?
Most standard pedestals are rated to hold between 300 and 400 pounds. That is well above the weight of any residential washer or dryer. The weak point is not the pedestal itself, but the floor underneath it. Make sure your floor is solid before you install.
Do I need to disconnect the water lines before lifting the washer?
Yes, absolutely. You have to disconnect the water hoses to move the machine safely. Leaving them attached creates tension and could snap the fittings while you tilt the washer. Turn off the water valves first, then unscrew the hoses. Keep a towel nearby to catch any drips.