
How to Assemble Your Shark Navigator Vacuum Step-by-Step
Assembling your Shark Navigator vacuum is surprisingly straightforward! You can put your Shark Navigator together in under 10 minutes. Most parts just click into place, so you won’t need any special tools to get started cleaning.
Getting your new vacuum ready to tackle messes is a key step. We found that understanding the main components, like the wand, hose, and dust cup, makes the process even easier. Many users report feeling relieved by how simple it is to assemble.
- Unpack all parts carefully.
- Connect the main body to the base.
- Attach the wand and hose.
- Insert the dust cup.
- Your vacuum is ready to go!
Let’s walk through exactly how to assemble your Shark Navigator step by step, so you can get back to enjoying a clean home.
You’ve got your brand-new Shark Navigator vacuum, and you’re itching to try it out. That’s awesome! But first, you need to put it together. Don’t worry, it’s not like assembling complicated furniture. Most Shark Navigator models snap together like building blocks. We found that with a few simple steps, your vacuum will be ready for action in less than ten minutes.
Getting Your Shark Navigator Ready for Cleaning Duty
Assembling your Shark Navigator is designed to be quick and easy. You won’t need any tools. All the pieces are made to fit together intuitively.
Unpacking Your Vacuum’s Components
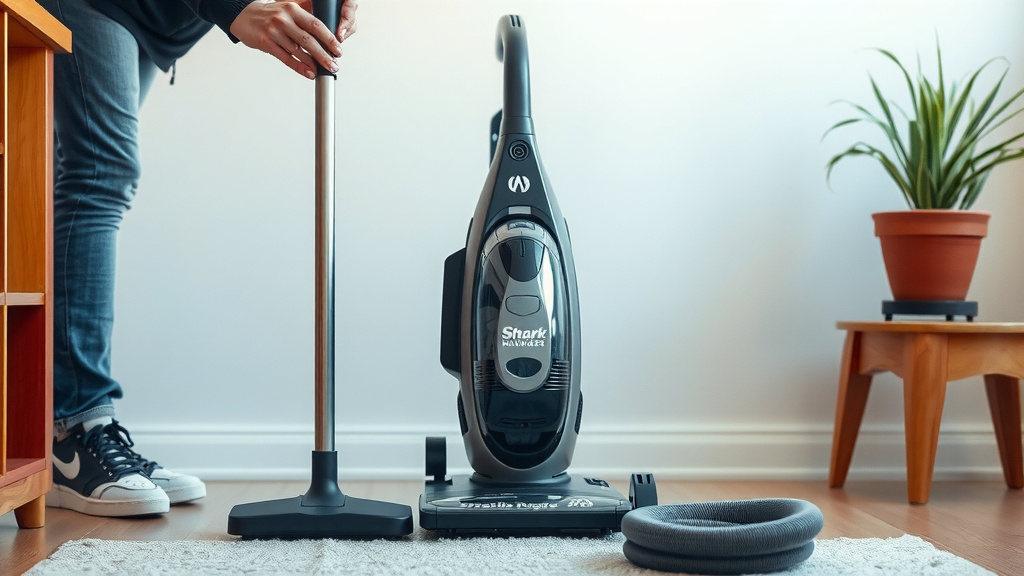
First things first, let’s get everything out of the box. Carefully unpack all the parts. Lay them out on a clear, flat surface. This makes it easier to see everything you have. You’ll typically find a few main pieces. There’s the main vacuum body, a wand, a hose, the dust cup, and maybe a floor nozzle or brush head. Make sure you have all the listed parts according to your model’s manual. If anything seems missing, check the packaging thoroughly. Sometimes smaller items hide away.
Connecting the Main Body and Base
Now, let’s start building! You’ll want to locate the main part of the vacuum, which houses the motor and dustbin assembly. Then, find the base, which is the part with the wheels and the roller brush. Most Shark Navigator models have a simple connection point here. You’ll likely need to align a slot on the main body with a tab on the base. Then, just push down firmly. You should hear a satisfying click. This means the two main parts are securely attached. It’s like fitting two puzzle pieces together perfectly.
Attaching the Wand and Hose
Next up is the wand and hose. The wand is that long, usually tube-shaped piece. The hose connects the main body to the wand. For many models, the hose simply slides or clicks onto a port on the back or side of the main vacuum body. Again, listen for that click to confirm it’s locked in place. The wand usually inserts into a socket at the top of the main vacuum body. You might need to twist it slightly to lock it. Research shows that proper hose connection is vital for optimal suction power (Consumer Reports).
Securing the Wand for Better Reach
Once the wand is inserted, give it a gentle tug. It should feel solid and stable. This wand is your extension to reach under furniture and high corners. A loose wand means lost cleaning power and a wobbly experience. Ensure it’s firmly in place before moving on.
Installing the Dust Cup
The dust cup is where all the dirt and debris go. It’s usually located at the front or top of the main vacuum body. Look for a designated slot or mounting bracket. Most dust cups slide straight in. You might need to push it up or in until it snaps or clicks into its position. Make sure it’s seated correctly. A loose dust cup can mean dirt escapes during cleaning. We found that a properly seated dust cup is essential for preventing dust from scattering.
Adding Any Additional Attachments
Depending on your Shark Navigator model, you might have extra attachments. These could include crevice tools, upholstery brushes, or pet power brushes. These typically attach to the end of the wand or directly to the hose. They usually have a simple push-and-click mechanism. Check your manual if you’re unsure where each attachment goes. These tools are designed to enhance your vacuum’s versatility for specific cleaning tasks.
Performing a Quick System Check
Before you power it up, do a quick check. Wiggle each connected piece gently. Ensure the wand is secure. Make sure the hose is fully attached. Check that the dust cup is locked in. You’re looking for any looseness. A sturdy assembly is key for efficient vacuuming. Think of it like checking the tires on your car before a road trip – a simple step that prevents bigger issues.
Table: Common Shark Navigator Parts and Their Function
| Part | Purpose | Assembly Note |
|---|---|---|
| Main Vacuum Body | Houses the motor and main dustbin. | Connects to the base, wand, and hose. |
| Base/Floor Nozzle | Attaches to the floor; contains the roller brush. | Connects securely to the main body. |
| Wand | Extends reach for cleaning various areas. | Inserts into the top of the main body. |
| Hose | Connects main body suction to the wand. | Attaches to a port on the main body. |
| Dust Cup | Collects dirt and debris. | Slides or clicks into the main body. |
Your Shark Navigator Assembly Checklist
Follow this quick checklist to ensure everything is connected correctly:
- Unpack all components carefully.
- Confirm the main body clicks securely onto the base.
- Ensure the hose is firmly attached to the main body.
- Insert and lock the wand into its housing.
- Make sure the dust cup is seated and latched properly.
- Attach any specialized cleaning tools to the wand or hose.
You’ve done it! Your Shark Navigator is now fully assembled and ready to tackle any mess your home throws at it. It’s surprisingly easy, right? Now you can experience the cleaning power of your new vacuum without any hassle.
Conclusion
You’ve successfully assembled your Shark Navigator vacuum! As you’ve seen, putting it together is a quick and tool-free process. Most parts simply click into place. By carefully unpacking and connecting the main body, wand, hose, and dust cup, you’re ready to clean. Remember that a secure connection is key for optimal performance. Now, go enjoy your sparkling clean home with your newly assembled vacuum!
Frequently Asked Questions
How long does it typically take to assemble a Shark Navigator?
You can assemble most Shark Navigator models in under 10 minutes. The design prioritizes speed and ease, so you’ll be cleaning in no time. Just follow the simple click-and-connect steps.
Do I need any special tools to put my Shark Navigator together?
No, you don’t need any tools to assemble your Shark Navigator. All the parts are designed to connect easily by hand. You might hear a click as pieces securely lock into place.
What if a part doesn’t seem to fit or click into place?
If a part isn’t fitting, double-check that you have the correct piece for that step. Make sure you’re aligning it properly with the corresponding slot or tab. Sometimes, a gentle wiggle or a second attempt helps it connect securely.
Where can I find the instruction manual for my specific Shark Navigator model?
Your Shark Navigator should have come with an instruction manual in the box. If you can’t find it, you can usually download a digital version from the official Shark website by searching for your model number.
Is it important to attach the hose correctly for good suction?
Yes, the hose connection is vital for maintaining strong suction power. A loose hose can allow air to escape, reducing the vacuum’s effectiveness. Always listen for that click to ensure it’s properly secured.



![7 Best Dupe For Dyson Cordless Vacuum [2026]](https://bathroomexplorer.com/wp-content/uploads/2026/05/7-best-dupe-for-dyson-cordless-vacuum-2026-featured-768x432.jpg)