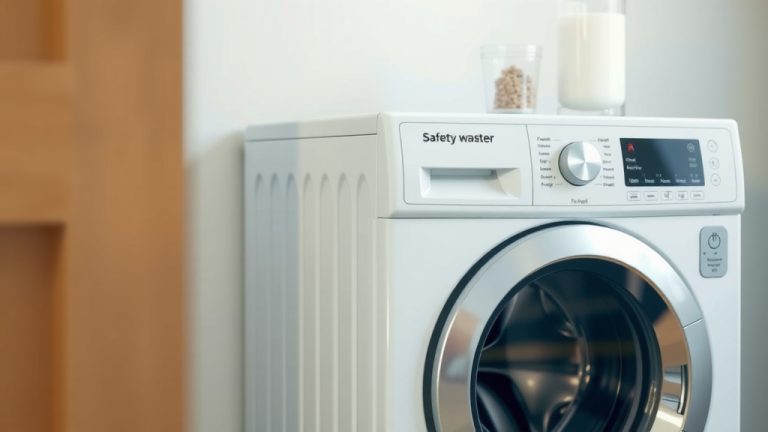
How to Install Washer and Dryer Pedestals: Step-by-Step Guide
You can install washer and dryer pedestals in about 30 to 60 minutes using basic tools. The fastest way to do it is to tilt the machine back, slide the pedestal underneath, and bolt everything together securely. This project is totally DIY-friendly, and you don’t need to be a handyman to get it right.
Pedestals raise your machines to a more comfortable height, which saves your back during laundry day. They also give you a handy storage drawer for detergent, dryer sheets, and other laundry essentials. We found that installing them is a straightforward job, but you need to pay close attention to leveling and securing the unit to prevent dangerous vibrations. Safety and stability are the two biggest priorities here.
- Turn off power and water: Always unplug the dryer and shut off the water supply to the washer first.
- Use the included hardware: Your pedestal kit comes with specific bolts and brackets—always use those parts.
- Slide, don’t lift: Tilt the appliance back onto its rear feet and slide the pedestal into place. This is the safest method.
- Level everything: Use a bubble level after securing the bolts to ensure the machines don’t wobble during the spin cycle.
- Reconnect and test: Plug everything back in, turn the water on, and run a quick empty cycle to check for leaks and balance.
Below, we break down exactly how to do this step by step, including the tools you need and the mistakes to avoid. Let’s walk through the process so you can get your laundry room set up the right way.
Installing Your Washer and Dryer Pedestals Step by Step
You have your new pedestals ready. Now you need to get them attached without breaking your back or your machines. We found that the process is simpler than most people expect. You just need a clear plan and the right tools.
Before you start, clear the area around your machines. You need room to tilt and move them. Grab a friend if you can. It makes the job safer and much easier. Many experts say that having a second person reduces the risk of dropping the appliance.
Gathering the Tools You Will Need
You do not need a fancy toolbox for this project. Most pedestal kits come with the necessary bolts and brackets. You will likely just need a few basic items from around the house.
- Socket wrench set (usually 10mm or 13mm)
- Phillips head screwdriver
- Adjustable pliers
- Bubble level
- Work gloves to protect your hands
- Towels to catch any water drips
Check your specific pedestal manual for the exact socket size. We found that most manufacturers list the required tools right on the first page. Keep that manual close by during the whole job.
Preparing Your Machines for the Move
Safety comes first in this project. You are dealing with heavy appliances and water lines. Take the time to disconnect everything properly before you touch a single bolt.
Shutting Off Power and Water
Start by unplugging the dryer from the wall outlet. Then, find the hot and cold water valves behind the washer. Turn both of them clockwise until they are completely closed. This stops any water from flowing into the machine while you work.
Next, disconnect the water hoses from the back of the washer. Have a towel ready because some water will spill out. Also disconnect the dryer vent hose and the dryer power cord if you need more room to move the unit. We found that freeing up all connections makes the tilt-and-slide method much easier.
Clearing the Water Lines
Even with the valves shut, water sits in the hoses and inside the washer. Tilt the machine back slowly to let any trapped water run out into a shallow pan. This simple step prevents a mess later. Many guidelines point to draining the lines as a good first move (Consumer Reports).
Positioning the Pedestal Under the Washer
Now you get to the actual installation. The washer is the heavier of the two machines, so we recommend starting with it. You will use a technique that keeps the appliance close to the ground and under your control.
Using the Tilt-and-Slide Method
Stand at the back of the washer. Tilt the machine toward you by lifting the front edge about four to six inches off the floor. Slide the pedestal into the open space with the drawer facing forward. Make sure the pedestal is centered under the machine.
Slowly lower the washer back down onto the pedestal. The alignment pins on top of the pedestal should fit into the holes on the bottom of the washer. If they do not line up, lift the washer slightly and shift the pedestal. Do not force anything. Forcing it can bend the mounting brackets.
Securing the Mounting Bolts
Once the washer sits flush on the pedestal, look for the bolt holes on the front and back of the pedestal. Insert the bolts provided in your kit. Tighten them with your socket wrench, but do not overtighten. You want them snug, not stripped.
We found that hand-tightening first helps prevent cross-threading. Then finish with the wrench for a secure fit. Give the washer a gentle shake to test the stability. If it rocks, check the alignment again.
Attaching the Pedestal to the Dryer
The dryer is usually lighter than the washer, but it still needs careful handling. The steps are almost identical to the washer. However, you need to pay attention to the vent connection.
Handling the Vent Hose
Reconnect the vent hose after the dryer is on the pedestal. Ensure the hose is not kinked or pinched between the dryer and the wall. A pinched vent restricts airflow. This can lead to longer drying times and a fire hazard, according to the U.S. Fire Administration.
If the pedestal raises the dryer, you might need a longer vent hose. Measure the distance before you buy a replacement. Many local hardware stores sell adjustable hoses that fit most setups.
Leveling the Machines for Safety
An unbalanced washer shakes violently during the spin cycle. It can walk across the floor and damage your machines. Leveling is not optional here. It is a critical safety step.
Checking the Side-to-Side Balance
Place your bubble level on top of the washer. Check the side-to-side position first. If the bubble is not centered, adjust the feet on the bottom of the pedestal. Most pedestals have adjustable legs that you twist to raise or lower each corner.
We found that making small quarter-turn adjustments works best. Turn one foot, then re-check the level. Repeat this process until the bubble sits perfectly between the lines.
Checking the Front-to-Back Balance
Now rotate the level 90 degrees to check the front-to-back angle. The machine should be perfectly flat, not tilted toward you or the wall. Adjust the front legs as needed to get it level.
Many experts say that a slight backward tilt of about one degree is acceptable. This helps keep the machine from walking forward during a heavy load. However, you should aim for a perfect level reading for the best results.
Reconnecting and Testing Your Setup
The hard part is over. You just need to hook everything back up and run a quick test. This final step confirms that you did the job right and that no leaks exist.
Restoring Power and Water
Reconnect the water hoses to the back of the washer. Tighten them with your pliers, but do not crank them down too hard. You only need a snug fit to prevent leaks. Plug the dryer back in and reconnect the vent hose if you removed it.
Turn the water valves back on slowly. Check the connections immediately for any dripping water. A tiny drop means you need to tighten the connection a bit more. A steady stream means you forgot a rubber washer inside the hose fitting.
Running a Test Cycle
Run an empty wash cycle with hot water. Stay nearby and listen for any unusual noises. Watch for vibration or rocking. A properly installed pedestal will keep the washer steady even during the spin cycle.
After the cycle finishes, run the dryer on a low heat setting for about 15 minutes. This confirms that the vent hose is connected properly and the dryer is not overheating. We found that a quick test now saves you from discovering problems on laundry day.
Common Mistakes to Avoid During Installation
DIY projects go wrong when people rush or skip steps. We found that most pedestal installation failures come from a few repeated errors. Here is what you should watch out for.
- Forgetting to disconnect the water lines before moving the washer.
- Using the wrong bolts from your toolbox instead of the kit hardware.
- Skipping the level check and dealing with a vibrating machine later.
- Overtightening the mounting bolts and stripping the threads.
- Pinching the dryer vent hose between the machine and the wall.
When to Call a Professional
Most people can handle this job alone. But sometimes, the situation is different. If your washer or dryer is hardwired into the wall, call an electrician to disconnect it. If you have a gas dryer, call a professional to handle the gas line. Gas connections are dangerous and require special training.
You should also call for help if the pedestal brackets do not line up with the holes on your machine. This mismatch means you bought the wrong pedestal model. A professional can help you find the right fit without damaging your appliances.
Quick Installation Checklist for Your Reference
Use this checklist as your guide. Print it out or keep it on your phone while you work. We found that following a simple list keeps you organized and prevents missed steps.
- Disconnect power, water, and vent lines completely.
- Tilt the machine back and slide the pedestal into place.
- Align the mounting pins and lower the machine down gently.
- Secure all bolts with the provided hardware.
- Level the machine side-to-side and front-to-back.
- Reconnect all lines and run a full test cycle.
You now have a complete guide to installing your pedestals. Take your time with each step. The result is a comfortable laundry room setup that protects your back and your machines. When you finish, step back and admire your work. You just saved yourself the cost of a professional installation. That is a win worth celebrating.
Conclusion
You now have everything you need to install your washer and dryer pedestals with confidence. The whole job comes down to working safely, using the included hardware, and taking the time to level everything properly. We walked you through disconnecting your machines, using the tilt-and-slide method, and securing everything for a rock-solid fit.
The payoff is real. You get a more comfortable laundry setup and extra storage space, and you skip the cost of hiring a pro. Your next step is simple: grab your tools, follow the checklist above, and tackle the job this weekend. Take it slow, and do not be afraid to call a friend for the heavy lifting. When you are done, run that test cycle. You will be glad you did it yourself.
Frequently Asked Questions
Do washer and dryer pedestals fit all machines?
No, they do not. You need to buy pedestals that are made for your specific brand and model. Check your owner’s manual or look for a model number on the back of your machines. Using the wrong pedestal is a safety risk. The mounting holes will not line up, and the washer can vibrate loose during a spin cycle.
Can pedestals be installed on stackable washer and dryer units?
Usually, no. Stackable units are designed to connect to each other, and adding a pedestal to the bottom can affect the stability of the whole stack. Some brands do make special pedestals for their stackable models, but you need to check compatibility first. If you are unsure, contact the manufacturer directly.
How much weight can a washer pedestal drawer hold?
Most pedestal drawers are built to hold between 25 and 40 pounds of laundry supplies. Check your specific pedestal manual for the exact weight limit. Overloading the drawer can break the slides or the frame. We recommend keeping heavy bottles of detergent on a shelf nearby instead of stacking them all in the drawer.
Will installing a pedestal void my washer or dryer warranty?
In most cases, it will not void your warranty, as long as you install it correctly. The key is to use the proper mounting hardware and follow the instructions from the manufacturer. If you cause damage during the installation, that damage is not covered. Keep your receipt and the installation manual in a safe place in case you need to make a claim later.
Do you need an anti-tip bracket when using a pedestal?
We strongly recommend using one. Many pedestal kits do not include an anti-tip bracket, but your dryer might have come with one. This small bracket secures the top of the dryer to the wall. It keeps the unit from tipping forward when you lean on it or pull heavy clothes out. Check your dryer’s manual to see if a bracket is required or available for your model.