How to Add a Water Line for Ice Maker: A Complete DIY Guide
Have you ever wished your refrigerator could produce ice without you having to fill trays manually? Well, adding a water line to your ice maker is like giving your fridge a major upgrade. It’s not as intimidating as it might sound, and honestly, you don’t need to be a plumber to get it done. I’m going to walk you through this process step by step, and by the end, you’ll have fresh ice on demand.
Understanding Your Ice Maker Water Line Setup
Before you grab your toolbox, let’s talk about what we’re actually dealing with here. An ice maker water line is essentially a small tube that connects your refrigerator to your home’s water supply. Think of it like a tiny pipeline that delivers water right where your ice maker needs it. The system is surprisingly simple, yet incredibly effective.
Most ice makers work by allowing water to flow into a reservoir, freezing it, and then ejecting the cubes into a storage bin. Without a water line, you’d be stuck doing this manually, which defeats the purpose of modern convenience. The good news is that installing one doesn’t require advanced plumbing skills or expensive equipment.
Tools and Materials You’ll Actually Need
Let’s get real for a moment. You don’t need to buy a ton of supplies to make this work. Here’s what you should gather before you start:
- A water line kit (specifically designed for your refrigerator model)
- An adjustable wrench or pliers
- A drill with a small bit (if you need to create a hole)
- Teflon tape for preventing leaks
- A bucket or towel for catching water drips
- Your refrigerator’s instruction manual
- A water saddle valve or compression fitting
- Tubing clamps
The water line kit you choose should match your refrigerator’s specific model. Don’t just grab any kit off the shelf—compatibility matters here. Check your refrigerator’s manual or the manufacturer’s website to find the exact kit you need.
Preparing Your Space Before Installation
Clearing the Area Around Your Refrigerator
First things first, you’re going to need some working space. Pull your refrigerator away from the wall a bit. I know it’s heavy, so get someone to help you if needed. You’ll need access to the back of your fridge, particularly where the water line will be installed. Clearing the area also gives you room to maneuver and prevents you from damaging anything important.
Turning Off the Water Supply
This is crucial, and I cannot stress this enough. Before you do anything else, shut off your main water supply or locate the shutoff valve closest to your kitchen. Trust me, you do not want water spraying everywhere while you’re working. Take a few minutes to find this valve now—it’s usually under the sink or in your basement.
Unplugging Your Refrigerator
Safety first. Unplug your refrigerator from the electrical outlet. This prevents any accidental electrical hazards while you’re working on the water line installation. You might think this is overkill, but it’s better to be cautious.
Locating the Water Supply Line Connection Point
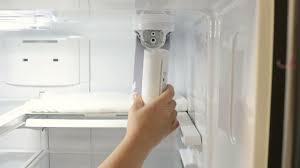
Your refrigerator has a specific location where the water line connects. On most models, this is either at the back of the fridge or underneath it. Check your manual to find the exact location. Some refrigerators have this port clearly marked, while others require you to look more carefully.
You might need to remove a small plastic cap or cover to access the connection point. This is normal. Just set it aside carefully so you don’t lose it. The port is usually a simple inlet designed to accept the water line tubing.
Finding the Best Route for Your Water Line
Planning Your Path from Water Source to Refrigerator
Now comes the planning stage. You need to decide how to run the water line from your main water supply to your refrigerator. The shortest path isn’t always the best path. You want to avoid:
- Sharp bends that could kink the line
- Areas where the line could get pinched or damaged
- Hot areas like near your oven or heating vents
- Exposed areas where it might look messy
The ideal route runs along walls or under cabinets where it stays hidden and protected. Most people find success running the line along the baseboards or through the back of cabinetry.
Choosing Between Under-Cabinet and Over-Cabinet Routes
If your refrigerator is against an outside wall, you might run the line under the cabinet. If it’s in an island or peninsula, you’ll probably need to go underneath. Some people even run their lines through the cabinet structure itself, which requires drilling. Whatever route you choose, make sure the line won’t get compressed by heavy items or bent excessively.
Installing the Water Saddle Valve
The water saddle valve is your connection point to the main water line. It’s a clever little device that taps into your existing cold water supply without requiring you to cut and reconnect pipes. Here’s how to install it:
First, find a good location on your cold water line. This is usually the line running to your kitchen sink or ice maker. The line should be easily accessible and relatively straight at the point where you’re installing the valve.
Position the saddle valve around the cold water line. Most saddle valves come with a rubber or plastic saddle that wraps around the pipe. Tighten the bolts or clamps evenly so they’re snug but not overly tight. You don’t want to crush the pipe underneath.
Once it’s secured, you’ll need to pierce the line. Some saddle valves have a small pointed tube that does this automatically when you tighten it. Others require you to pierce it separately with a special tool. Follow your specific valve’s instructions. After piercing, you’ll be able to run the water line from this connection point to your refrigerator.
Running the Water Line Properly
Securing the Line Along Your Route
Now you’re going to run the water line from the saddle valve to your refrigerator. Use clamps or clips to secure it along the route you planned earlier. Don’t just leave it dangling. When you clamp it, make sure you’re not compressing it so hard that you restrict water flow. You should be able to press a finger against the line between clamps without effort.
Avoiding Common Installation Mistakes
Here’s where people often mess up. Don’t create sharp bends or kinks in the line. Water needs to flow freely, and kinks create pressure points that can cause leaks or reduce water flow. Think of it like a garden hose—you wouldn’t bend it into a pretzel, right?
Also, keep the line away from heat sources. Plastic tubing can deteriorate when exposed to excessive heat. If you must run it near warm areas, insulate it with foam pipe insulation. This protects the line and maintains water temperature.
Finally, make sure the line doesn’t sit in areas where it could get damaged. If you have kids or pets, consider running it where it won’t be a tripping hazard or something they might chew on.
Connecting the Water Line to Your Refrigerator
This is the moment of truth. You’re going to connect the water line to the inlet port on your refrigerator. Before you do, wrap the connection fitting with Teflon tape. This creates a watertight seal and prevents leaks. Just wrap it around the threaded portion a few times clockwise.
Now, carefully insert the water line into the inlet port. Some refrigerators have a simple push-fit connection, while others require you to screw the fitting in. Check your manual to determine which type you have. If it’s a push-fit, push firmly until you feel it click or seat. If it’s a screw connection, tighten it by hand first, then use a wrench to snug it up. Don’t overtighten—you’ll just strip the threads.
Testing for Leaks Before You Celebrate
The Initial Leak Check
Before you plug your refrigerator back in and expect perfect ice, you need to test the system. Turn the water supply back on slowly. Watch the connection points carefully. Are you seeing any water dripping? If you are, this is your chance to fix it before it becomes a bigger problem.
Place towels under the connection points to catch any small drips. Even a tiny leak will reveal itself within a few minutes. If you see water, turn the supply off immediately and tighten the connection. Small leaks are usually fixed by tightening the fitting with a wrench.
Running the First Cycle
Once you’ve confirmed there are no leaks, plug your refrigerator back in. Let it run for a few minutes, then manually activate the ice maker if your model allows it. You should hear water flowing into the ice maker. On the first cycle, the water might be discolored or taste odd because it’s been sitting in the lines. This is normal.
Run a couple of batches of ice and discard them. After two or three cycles, the water in the lines will freshen up and your ice should look clear and normal.
Troubleshooting Common Issues
No Water Flowing to the Ice Maker
If you’re not getting any water flow, there are a few things to check. First, make sure the water supply valve is actually open. You’d be surprised how often this is the culprit. Next, check if the line is kinked or pinched somewhere along its route. A kink can completely block water flow.
You might also have an air lock in the line. This happens when air gets trapped inside. To fix it, turn the water off and on several times quickly. This helps purge the air.
Water Leaking from Connections
Leaks usually mean your connections aren’t tight enough. Turn off the water, disconnect the line at the leaking point, and reapply Teflon tape. Wrap it more thoroughly this time—about five to seven wraps around the threaded section. Reconnect and test again.
If you’re still leaking, the fitting itself might be defective. Replace it with a new one. Sometimes the rubber washers inside the fitting wear out or don’t seat properly.
Ice Maker Not Producing Enough Ice
If you’re getting some ice but not as much as you’d like, the water flow might be restricted. Check for kinks or pinches in the line. You could also have a water pressure issue. If your home’s water pressure is low, the ice maker might not fill completely.
Some saddle valves have a small adjustment screw that controls water flow. Check yours to see if you need to open it up more to increase the flow rate.
Maintaining Your Water Line System
Installation is just the beginning. To keep your system running smoothly, you need to maintain it. Every few months, check the connection points for any signs of leaks. Make sure clamps are still tight and the line isn’t showing signs of wear or cracking.
If you notice sediment in your ice cubes, your water might need filtering. Some refrigerators have built-in water filters that need replacing. Check your manual to see if yours has one and how often it should be changed.
During winter, if you live somewhere cold and your line runs along an exterior wall, insulate it heavily to prevent freezing. A frozen water line means no ice production until it thaws.
When to Call a Professional
Most of the time, installing a water line for your ice maker is a doable DIY project. However, there are situations where you might want to call a professional plumber:
- If you don’t feel comfortable working with water lines
- If your home has a complex plumbing system
- If you need to run the line through walls or under flooring
- If your local building codes require licensed installation
- If you encounter any issues you can’t resolve
A professional plumber can complete the job quickly and guarantee it’s done correctly. The cost is usually reasonable, especially considering the peace of mind you’ll have.
Conclusion
Adding a water line for your ice maker is entirely achievable for most homeowners. With the right tools, a bit of patience, and careful attention to detail, you can have an ice-making refrigerator that operates automatically. The key steps are understanding your system, planning your route carefully, making secure connections, and testing thoroughly before you call it done. Remember to turn off the water supply, use Teflon tape on all threaded connections, and never overtighten fittings. Once everything is running smoothly, maintaining your system is simple. You’ll enjoy fresh, cold ice whenever you need it, and you’ll probably wonder how you ever lived without it. If at any point you feel unsure, don’t hesitate to consult your refrigerator’s manual or call a professional. The small investment in getting it right ensures years of trouble-free ice production.
Frequently Asked Questions
Can I Install a Water Line for My Ice Maker Without Professional Help?
Absolutely! Most homeowners can install a water line for their ice maker without professional help. The process involves basic tools like wrenches and pliers, and the connections are relatively straightforward. As long as you follow the manufacturer’s instructions carefully and test for leaks, you should be fine. The only exception might be if your home has unique plumbing challenges or local building codes require licensed installation.
How Long Does It Take to Install a Water Line for an Ice Maker?
Most installations take between one to three hours, depending on how far your refrigerator is from the water supply and how complex your routing needs to be. If you need to drill through cabinets or run the line a long distance, it might take closer to three hours. If your water supply is nearby and the path is straightforward, you could be done in an hour.
What Happens If I Connect the Water Line Incorrectly?
If you connect the water line incorrectly, you might experience leaks, reduced water flow, or water damage. The good news is that improper connections usually show up immediately when you test the system. That’s why testing before you consider the job complete is so important. If something is wrong, you can fix it before water causes any damage to your home.
Do All Refrigerators Use the Same Water Line Size?
No, different refrigerators sometimes use different water line sizes and connection types. This is why it’s crucial to purchase a water line kit designed specifically for your refrigerator model. Check the model number on your refrigerator and verify the correct kit before buying. Using the wrong size could result in poor connections or leaks.
Will My Ice Taste Different With a Water Line?
Your ice should taste the same as ice made from the water in your home. If you notice a taste difference, it’s likely because the lines need flushing or your water supply needs filtering. Run several batches of ice and discard them until the taste improves. If the problem persists, consider installing a water filter or having your water tested. Most ice makers function better with filtered water anyway.
“`