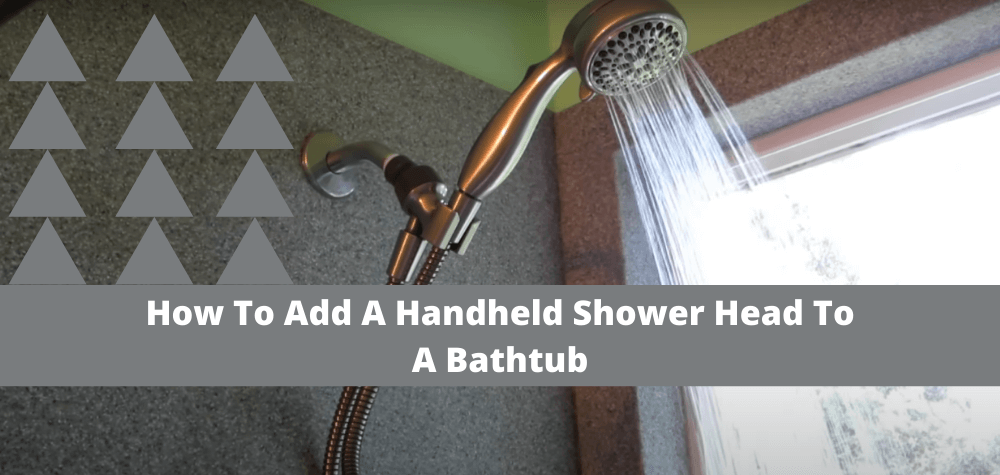
How To Add A Handheld Shower Head To A Bathtub [Be A Master In 20 Minutes]
You read the right headline; it is possible. You can even save $60 showerhead replacement costs.
Don’t you believe it? Let me share a common pain point. That is you have to book an appointment with a plumber.
This is time-consuming and money-draining. I am not demotivating you; of course, they can do it better.
But, what if it is urgent? You cannot wait at that time. This article will fill up your urgency. Read how to add a handheld showerhead to a bathtub. It will prepare you to fit the showerhead within 20 minutes. Trust me! And follow the full instruction.
First Thing First:
Your first step to prepare. Remember, preparation comes before success -even in the dictionary.
Get all the essentials near your hand. Here are the lists of the tools.
- Adjustable wrench
- Channel-lock pliers.
- Heavy rubbing clothes
- Plumber pipe seal tape
- Allen wrenches
Now you got the list. Jump to the next step.
Remove The Old One:
Begin the replacement by removing the old one. Replacing an old showerhead is easy. Put a cloth over the showerhead.
Then twist the head with an adjustable wrench. This process will loosen up the shower head; it will ease up your rest of the job. Now you can remove the showerhead with your hand.
Clean -Up The Area:
Done! Your third step is to clean the area. Why is it essential? Over time, the showerhead has mineral and lime build-up.
These specks of dirt must be cleaned, or else there are high chances for a clog. To clean the dirt, you can use bleaching powder and hot water mix. Rubbing alcohol can also do the job. So, clean the total area at this stage.
New Handheld Showerhead Installation In The BathTub: 3 Ways To Follow:
Preparation is done. Time to install your handheld showerhead. Here you will read three types of the installation guide. Each will guide you to do the toughest job easily.
Way 1: Standard Installation:
Standard installation takes 10 minutes to fix. Here are the ways.
Install the showerhead:
Wrap up the thread tape. Remember, you have plumber tape? Use it by layering the shower arm.
Then attach the hand held showerhead base with it. Put the heavy cloth over the head. Use the adjustable wrench to tighten up. When you are done with this, check for the water leaks. You can use silicone caulk to avoid the leak.
Hose installation:
A handheld showerhead comes with a hose connector. The manufacturer provides gaskets with it. So, your first step is to connect the hose with the showerhead.
Place the gasket inside the connector hole. Tighten up this with the shower head joint. The second step is to connect it with the water hole.
The process is the same as you read. Doing these two steps will prepare you to check the leaks.
Don’t avoid leak checking. Usually, the gasket does not leak. If it still leaks, tries to use the adjustable wrench to tighten up.
One more thing: if you are using pipe seal tape, use the pliers to tighten up securely. This will save the head from leakage.
Wall Bracket Mounting:
Some handheld showerheads need a wall bracket; some do not need it. Check the manual guide for the proper instruction. The Wall bracket reduces the installation time.
Way 2: Handheld Showerhead Installation In Cross-Tee:
You have successfully passed your 10 minutes period. Let’s try something more exciting- Cross-Tee Showerhead Installation.
What is the purpose of cross-tee installation? Cross-tee is a diverter. It keeps the rain and handheld shower head with on/off button together. You can choose two options while showering. The installation process is super simple. Here is the process.
Install The Diverter:
Wrap the pipe seal tape on the showerhead arm. Then fit the cross-tee diverter. Secure it with the adjustable wrench.
Attach The Rain Showerhead:
Now you will fit the overhead showerhead. Use the tape for a two-layer wrap. Fix the showerhead with a slight twist, then. Tighten the head with the wrench once again. Done.
Attach The Handheld Showerhead:
The process is the same as a standard installation. Place the gaskets and tighten up the showerhead.
See, How simple it is to install! It will fairly take 5 minutes to install
Way 3: Tub Spout Diverter Installation:
Learning the previous process can help you to accomplish this final step. Tub spout driver valve installation. That is what you are going to learn now.
How would you get benefited from this? This diverter allows you to choose the water flow option. Here is the installation process.
Remove The Old One:
Use the Allen wrench/Hex to remove the screw first. Then put a cloth over it. Twist it with an adjustable wrench. It will loosen up the tub spout. Remove it and clean the area.
Install The New One:
The way you removed the old one. Apply the same process to install the new one. When you are done with that, use silicone caulk to stop the leakage.
Check The Diverter:
Use the diverter switch to see the handheld showerhead performance. So far this time, you are convinced with the water flow selection. Now you will check for the water leakage in the diverter. If you still see the leaks. Tighten the tub spout once more.
FAQ:
Why do the gaskets are used for?
Gaskets are the perfect alternative to pipe sealing tape. It stops the leaks and keeps the fittings sturdy.
Which is better: Teflon tape or paste?
Well, it depends on the threads. Paste works better in the straight thread. The tape also works well, but it’s temporary. So, for a permanent solution using the paste will be a decision.
What are the best handheld shower head maintenance tips?
Three major maintenance tips are major. Even the expert applies these every time. Follow the tips to enhance your handheld showerhead lifetime.
– Clean it up twice a month at least.
– Use the right cleaning materials: Vinegar and hot water mix.
– Check your water quality. Is it like and mineral-free or not? Find out this
Final Words:
You got your 20 minutes mastery guideline. It’s time to apply the total procedure. Don’t be afraid, you can do it. I applied all the techniques, and it worked perfectly during my urgency.
So, if you have no other option left, try this $60 saving guide. I am pretty sure you can not only save the budget but also learn a new skill.
Share this how to add a handheld showerhead to a bathtub with your friend. Save their time and money.
![How to Clean a Dirty Bathtub Without Scrubbing [Effortless Methods That Work]](https://bathroomexplorer.com/wp-content/uploads/2025/04/How-to-Clean-a-Dirty-Bathtub-Without-Scrubbing.jpg)